Copper Mosaic Wall Jewelry Geode
Stained glass, smalti, howlite, metal beads | 4.25" x 3.25"
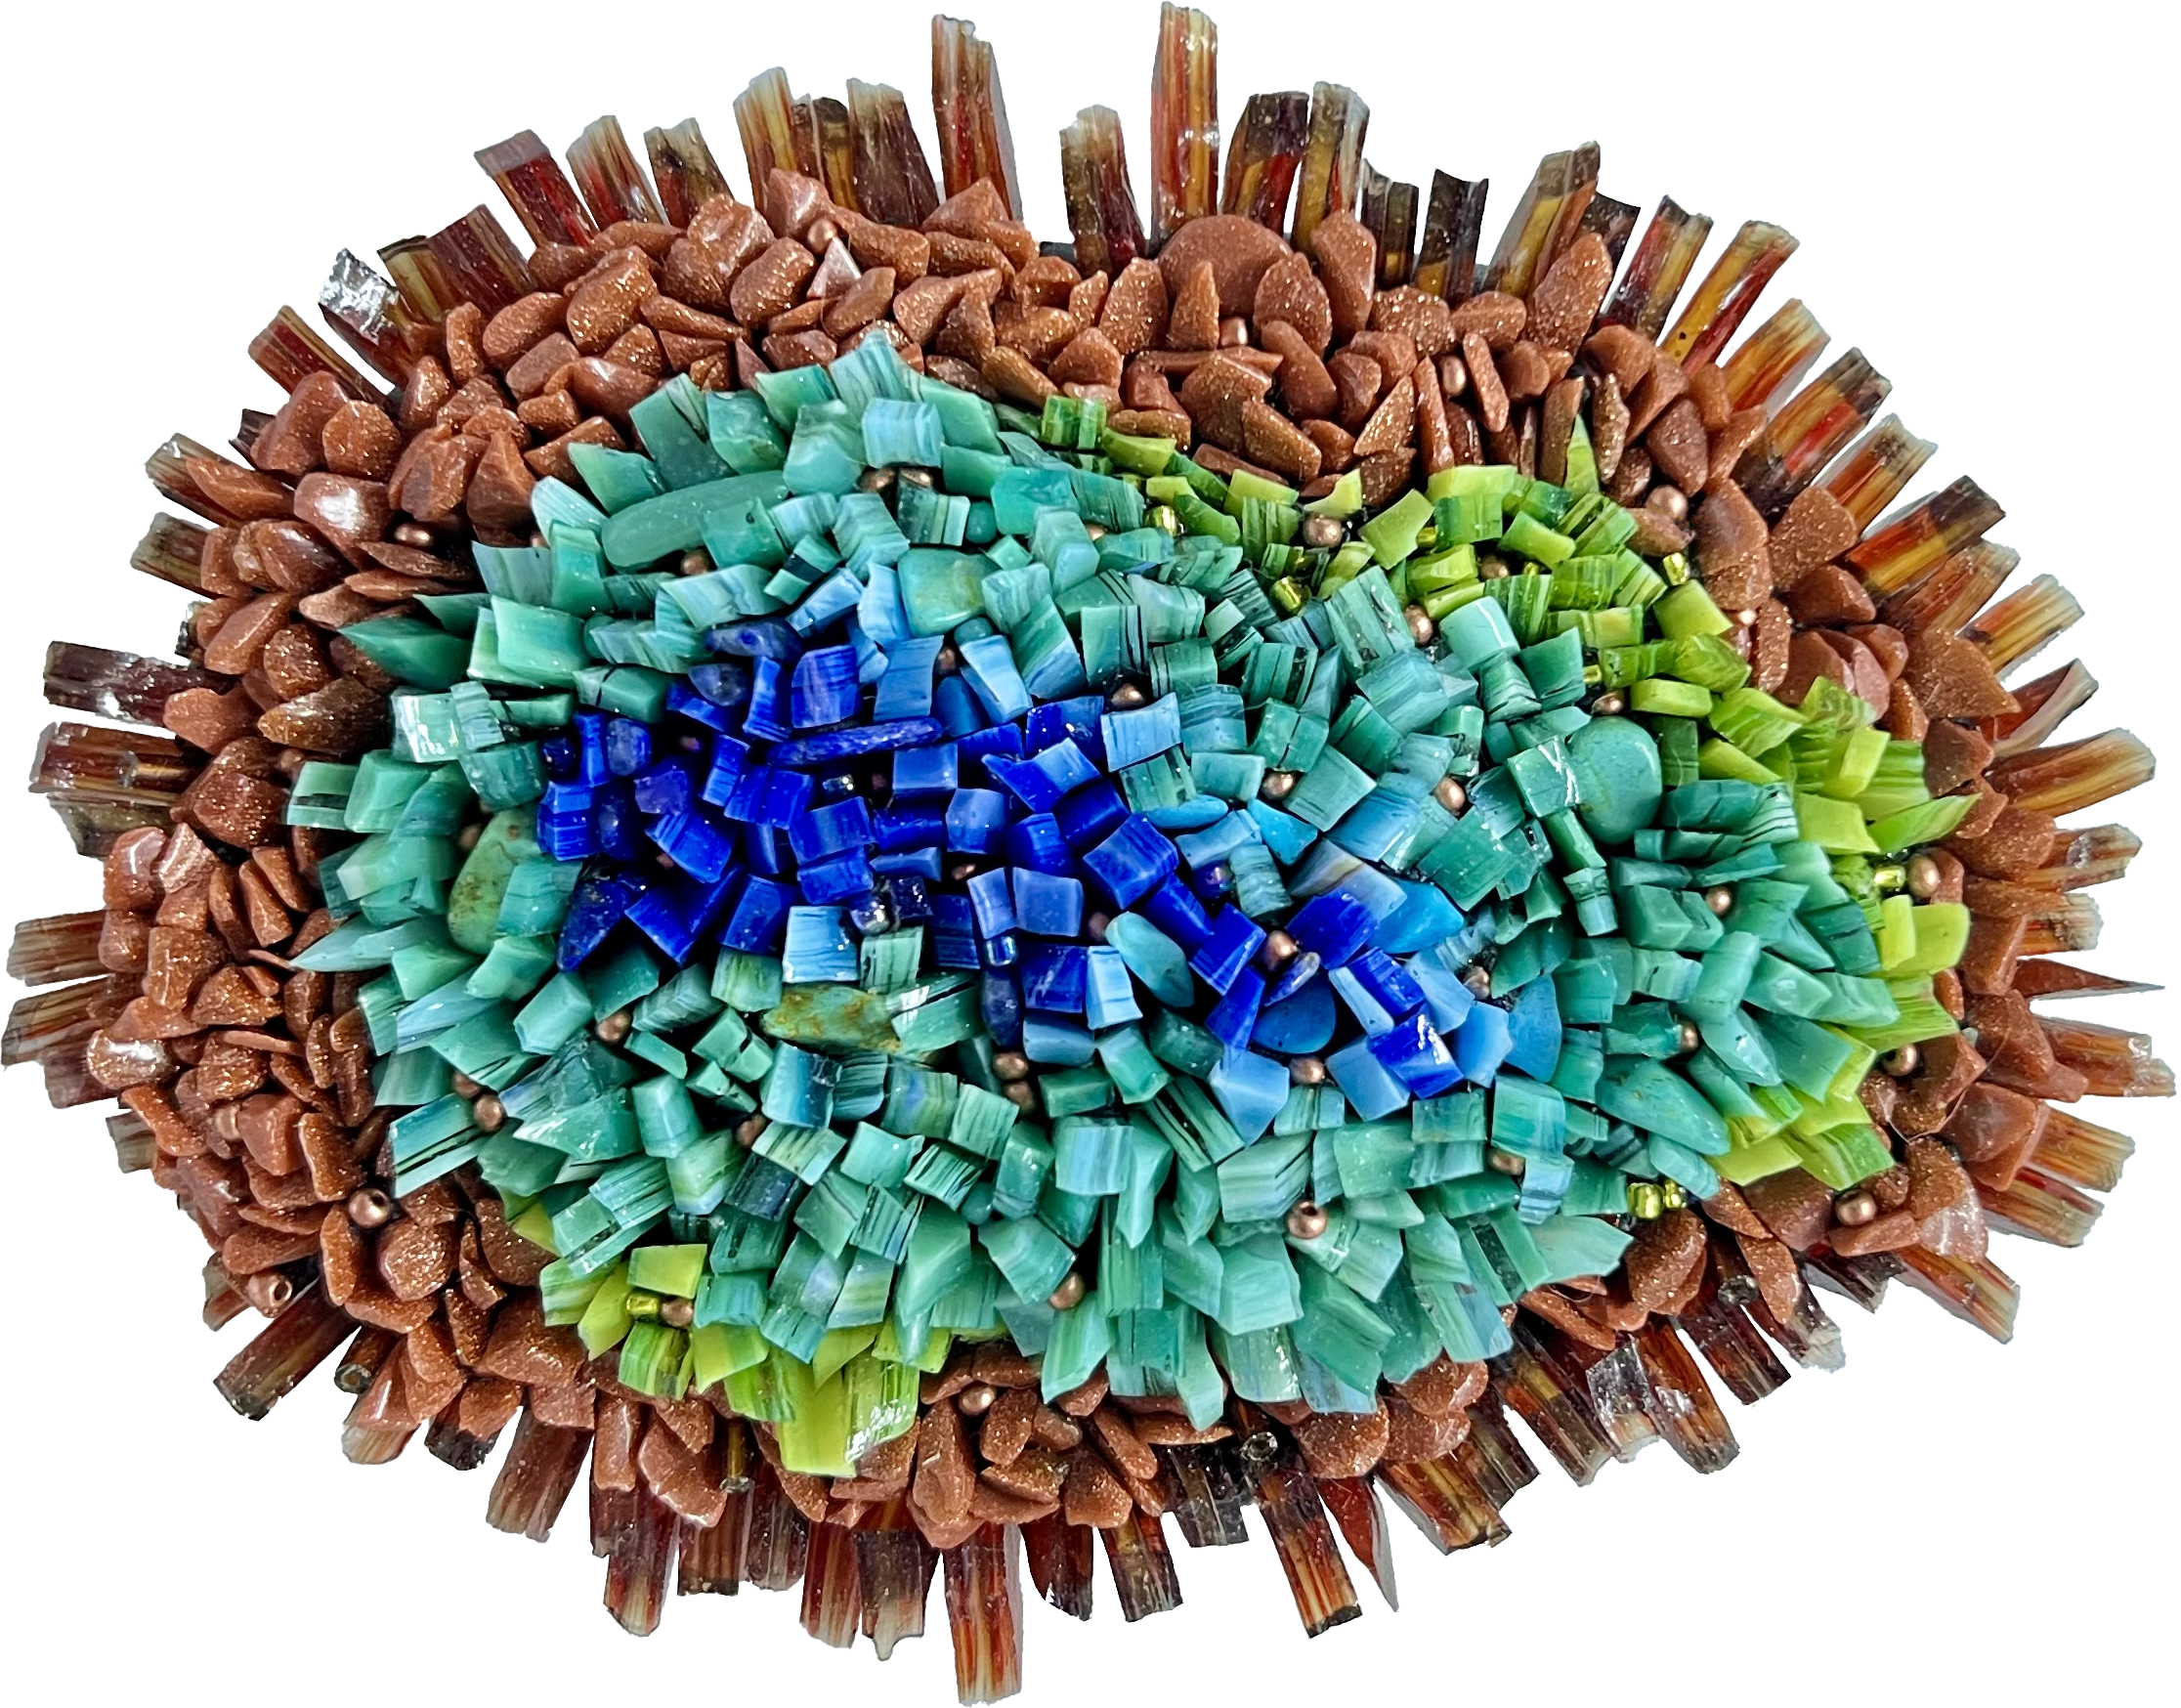
Copper Mosaic Wall Jewelry Geode
The Copper Series is inspired by the natural beauty of copper as it oxidizes. The textures, patterns, and colors are so gorgeous and varying that there is an endless well of inspiration. The first mosaic Copper I (the name is possibly a placeholder) brings together almost all the colors that will be used in the series and almost serves as a palette for the continued work over the next few years.

Creation of the Copper I Mosaic
I created Copper I during the Covid pandemic. Early on I finished as work as I could with the commission I was working on and was waiting for smalti pizzas to be delivered from Italy. I had only 15 more hours of work on a project that has taken thousands of hours, but couldn’t do any more without the rest of the glass. Italy shut down way before the US did, so it was going to be a very long wait. I used the time to make a couple gifts for family members that I hadn’t had time to make, then decided to start on a mosaic idea I’ve had for a long time. Now I finally had the time.
I started with the largest sheet of 3/4” plywood I had around my studio that I primed with diluted Weldbond. Next I pulled out all the tesserae that fit my color palette, basically all the colors from indigo to mint green. I keep my supplies organized by type, then color, so I really went digging through everything. Yes, it was a nightmare to put back when I finished! I also grabbed all the browns with some sort of metallic streaks or iridescent sheen, along with this amazing iridescent cream from Wissmach.
I started off making irregular circles with an abundance of textures and colors, trying to mix things up as much as possible. Once I finished the colored circles, I fell into the same mental trap I always do… the foreground is done; I’m almost done. Nope. The background almost always takes way longer than the foreground, especially when you have a lot of design going on in the background.
As I moved toward the browns, I knew I wanted some spiky, starburst shapes. I planned to make them all different like the blue and green circles, but worried the starburst effect would get muddled if I didn’t have some consistency, so I chose two types of patterning. I completed all of these, then moved onto the five colors of brown-to-amber Hakatai Aventurine tiles that would make up the rest of the copper deposit. Originally I wanted to pattern these in circles too, but with a 3’ x 4’ working space, there wasn’t going to be enough room to make circles and fade the colors the way I wanted to. Instead I chose a more jagged effect, working one color at a time and frequently backing up to look at the mosaic to make sure the overall shape was what I envisioned.
I placed gems with antiqued copper ball chain around them in the rest of the background. Then I only had the iridescent cream stained glass left. I made a vellum template for each piece so I could cut the stained glass precisely. I rarely use cream glass, but I love this effect so much and I’m glad I accidentally picked up a piece while I was looking for other glass.
Finally it was time to grout. I always use Mapei grout, but decided to go with 5 colors this time including a new product I’m using for the first time, Mapei Flexcolor 3D. It is more than glitter grout, it has a metallic, sort of iridescent sheen. If I knew I was going to use this when I started the cream part of the background, I would have left larger grout joints. Usually I put my tessera right up against each other because the glass is the star of the show, not the grout. With the 3D grout, it would have been cool to have 1/8” lines of the copper colored grout as part of the design. It looks great how it is, and you can always think of things you would want to change. I added some brick red and a drop of black tint to the copper 3D grout because I wanted the color to be a little richer. I was really happy with the result.
In all, this mosaic took about 180 hours to complete. It was the first mosaic in which I time-lapsed the whole process. You can see it all and support my art by becoming a patron at my Patreon page.