Ombre Mosaic Fireplace

I loved making this mosaic so much! The subtle color changes and wide variety of tessera made this fireplace a work of art.
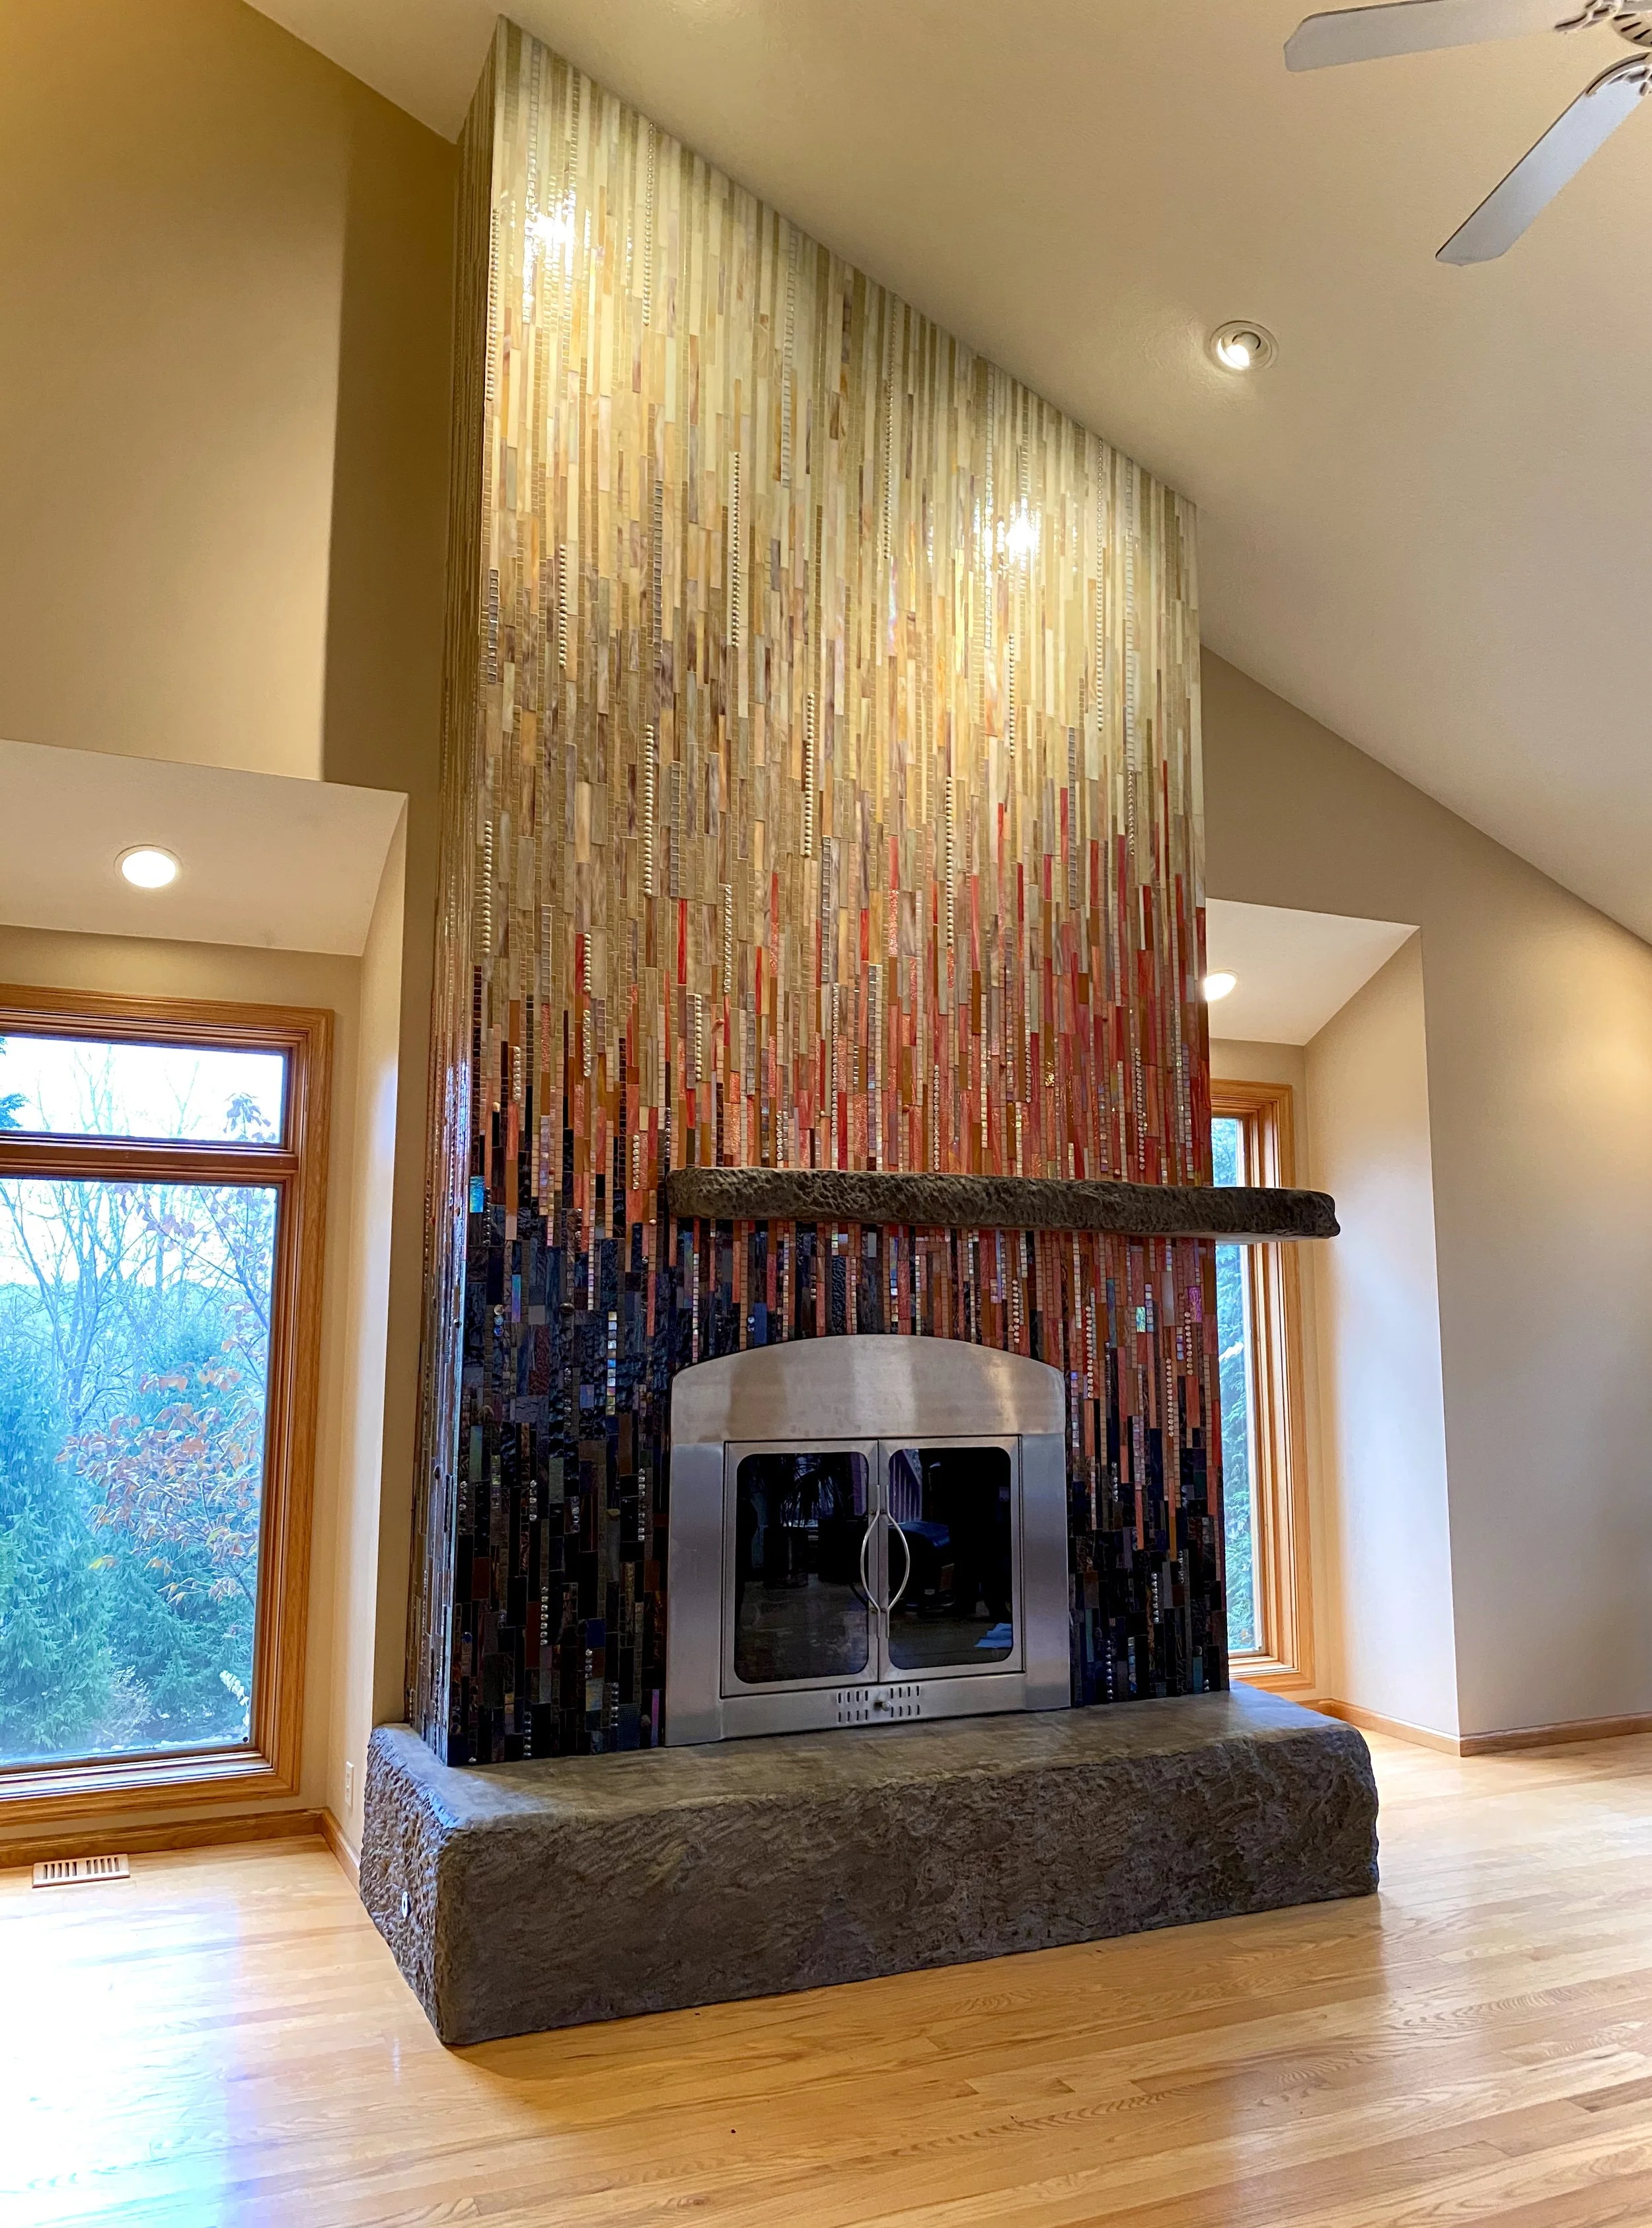
It was such a pleasure to make this mosaic fireplace for this delightful client in Akron, Ohio. She had a wonderful eye for color, design, and theme, and had planned color palettes evoking the seasons in different areas of her home. It's wonderful to work with someone who knows what she wants but is open to discussion.

When I visited her home to see her aesthetic, I immediately saw that the fireplace had the potential to be something ethereal. She came with images and a concept, and I sketched up a few ideas. I presented her with a couple of approaches to the ombré, including a simpler diagonal following the line of the ceiling, and she chose the diagonal criss-cross pattern you see here. I think it was absolutely the right call.
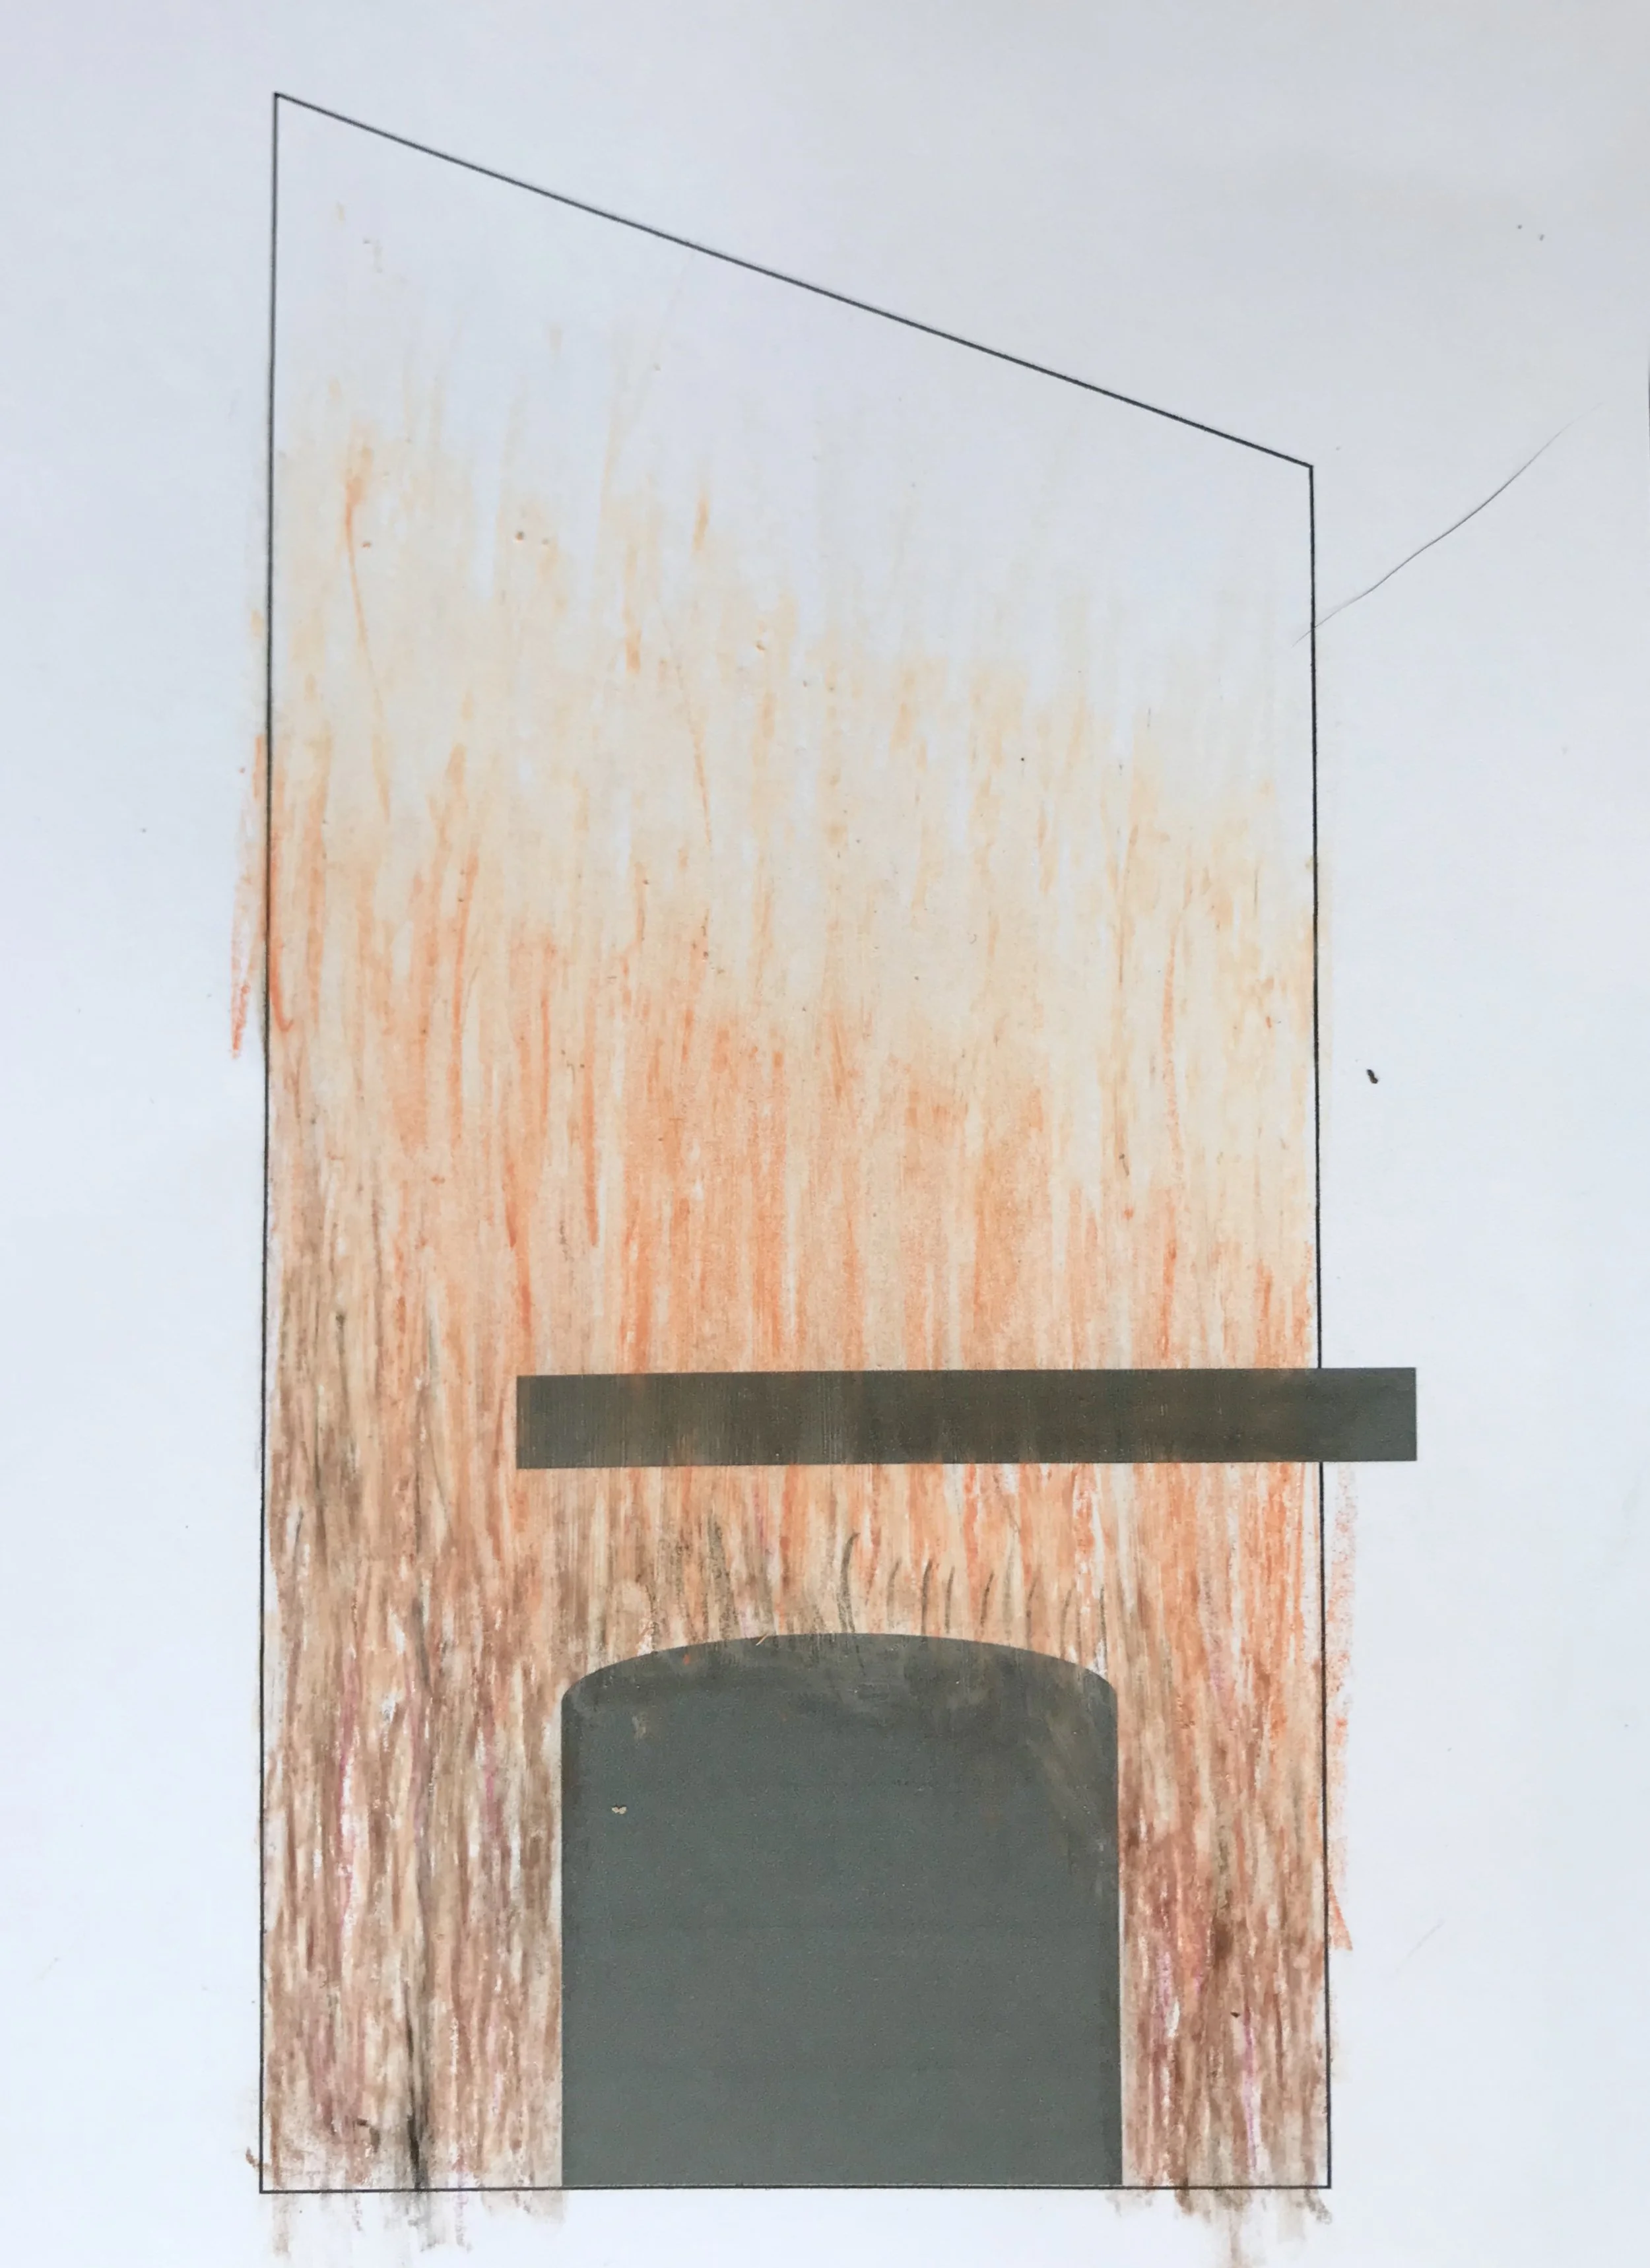
Diagonal Fireplace Mockup
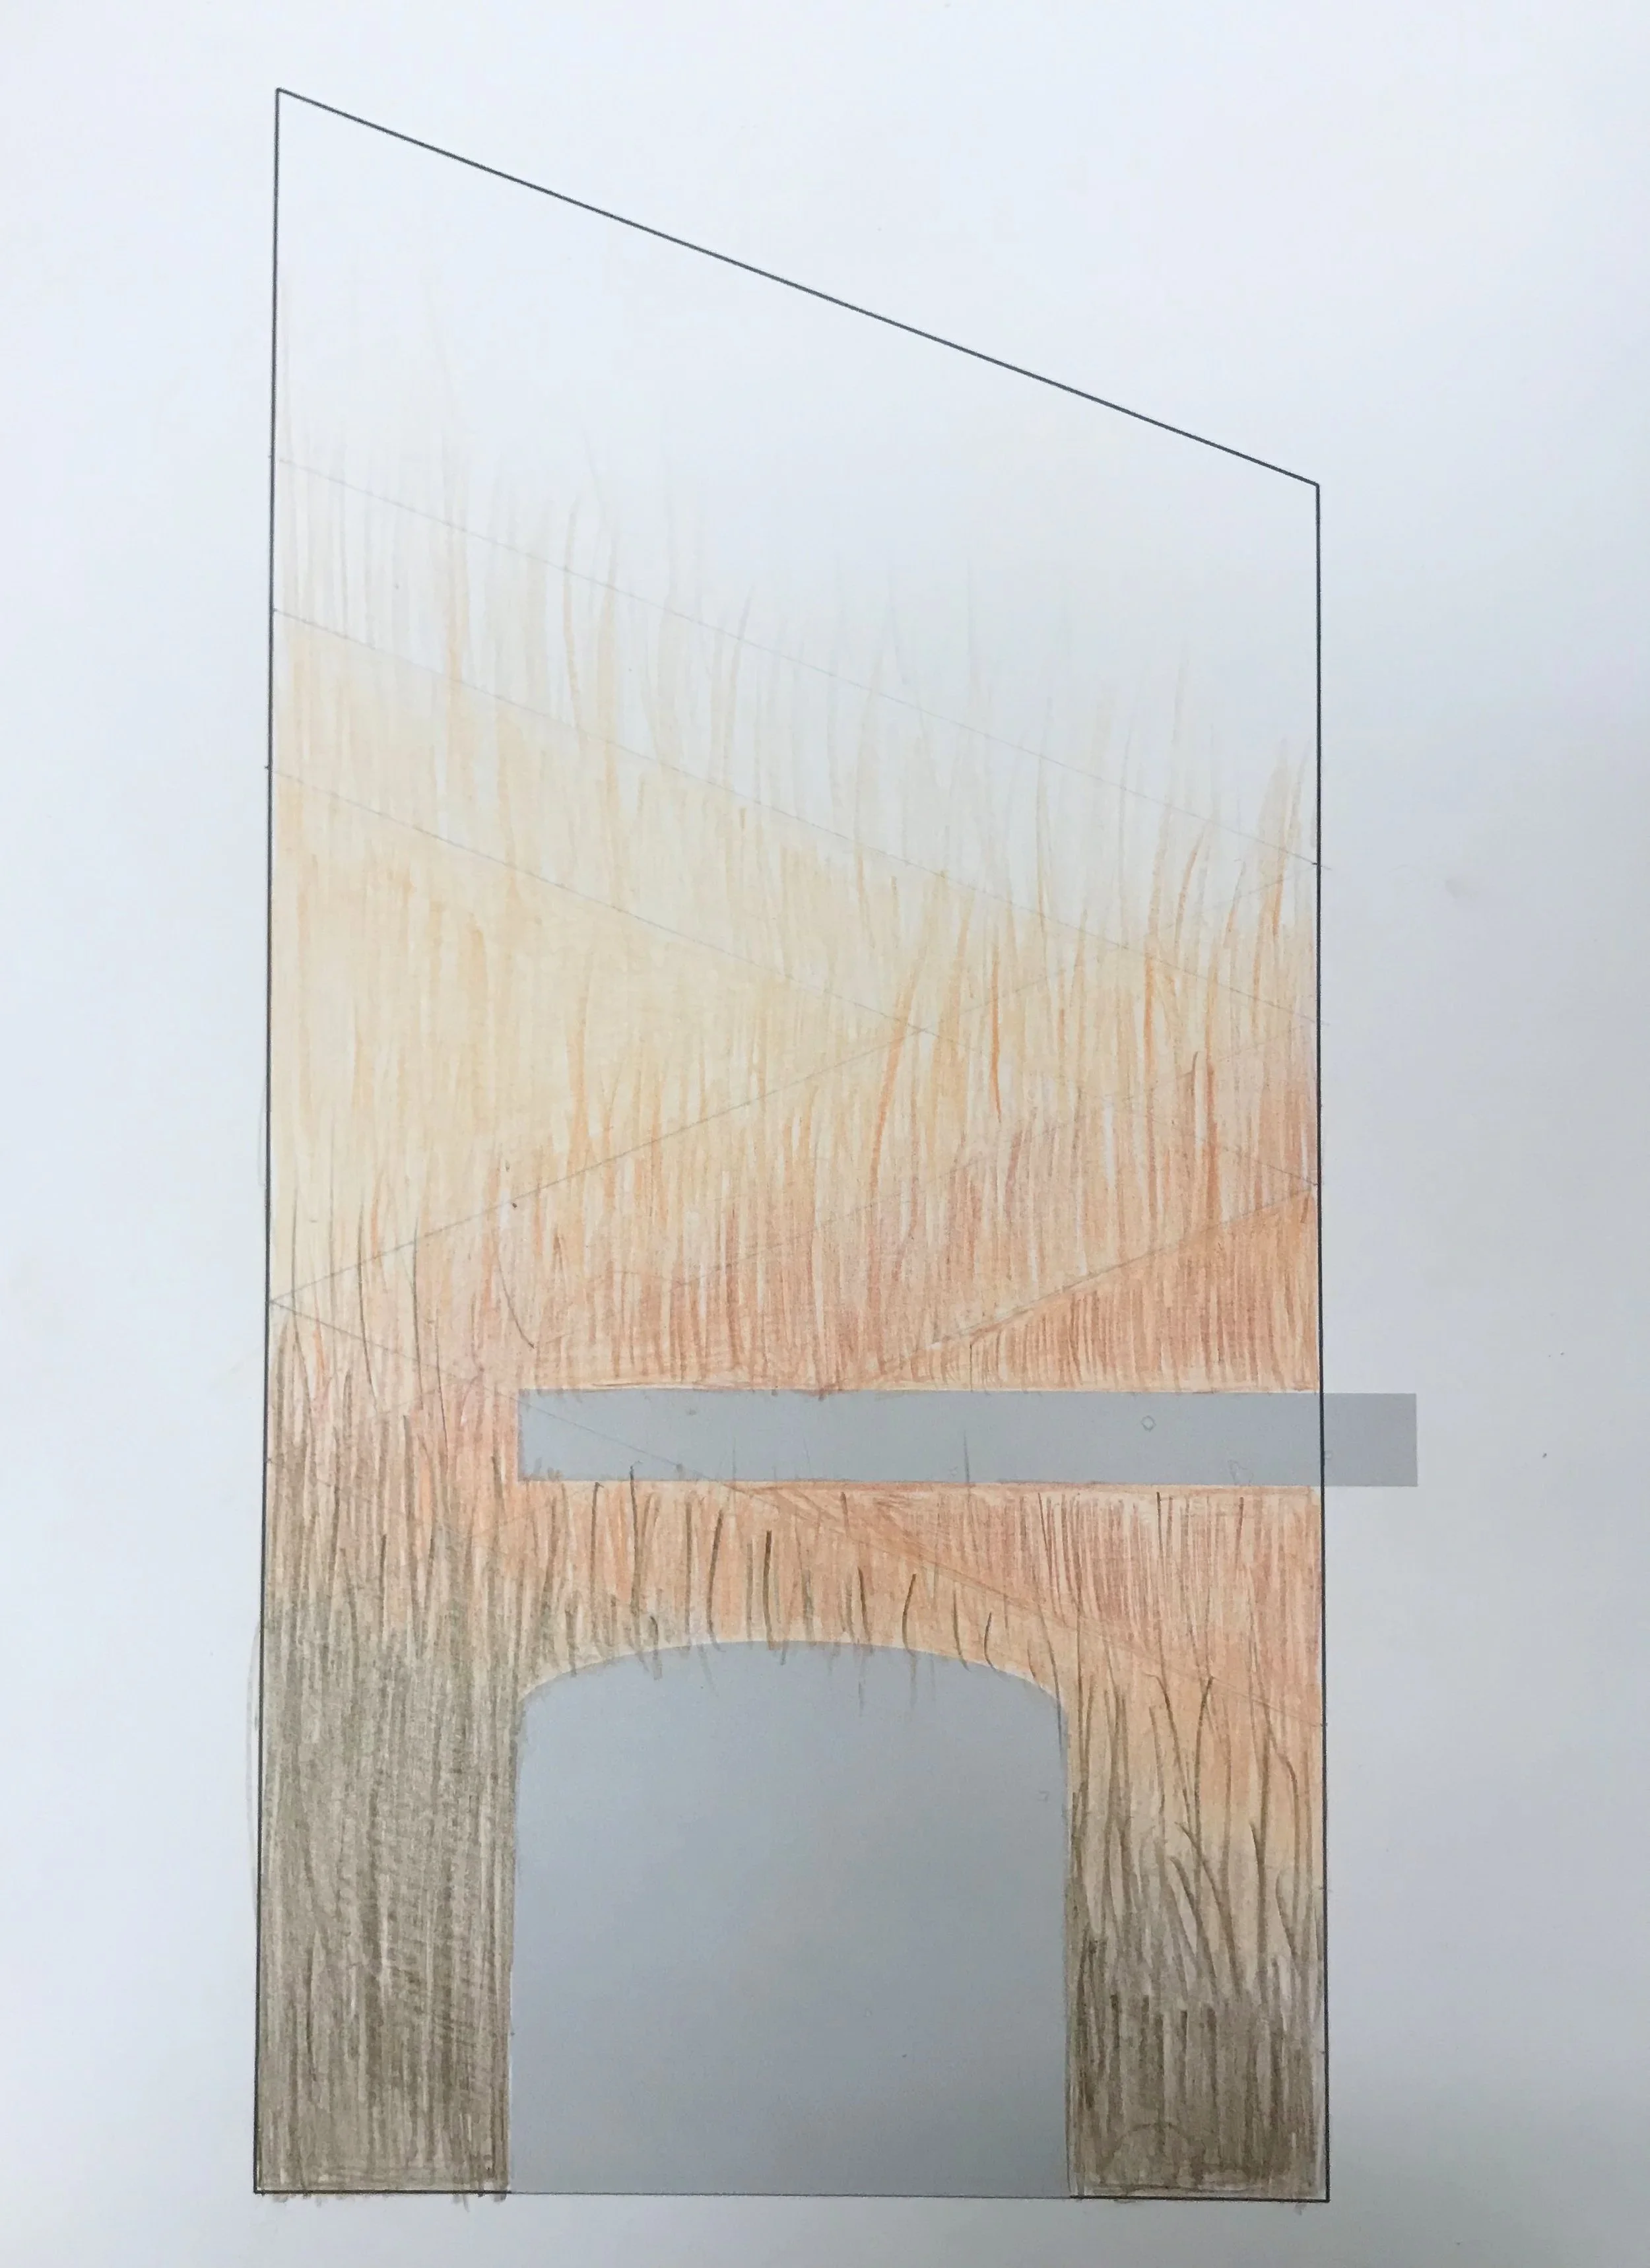
Diagonal Fireplace Mockup

Criss-Cross Diagonal Fireplace Mockup

Criss-Cross Diagonal Fireplace Mockup

The ombré transitions through four color sections: deep brown at the base, warm peach in the middle, taupe, and finally a creamy iridescent glass at the top. I felt strongly that the bottom needed the weight of dark brown to ground the piece and make the upper half feel more ethereal by contrast. The peach tones in the middle evoke the warmth of fire without the harshness that orange or red would have brought to the room. And the iridescent cream at the top creates exactly the luminous, almost otherworldly quality I had envisioned from the start.
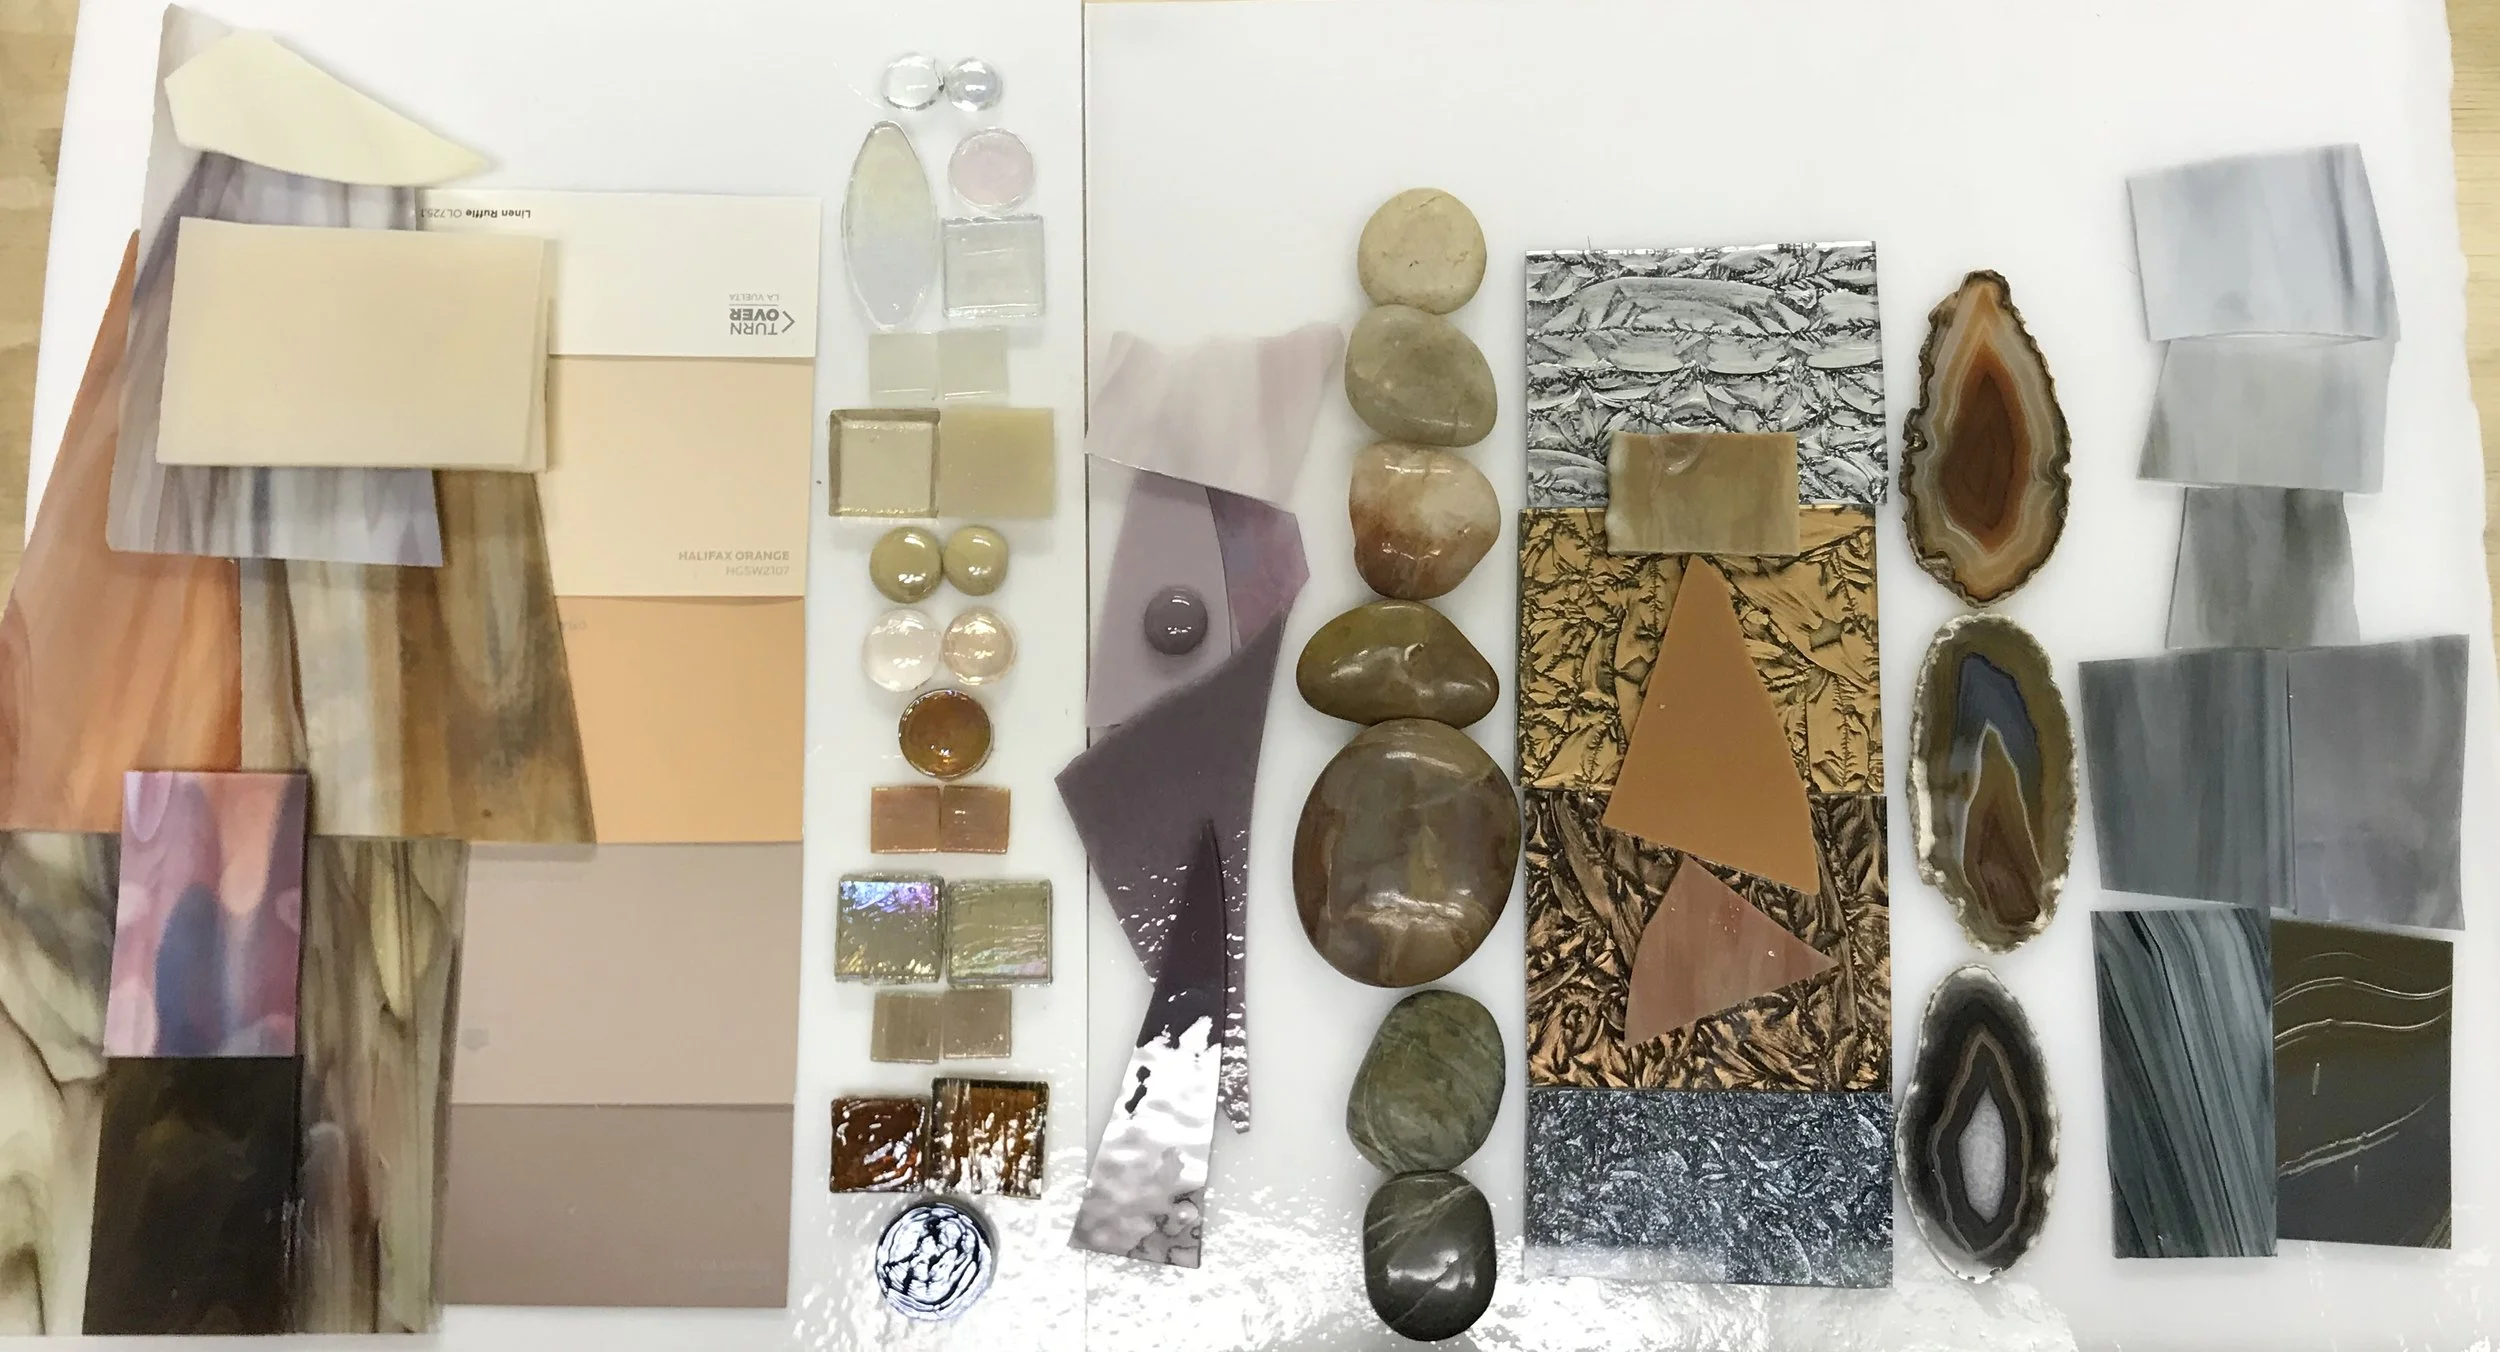
One of the palettes of materials I showed the client.

One of the palettes of materials I showed the client.

The color palette required some careful negotiation between her original vision and what was technically achievable. Certain materials, like the thicker glass gems and tiles, simply don't come in every color, and excluding them from any section would have made the piece feel inconsistent. Working within the budget also shaped some of the glass choices. She was wonderfully collaborative throughout, willing to discuss adjustments when I felt strongly that a change would serve the piece better.

She came to my studio to choose from a huge variety of glass options and quickly identified what she did and didn't want to use. It was a tough decision to commit to the darker, heavier materials at the bottom, but I really felt it would ground the mosaic and make the design pop. I'm so glad she trusted that instinct.
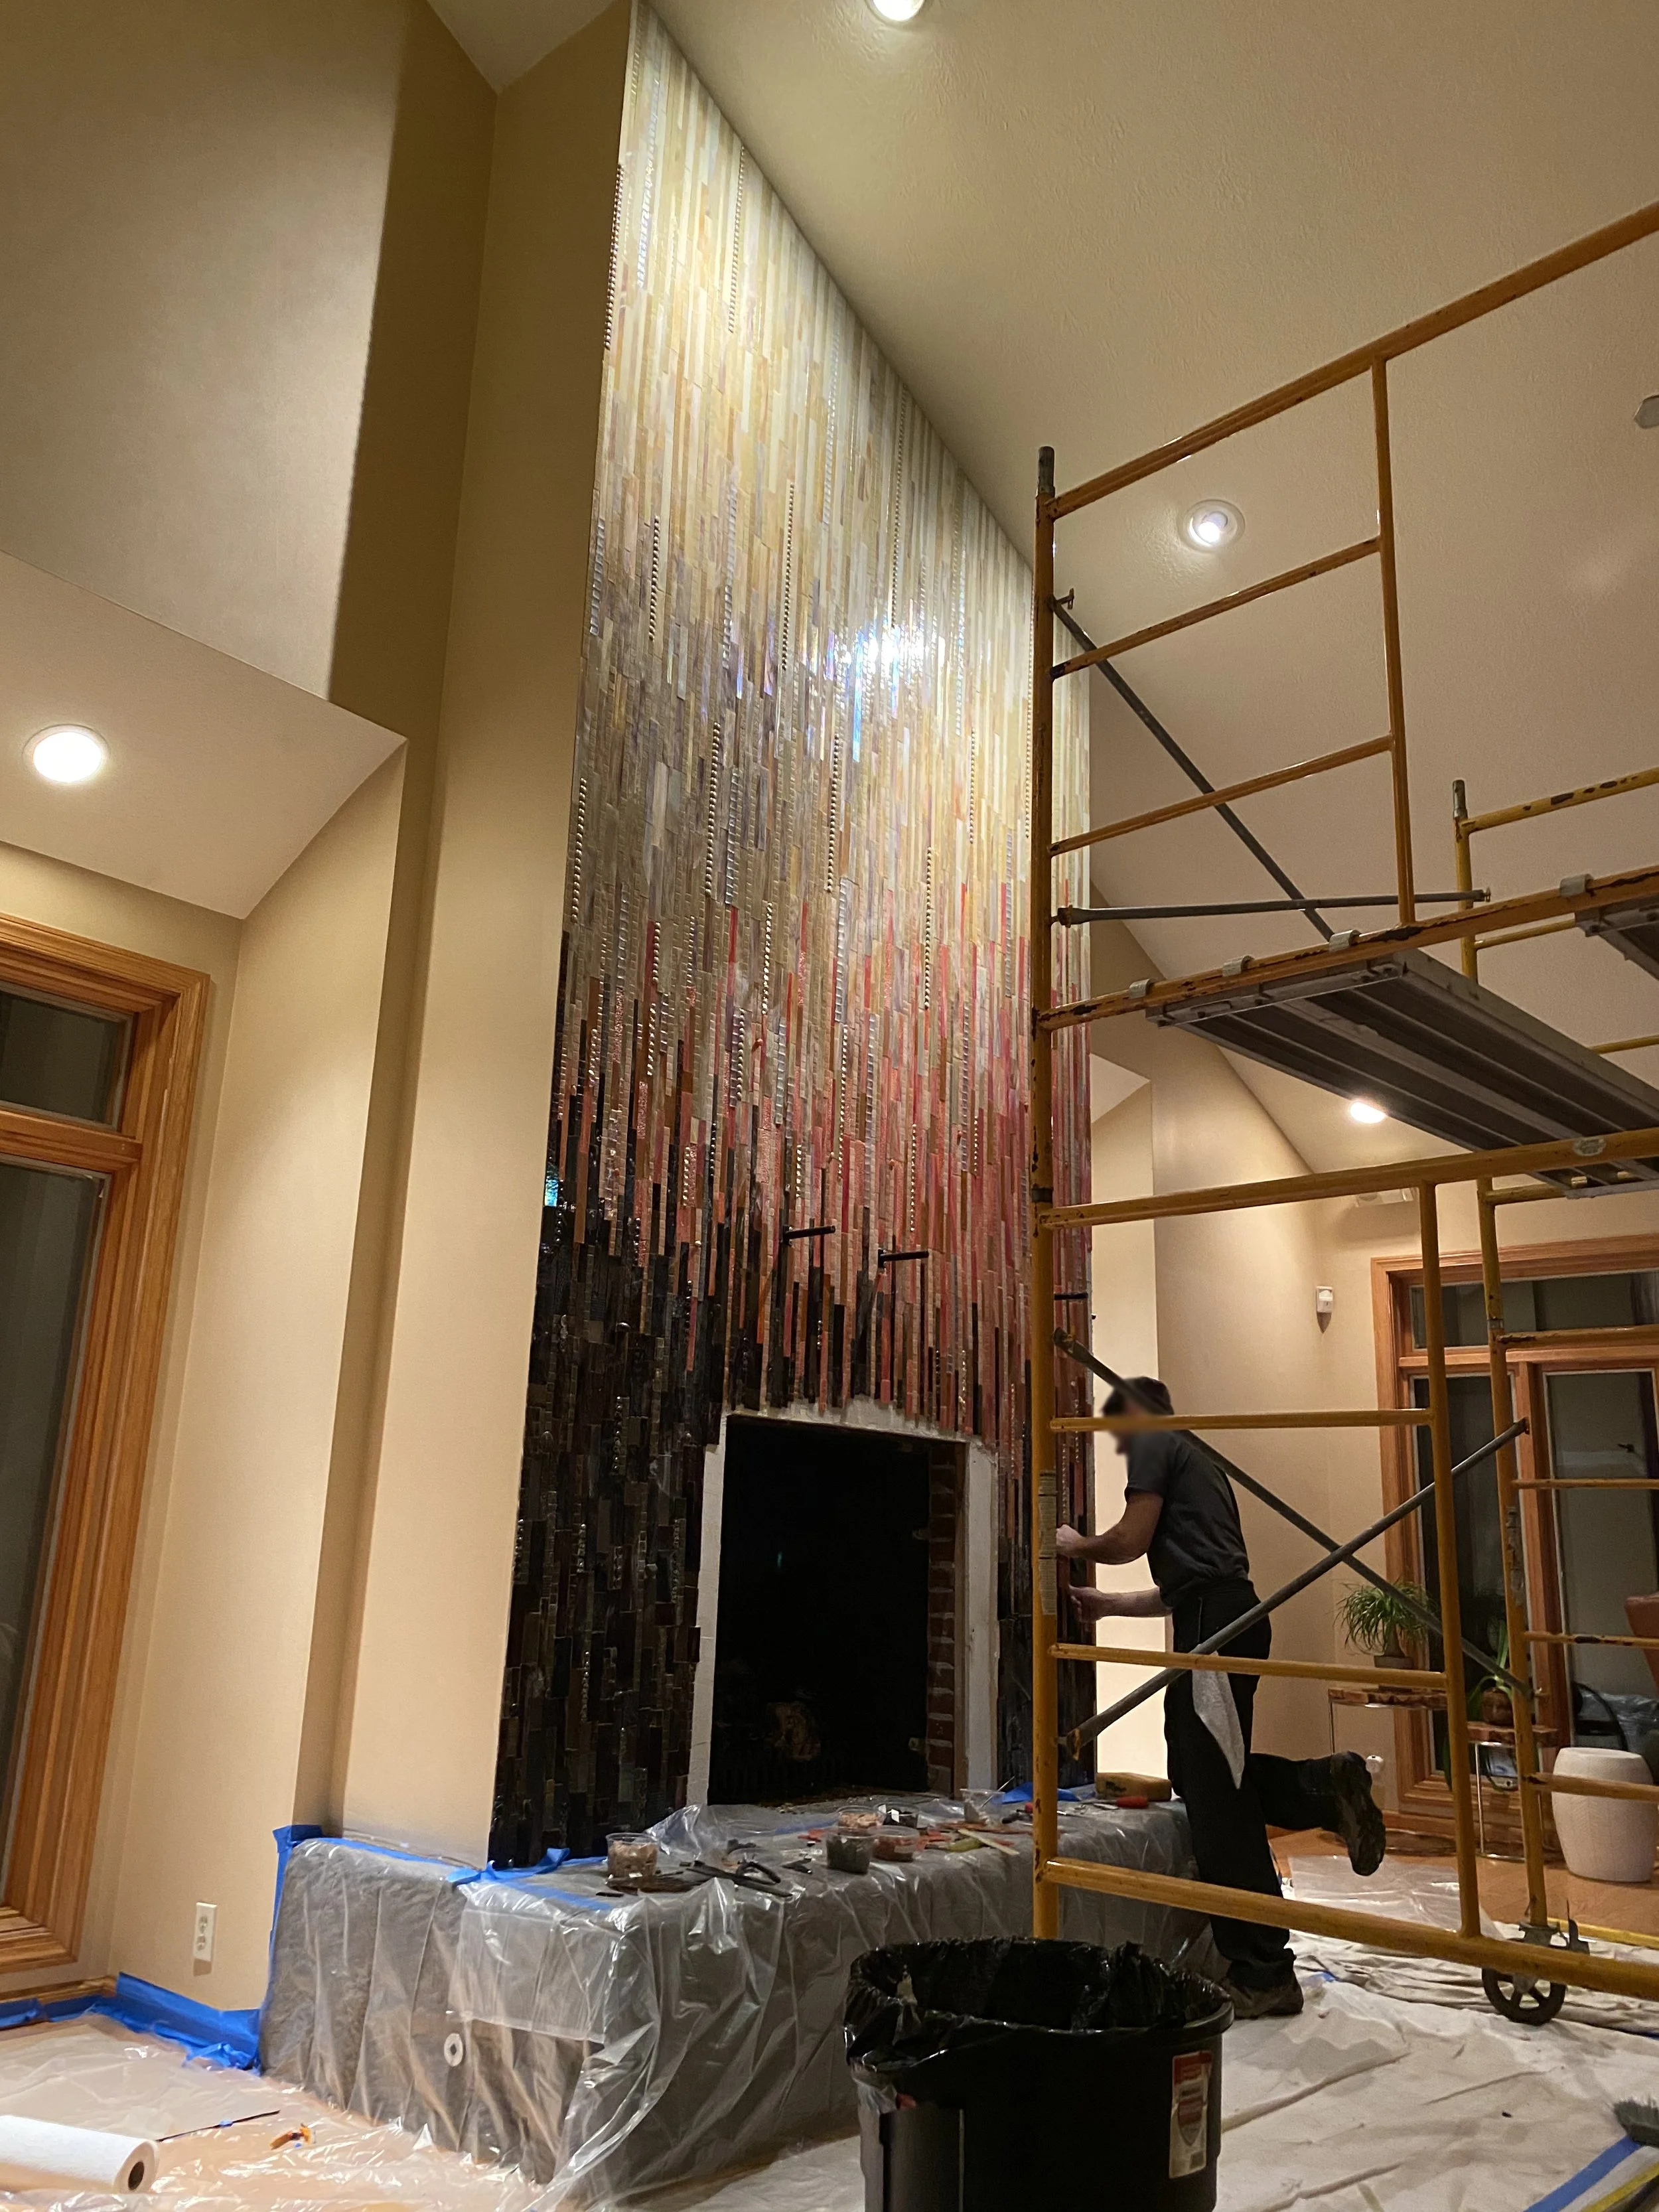
 
Installing the fireplace mosaic.

Installing the fireplace mosaic.


Several different materials are woven throughout the composition including stained glass, vitreous glass, glass gems, and pebbles. The pebbles are concentrated in the darker lower sections where their weight and texture feel most natural. One of the more technically demanding aspects of this piece was keeping the ombré transitions smooth and gradual while also keeping the criss-cross pattern legible. With so many materials of different widths and thicknesses, maintaining consistent spacing across the entire surface required constant attention.

Iridescent stained glass presents a particular challenge: it can look completely different before it's cut and placed against neighboring glass, so color decisions had to be made carefully and sometimes revisited. Some of the more translucent glass required adhering directly with mortar rather than mesh so the backing wouldn't show through. For grouting I used four different grout colors, blending them at the transitions. That sounds complicated, but it came together more smoothly than I anticipated, even with so many different textures and thicknesses to work around.


This is my favorite mosaic I have ever made. The way so many complicated decisions, materials, and techniques came together into something unified, flowing, and elegant is exactly what I hope for in a commission, and rarely get to this degree.
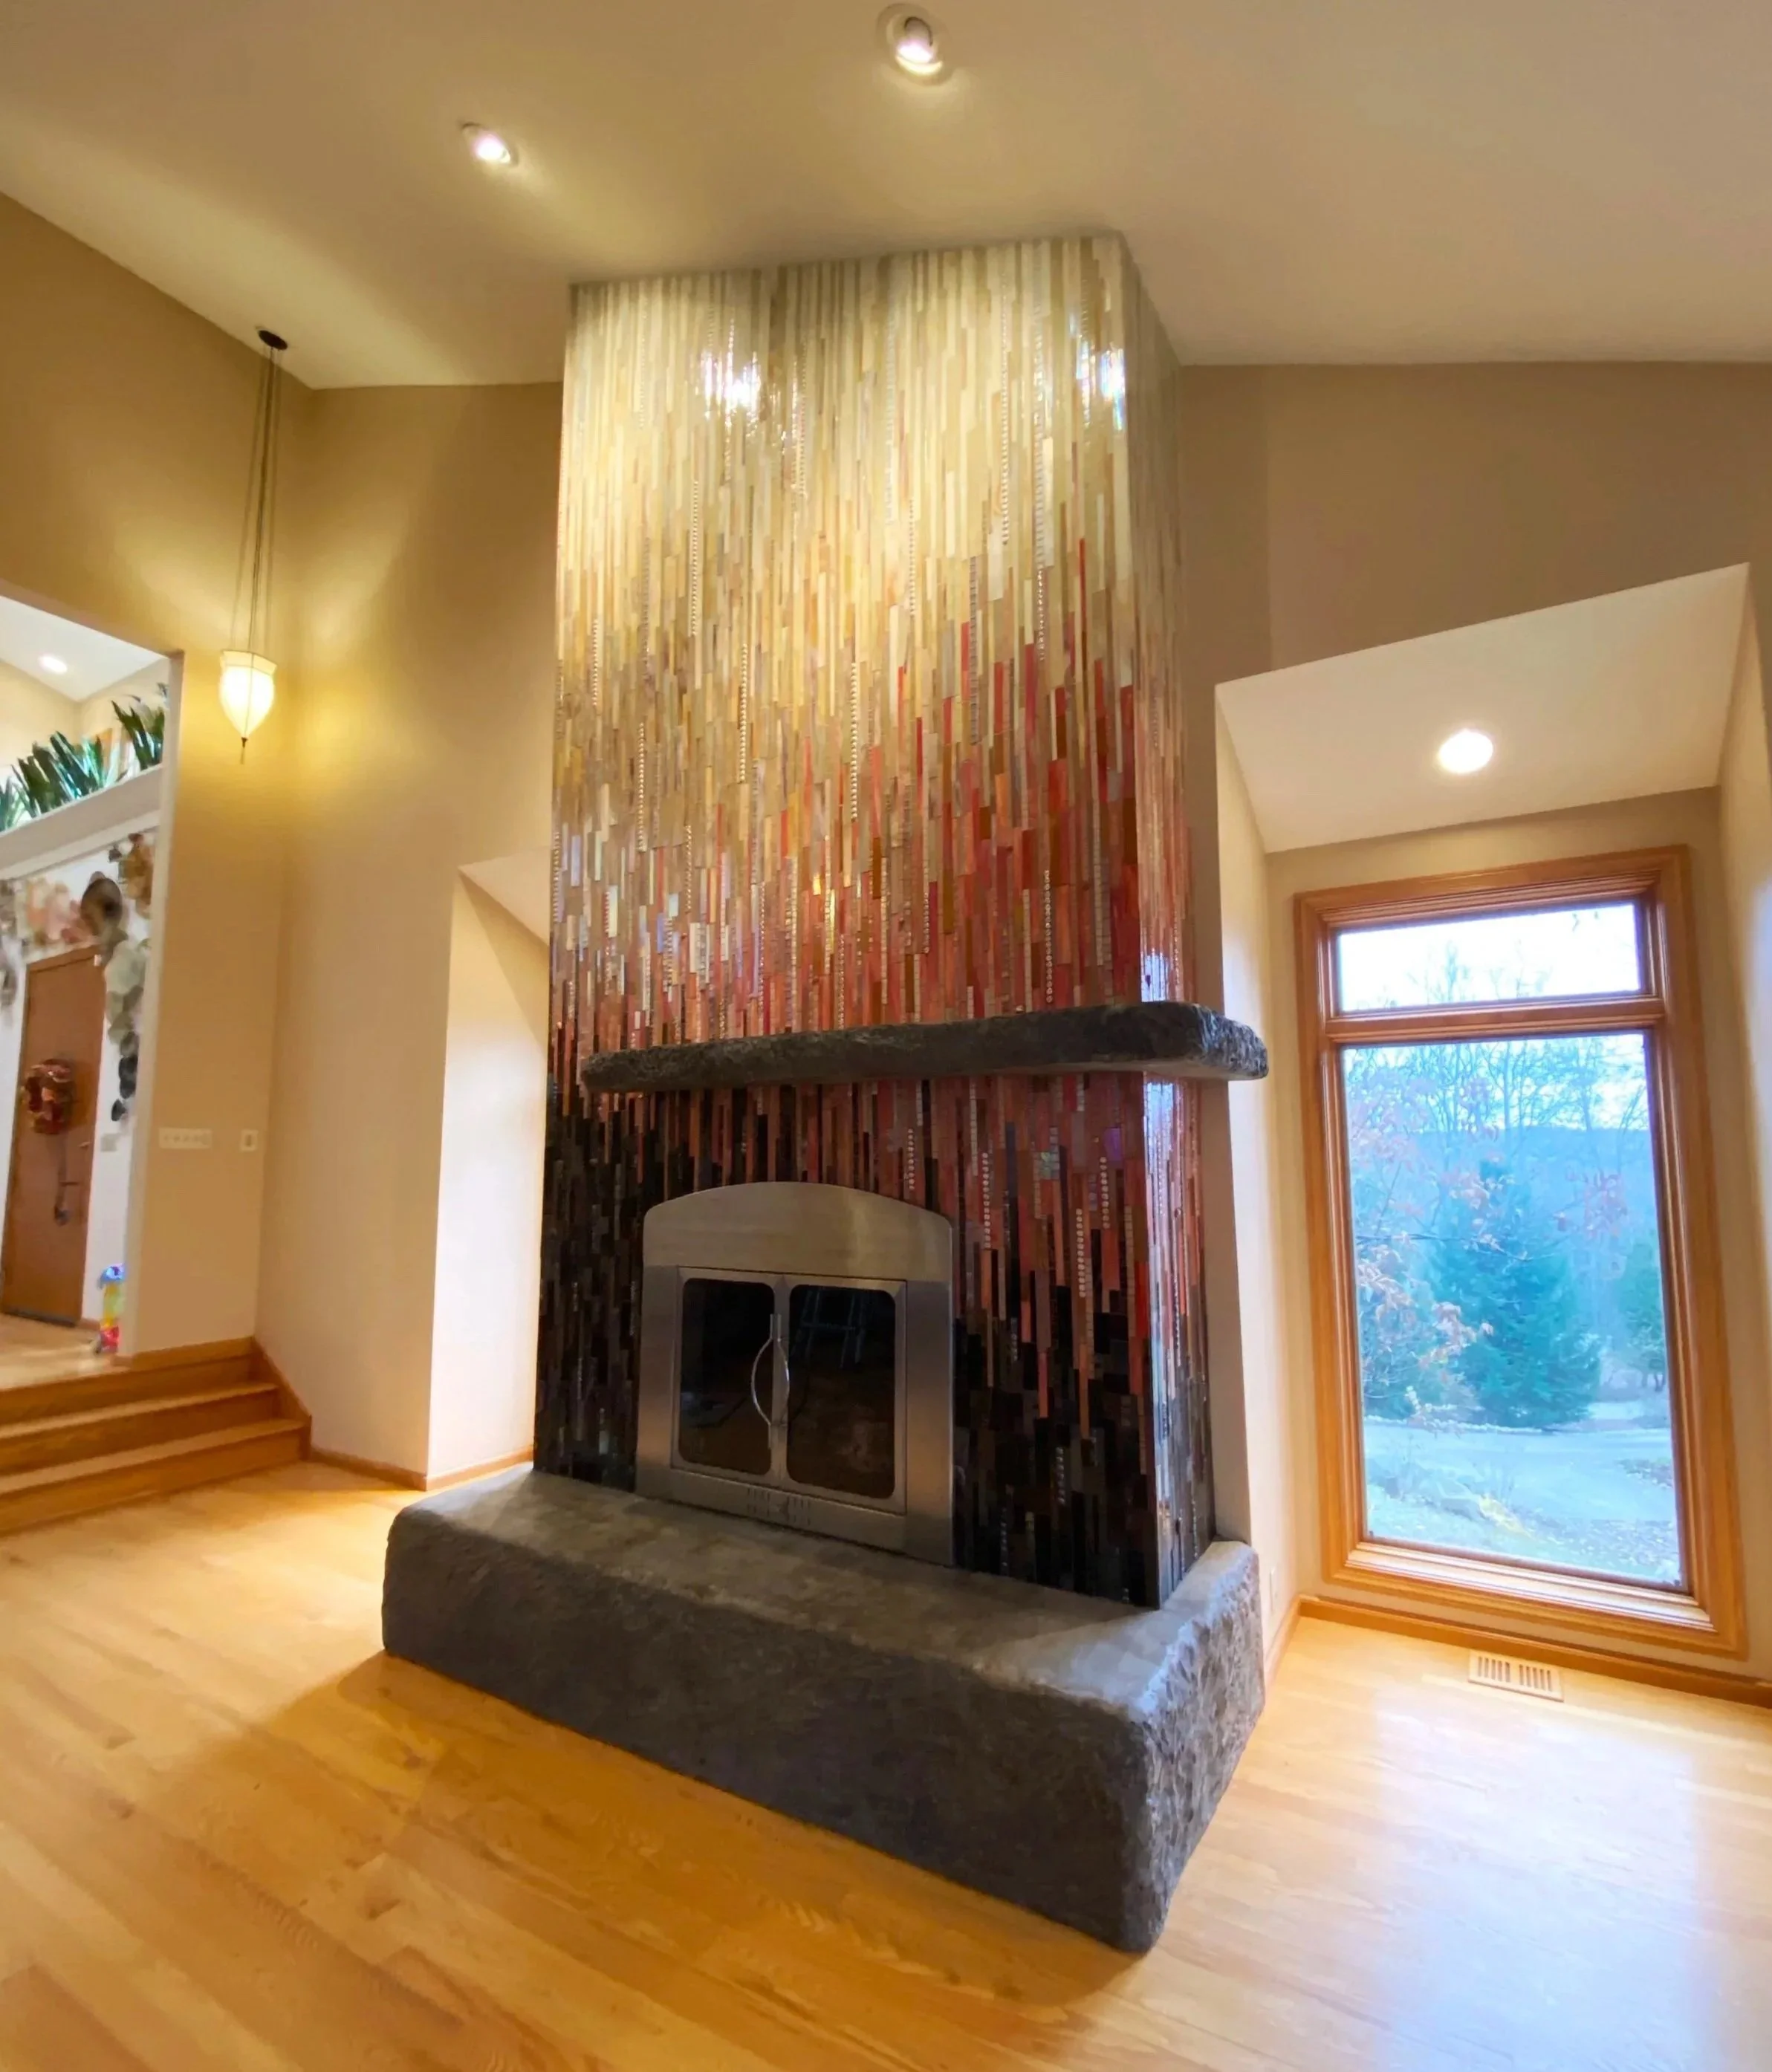
See the full gallery page for this commission.

Ombré Mosaic Fireplace viewed from other side.

Sun Kitchen Mosaic Backsplash

It was so much fun to have the honor of making this brilliant, Gaudi-inspired showpiece for a client’s home! 

My clients were building their dream pool house, which was sleek, modern, and minimal. It is a gorgeous home with clean lines and almost entirely white walls. They planned on doing a lot of entertaining, so they wanted a bright, bold mosaic backsplash in their open kitchen to serve as the centerpiece of the dining and living area. I was so fortunate that the wife of the president of an arts organization I work with are neighbors and friends with the couple building the home. She told them about my mosaic work and we met to discuss the project.

The couple wanted something inspired by Gaudí because they loved his mosaics and wanted a special artwork to remind them of their travels to Barcelona. They also wanted cobalt contrasting with vibrant, warm colors. It's so rare that clients are bold enough to put this much color in their home, so it was such a joy to work with them to make this mosaic happen.

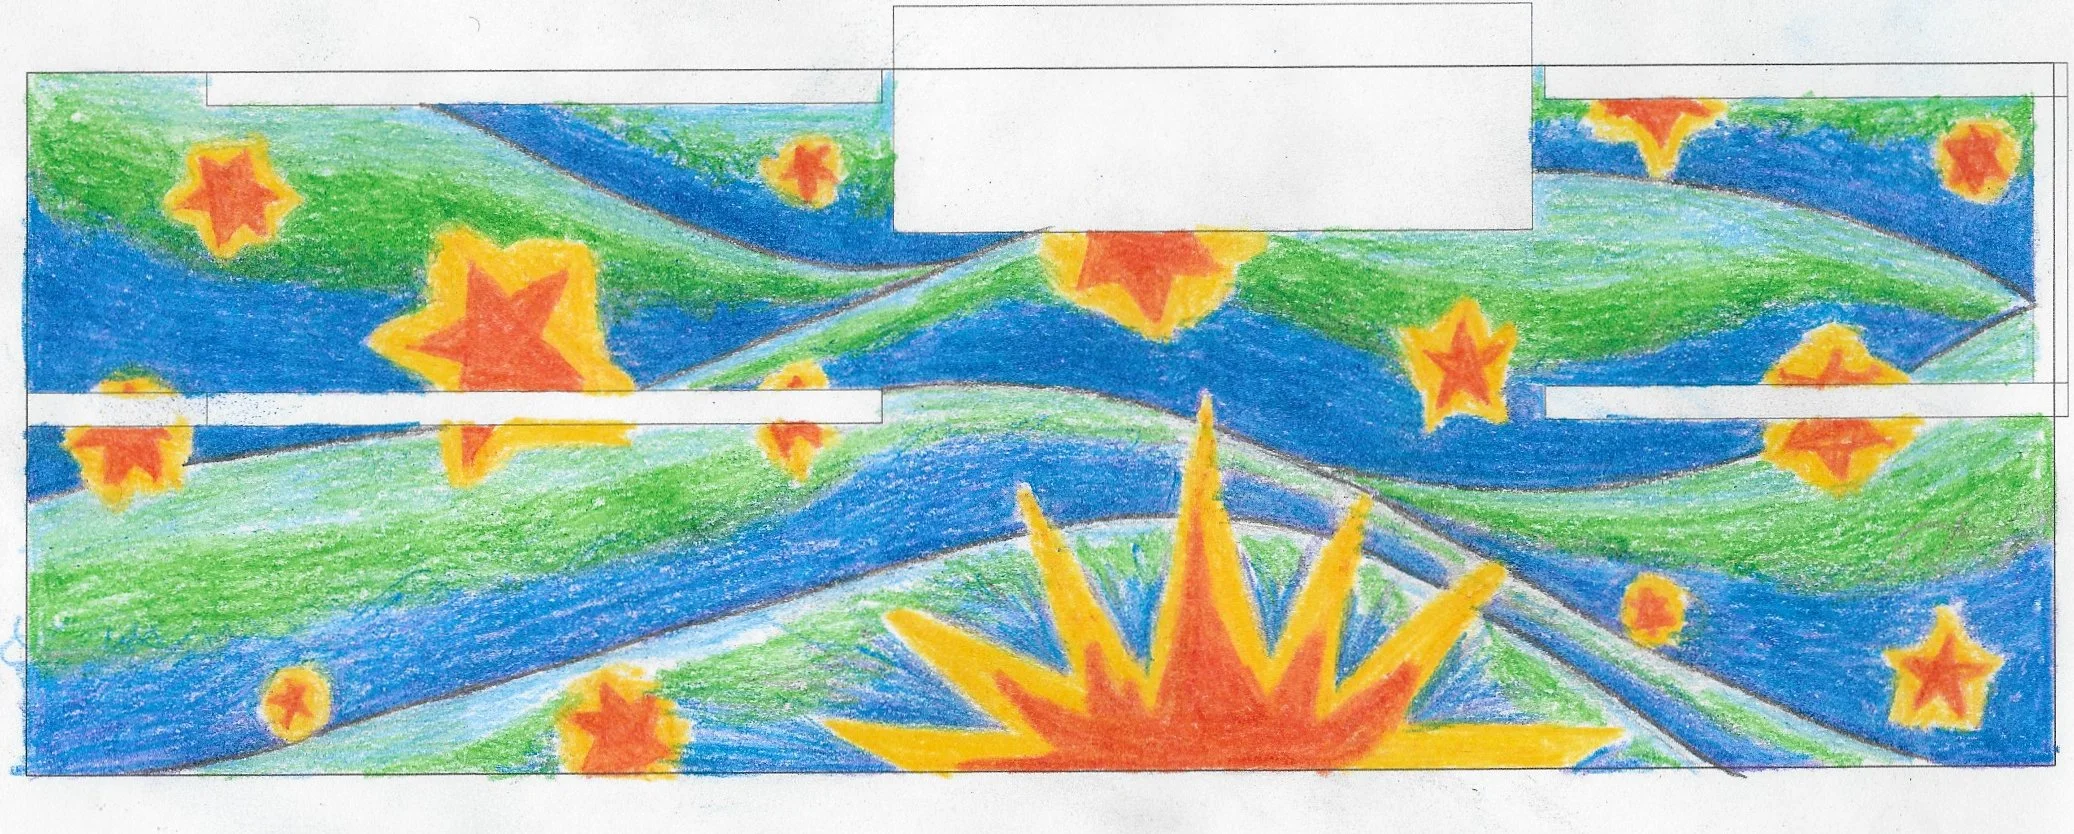
Mockup of design option 1, colored pencil sketch.

Mockup of design option 1, colored pencil sketch.

I began with a hand-drawn sketch exploring the concept. This early option used a looser, more organic approach with stars and sweeping movement across the full width of the backsplash. You can also see the shelf cutouts already accounted for in the design, since planning around the architecture was part of the process from the very beginning.

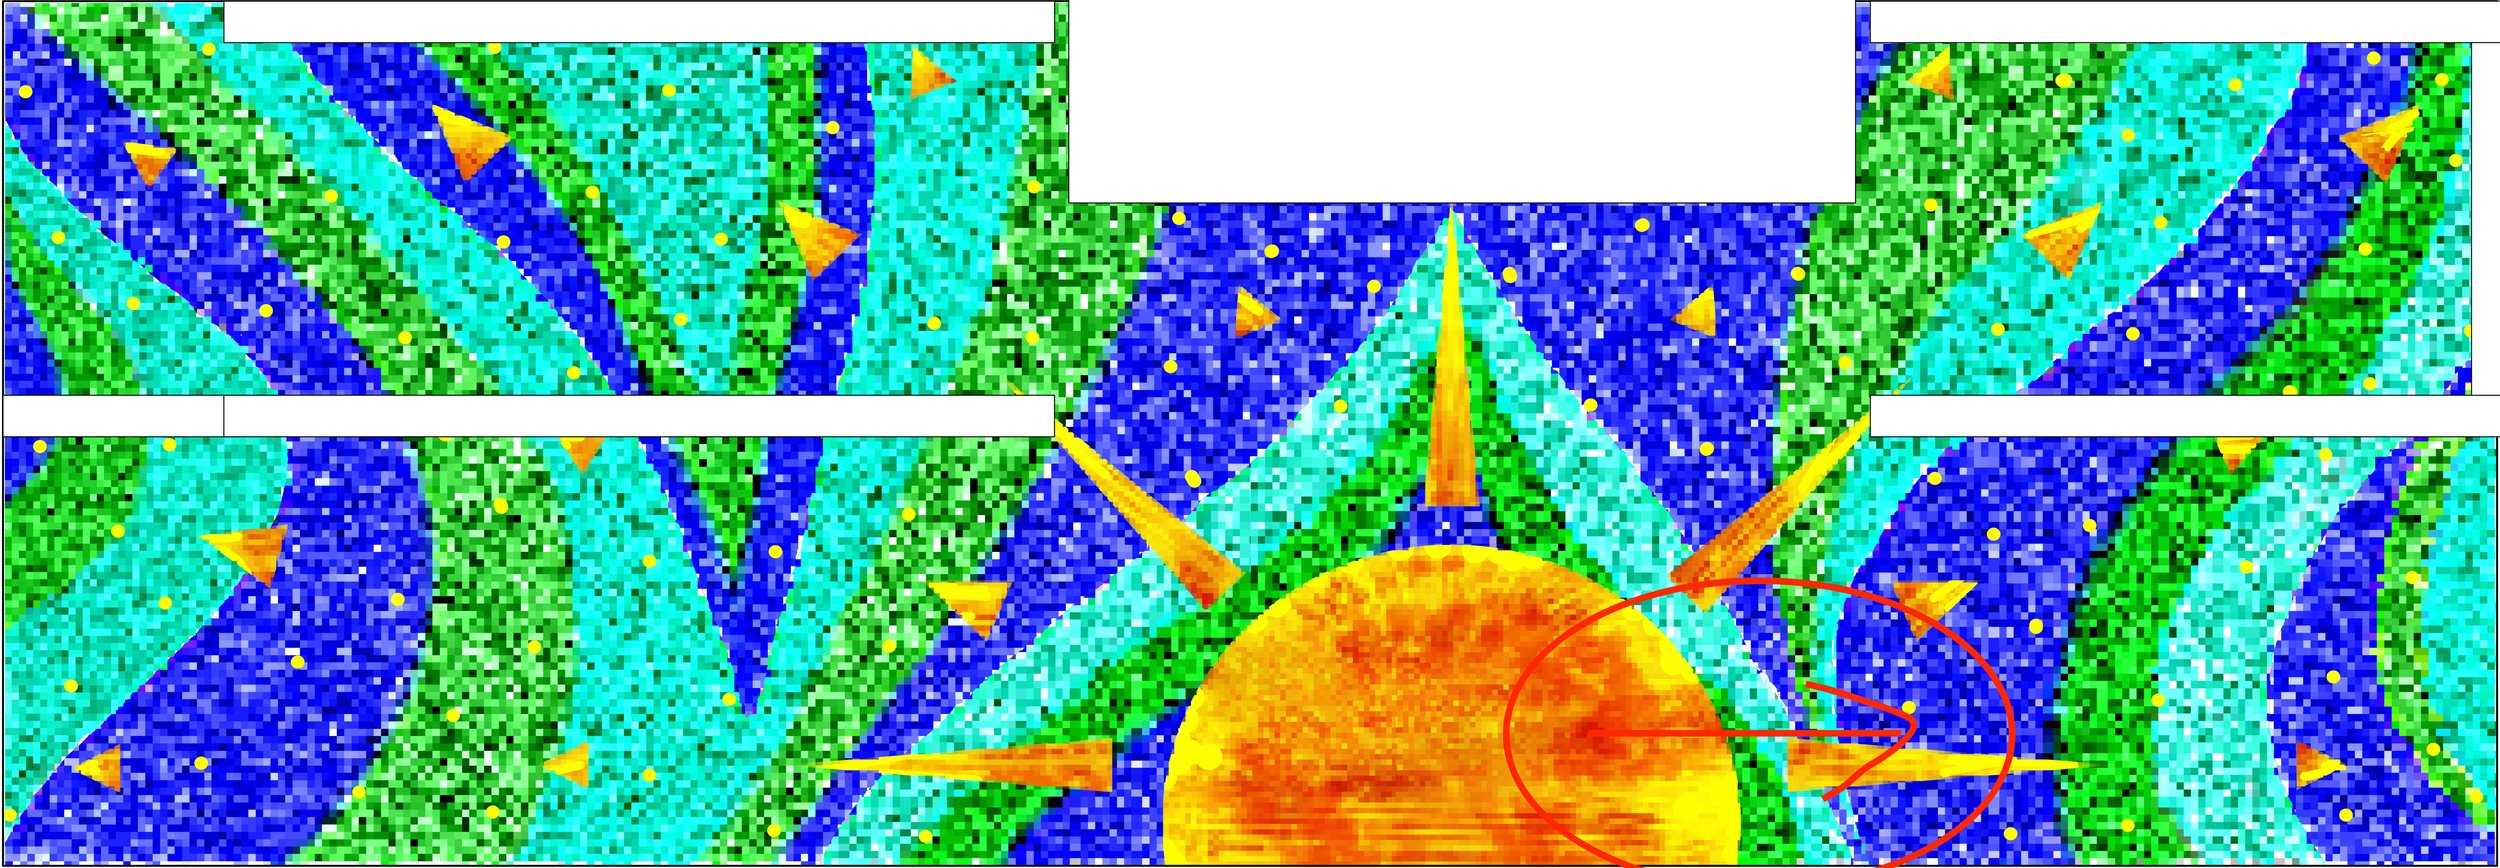
Mockup of design option 2, digital.

Mockup of design option 2, digital.

From there I moved into digital mockups to work out the color relationships and composition more precisely. This version refined the design toward the sun concept and brought the cobalt and warm color contrast into sharper focus.

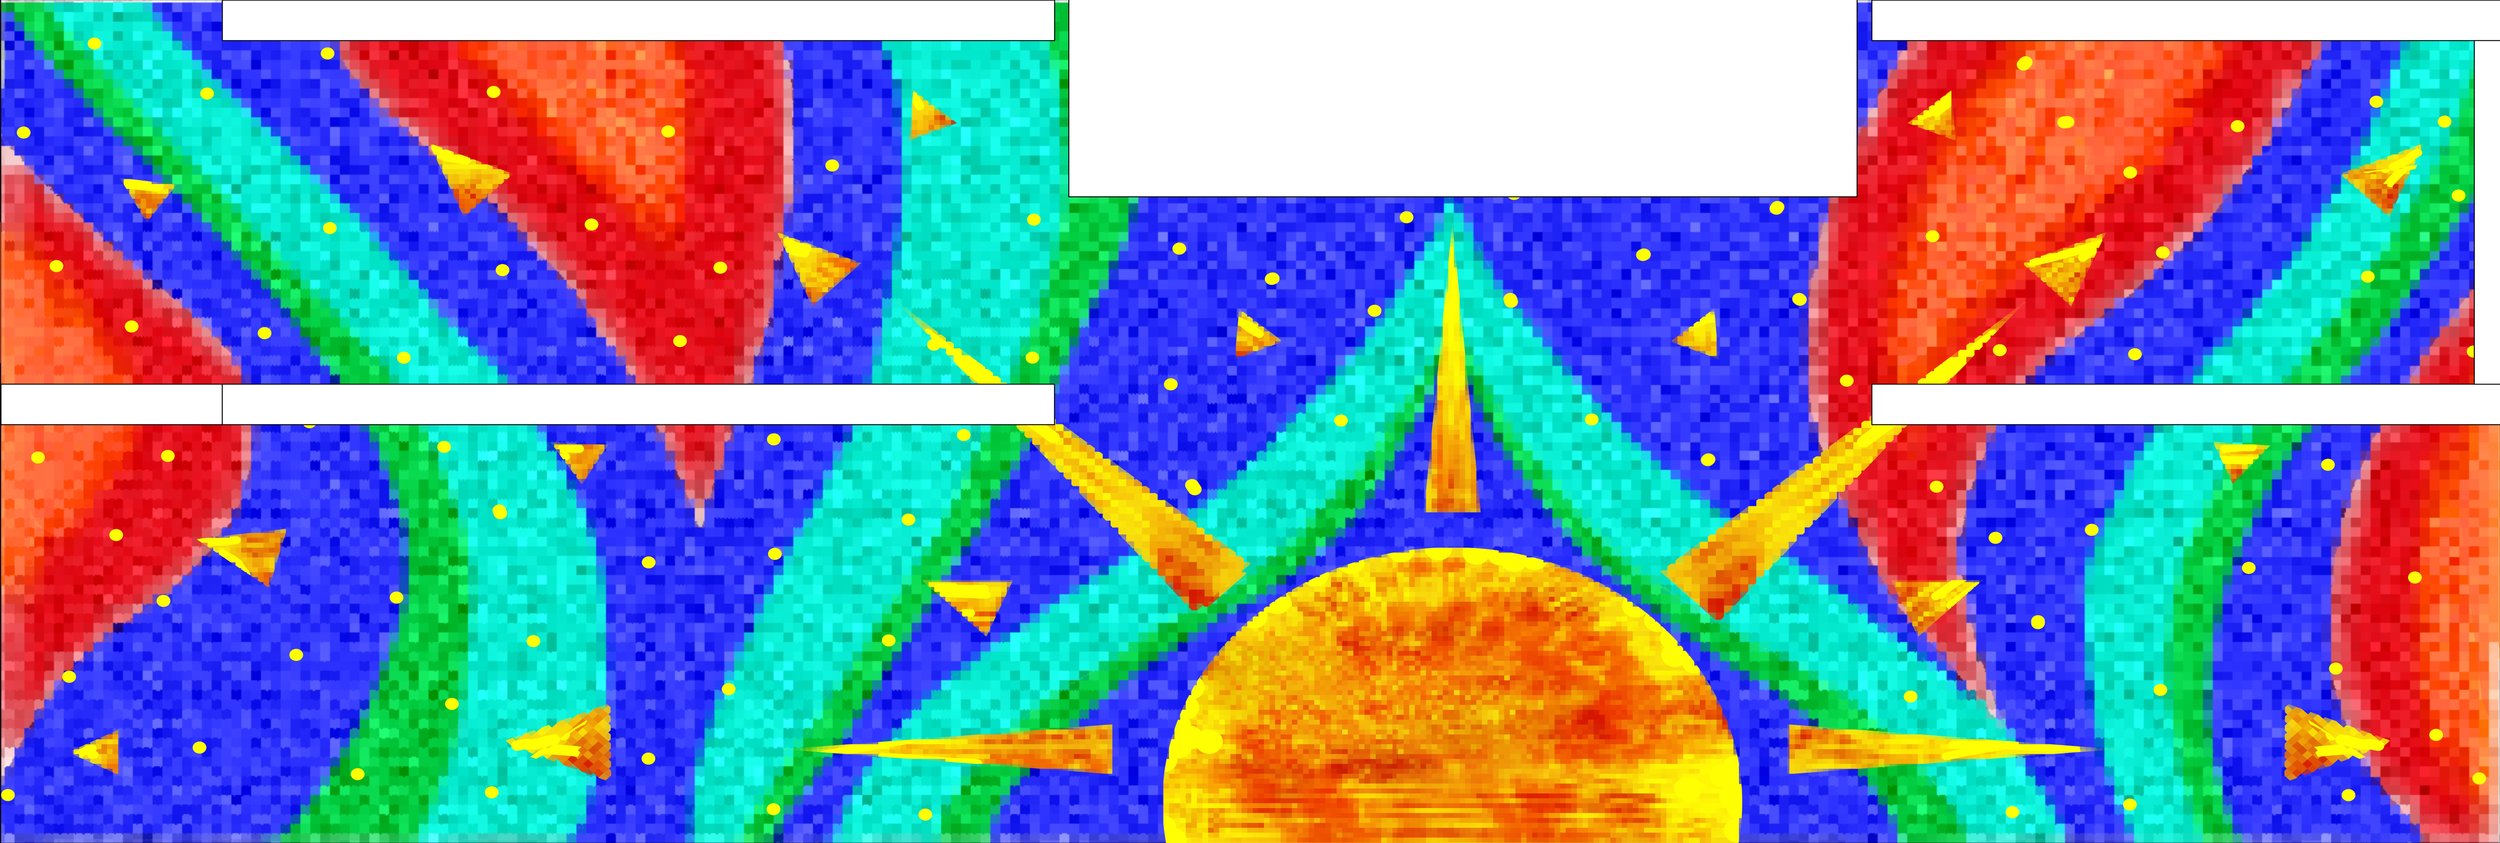
Mockup of design option 3 (chosen design), digital.

Mockup of design option 3 (chosen design), digital.

This is the final design the clients approved. I wanted to create something that matched their Gaudí and color specifications while still reflecting my own style. I suggested a sun because Gaudí has worked with solar imagery, but I approached it my way using geometric shapes, varying levels of translucency in the glass, colored mirror, and gold smalti. I also suggested creating the mosaic in glass rather than ceramic. I was so glad they agreed, because I couldn't have created a work this intricate in ceramic, and it would have lacked the luminosity and impact that glass brings. I still used a picassiette-style andamento traditional to ceramic mosaics as a nod to Gaudí. The whole design came together beautifully and quickly because the clients were open to ideas but also knew exactly what they wanted when they saw it.

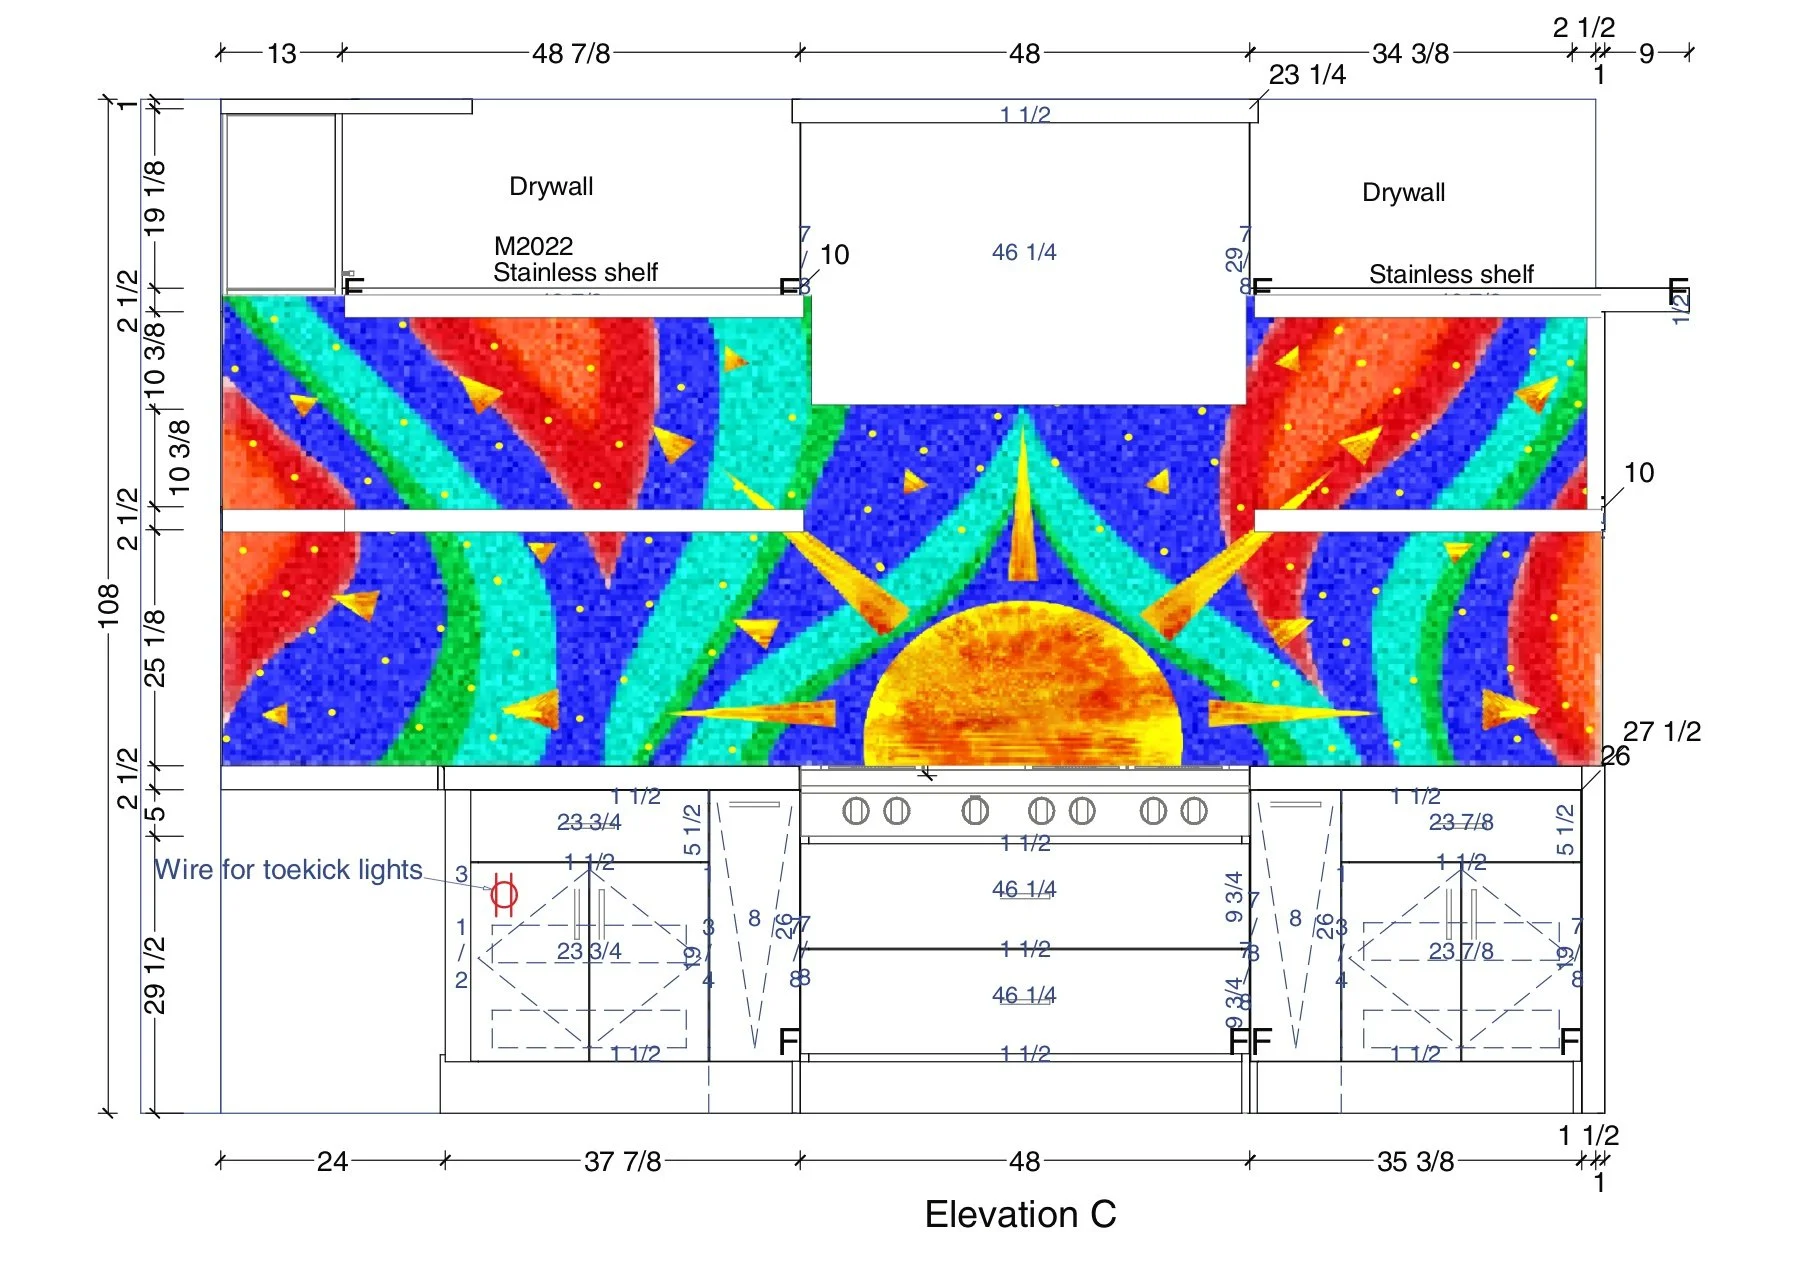
Chosen mockup of Sun Kitchen Mosaic placed into wall elevation.

Chosen mockup of Sun Kitchen Mosaic placed into wall elevation.

Before construction began I worked from the architect's wall elevation drawing to plan the panel layout precisely around the stainless shelves, range hood, and exact dimensions of the space. The sun was centered over the stove intentionally, both as a compositional anchor and so the focal point would sit entirely clear of the shelves. I also planned a buffer area at the top of each panel to account for any slight variation between my measurements and the actual wall, since it's far easier to trim a clean edge on site than to cut down a completed mosaic panel.

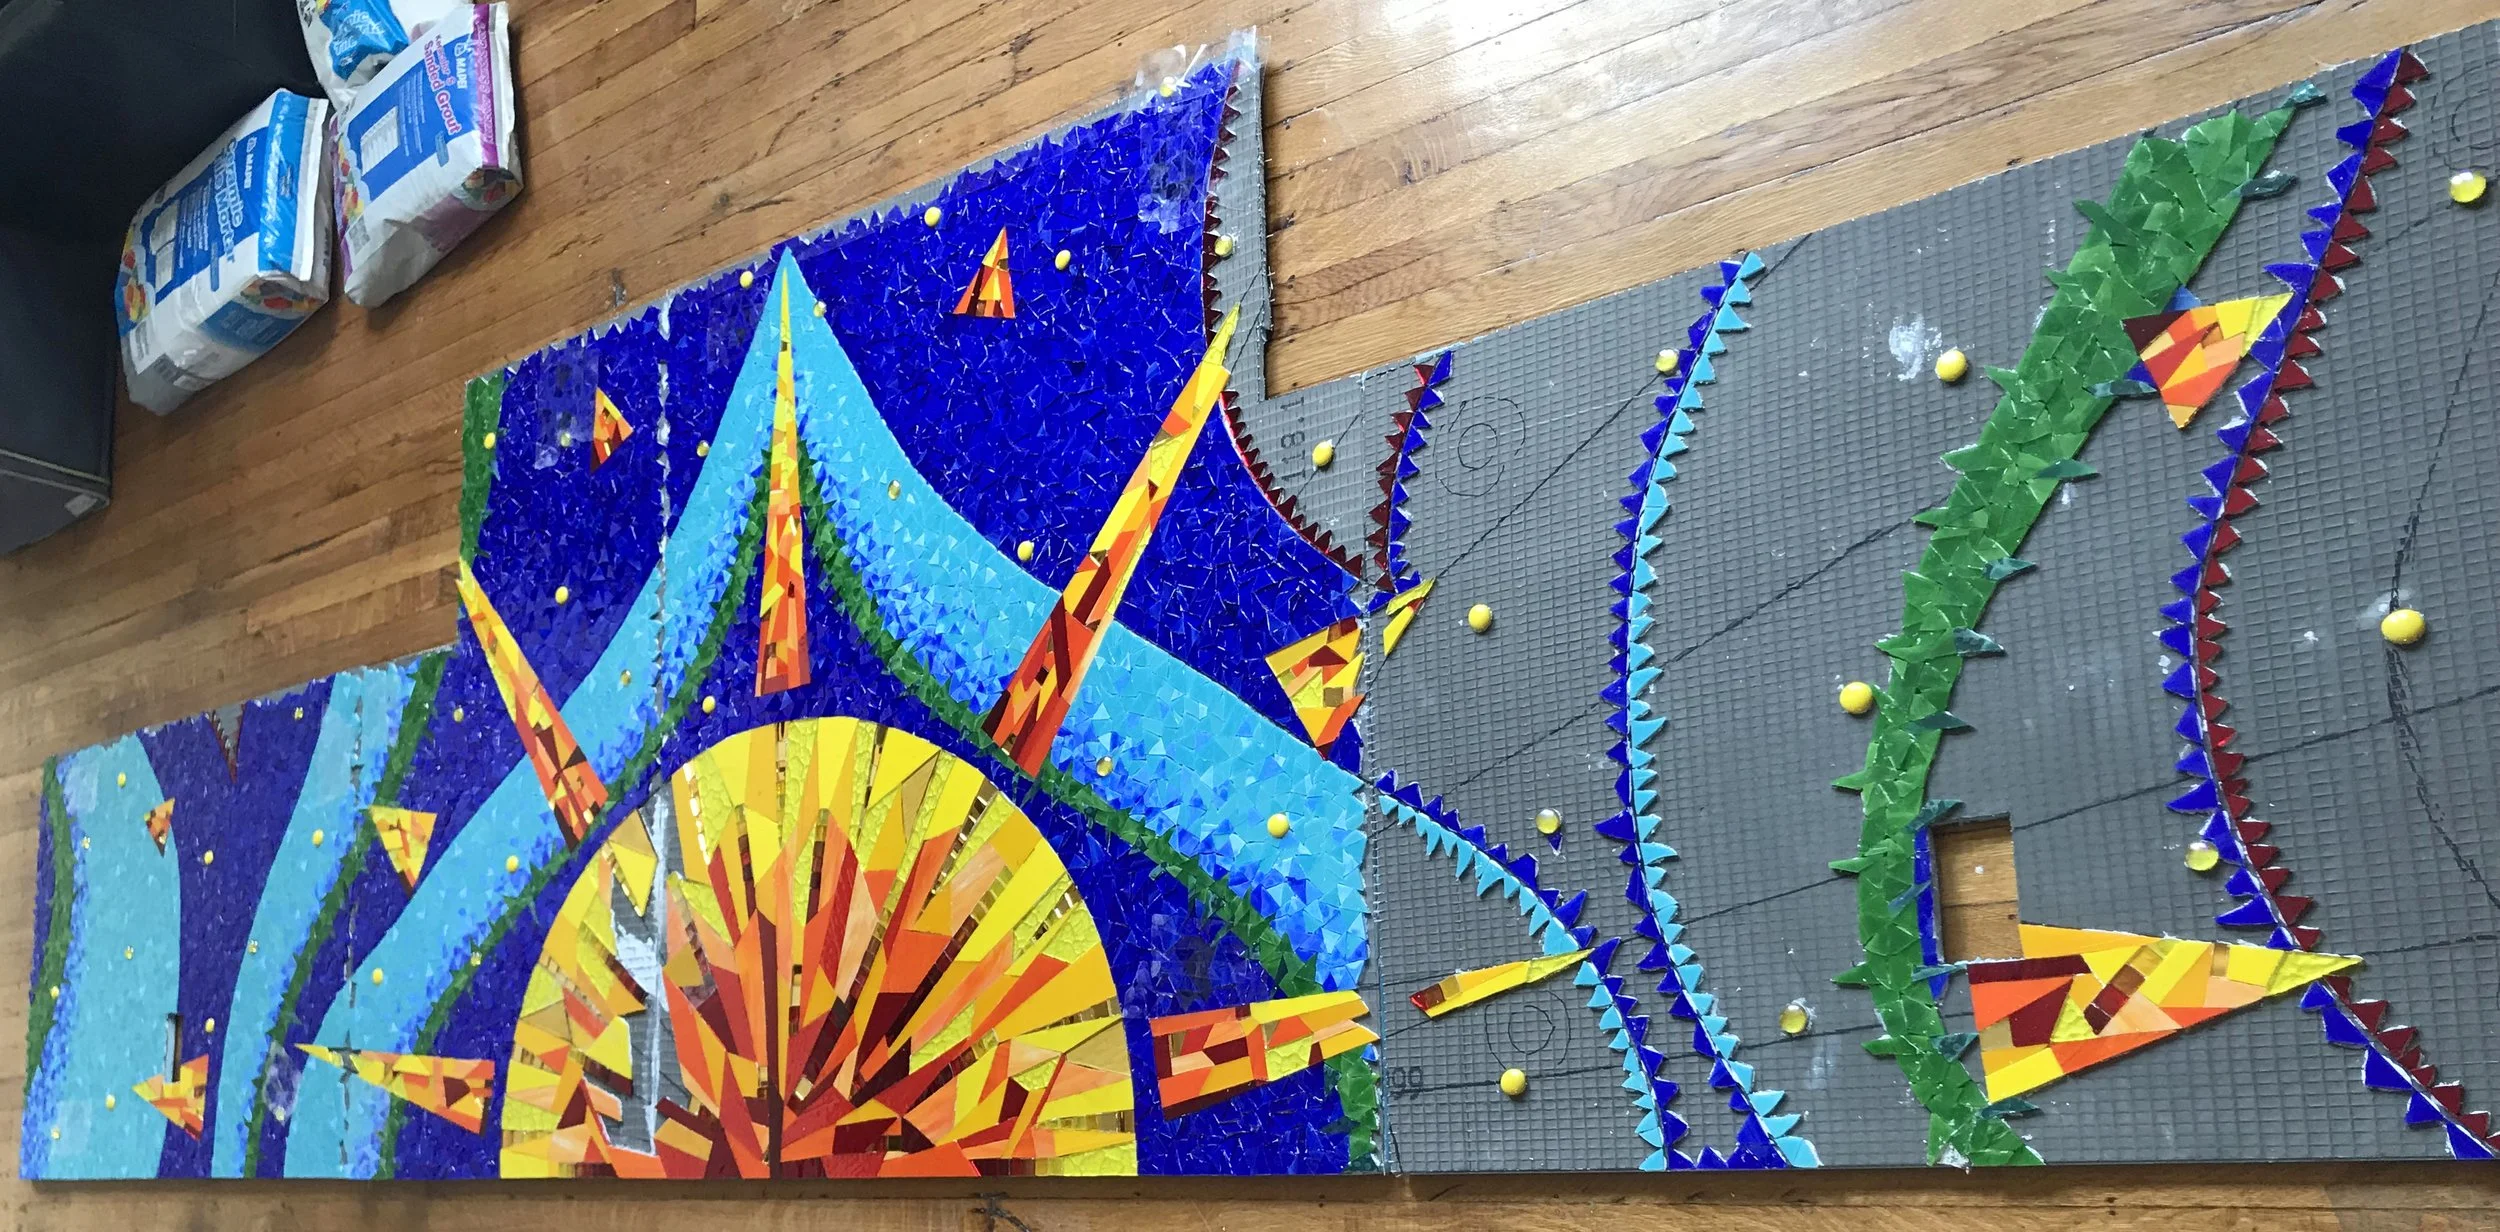
Sun Kitchen Backsplash, work in progress.

Sun Kitchen Backsplash, work in progress.

The mosaic was built on Wedi board panels, a foam core backer board coated on both sides with fiberglass mesh and cementitious resin, cut to fit the space. Working on the floor of my studio, I built each panel section by section, adhering all the glass with white mortar. I chose white mortar specifically because this is a kitchen installation and I wanted it to be as waterproof as an outdoor piece. White mortar also dramatically affects the color and reflectiveness of stained glass, even opaque glass has some level of translucency, so the mortar color underneath matters. For the translucent gems I backed them with foil so they would catch and reflect light beautifully.

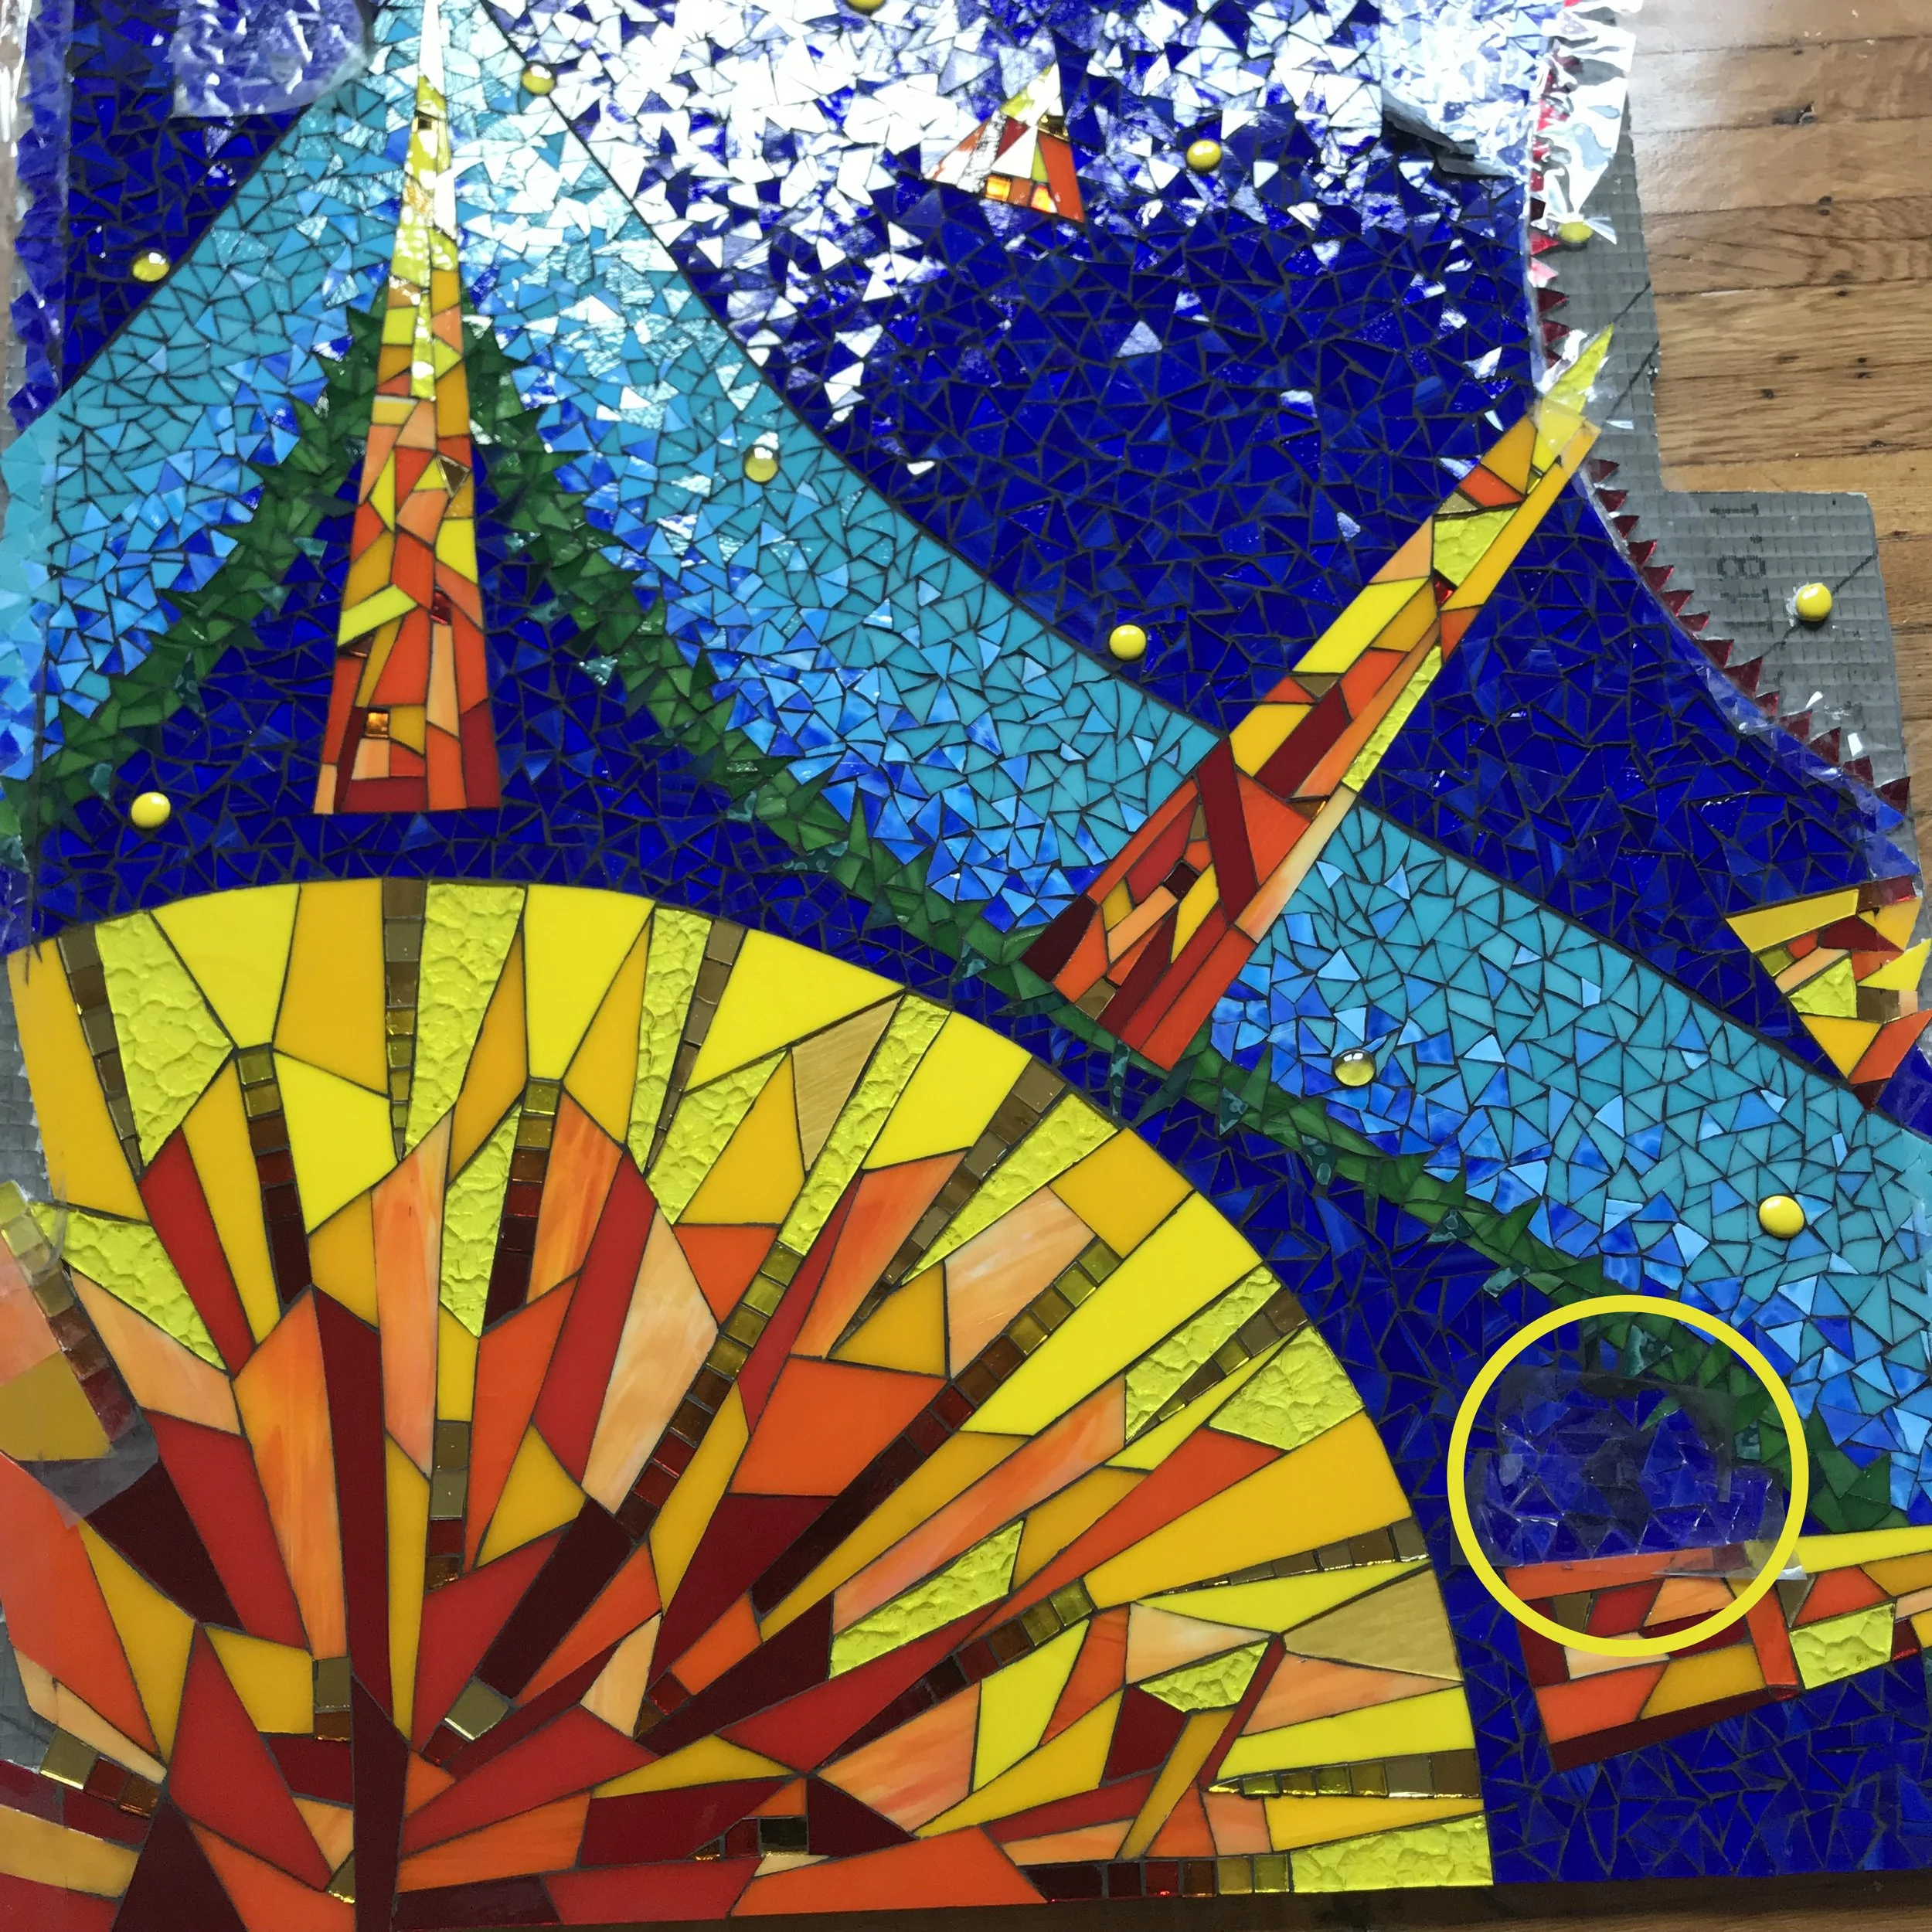
Completed & grouted panel of Sun Kitchen Mosaic with removable section for washer circled in yellow.

Completed & grouted panel of Sun Kitchen Mosaic with removable section for washer circled in yellow.

For each panel seam I pre-cut the glass pieces that would bridge the gap after installation, but instead of adhering them I applied clear packing tape to the front and removed them. That way I could set them aside, install the panels, and then reapply them over the seams and washers during installation. The yellow circle in this image shows where one of the Wedi board washers sits beneath the glass surface. Those washers are designed specifically for foam core backer board installation and are completely hidden once the glass is applied over them. The main panel areas were grouted before installation so that only the seams and washer covers needed grouting on site.

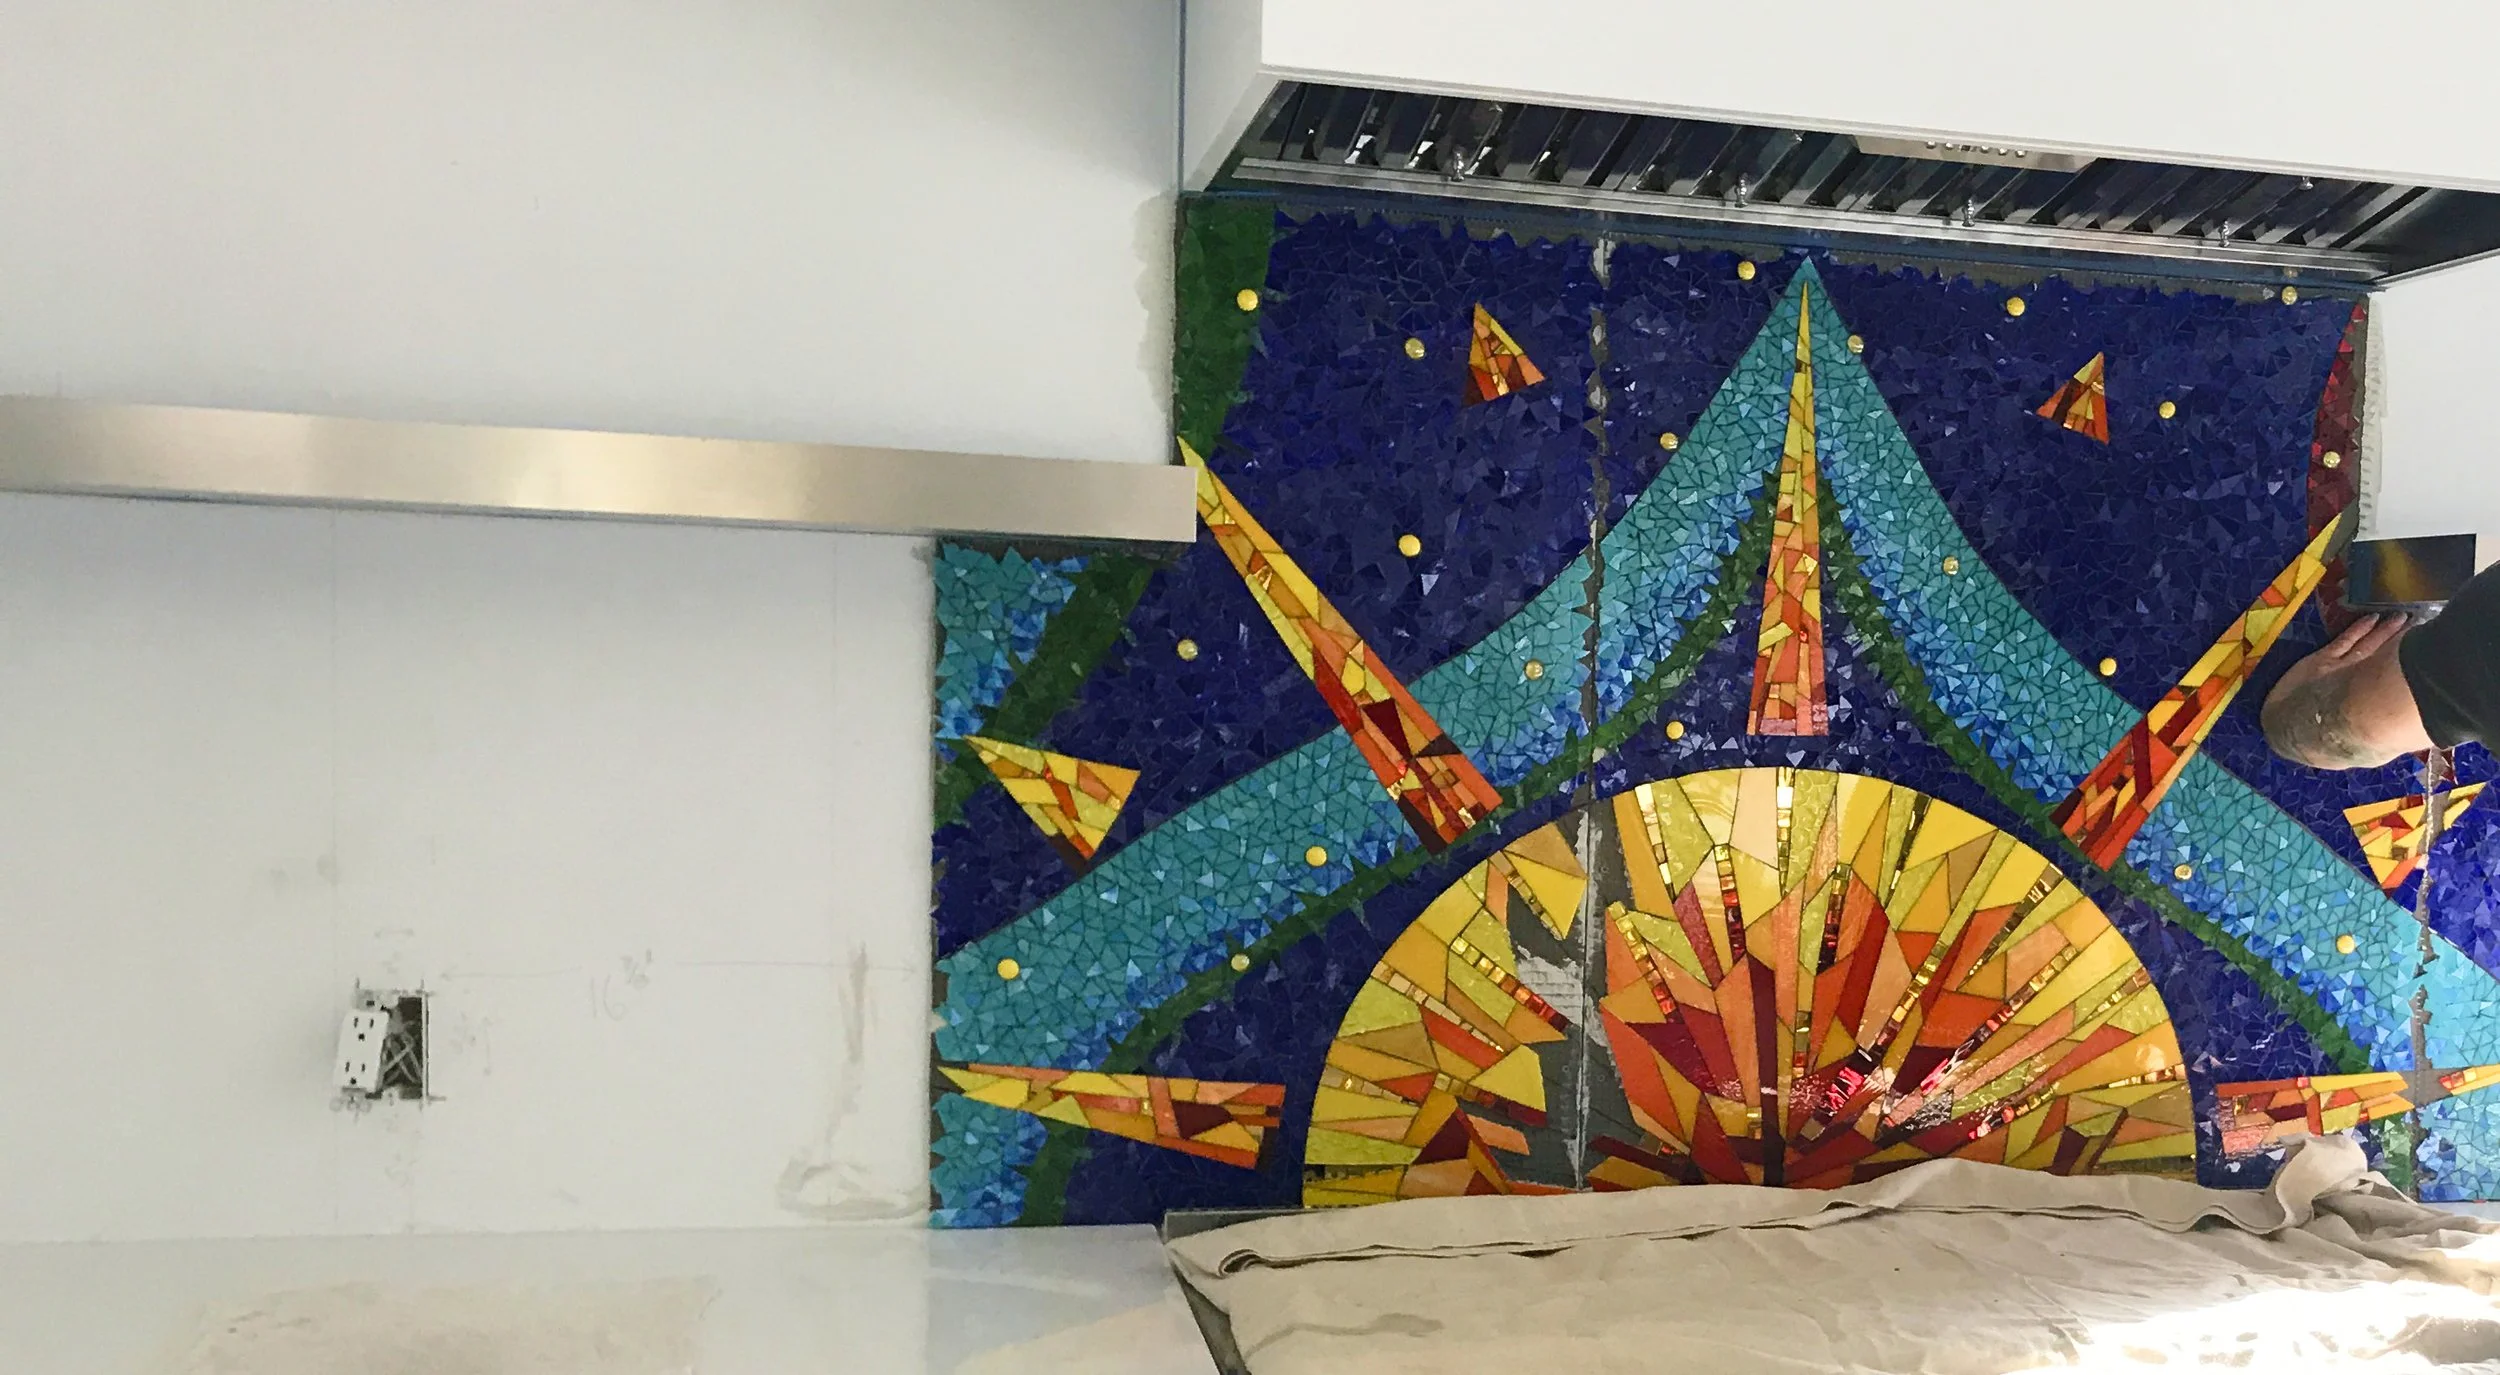
Sun Kitchen Mosaic Backsplash during installation.

Sun Kitchen Mosaic Backsplash during installation.

Installation day was incredibly satisfying. We first dry-fitted all the panels to confirm everything aligned correctly, and fortunately it all fit perfectly. The installers then secured the panels using mortar and screws through the washers. After that we applied the pre-cut glass pieces over the seams, washers, and buffer areas, with extra supplies and tools on hand in case any gaps needed filling. The last thing I wanted was extra grout lines giving away where the seams were hiding. Finally we grouted those areas and the backsplash was complete.

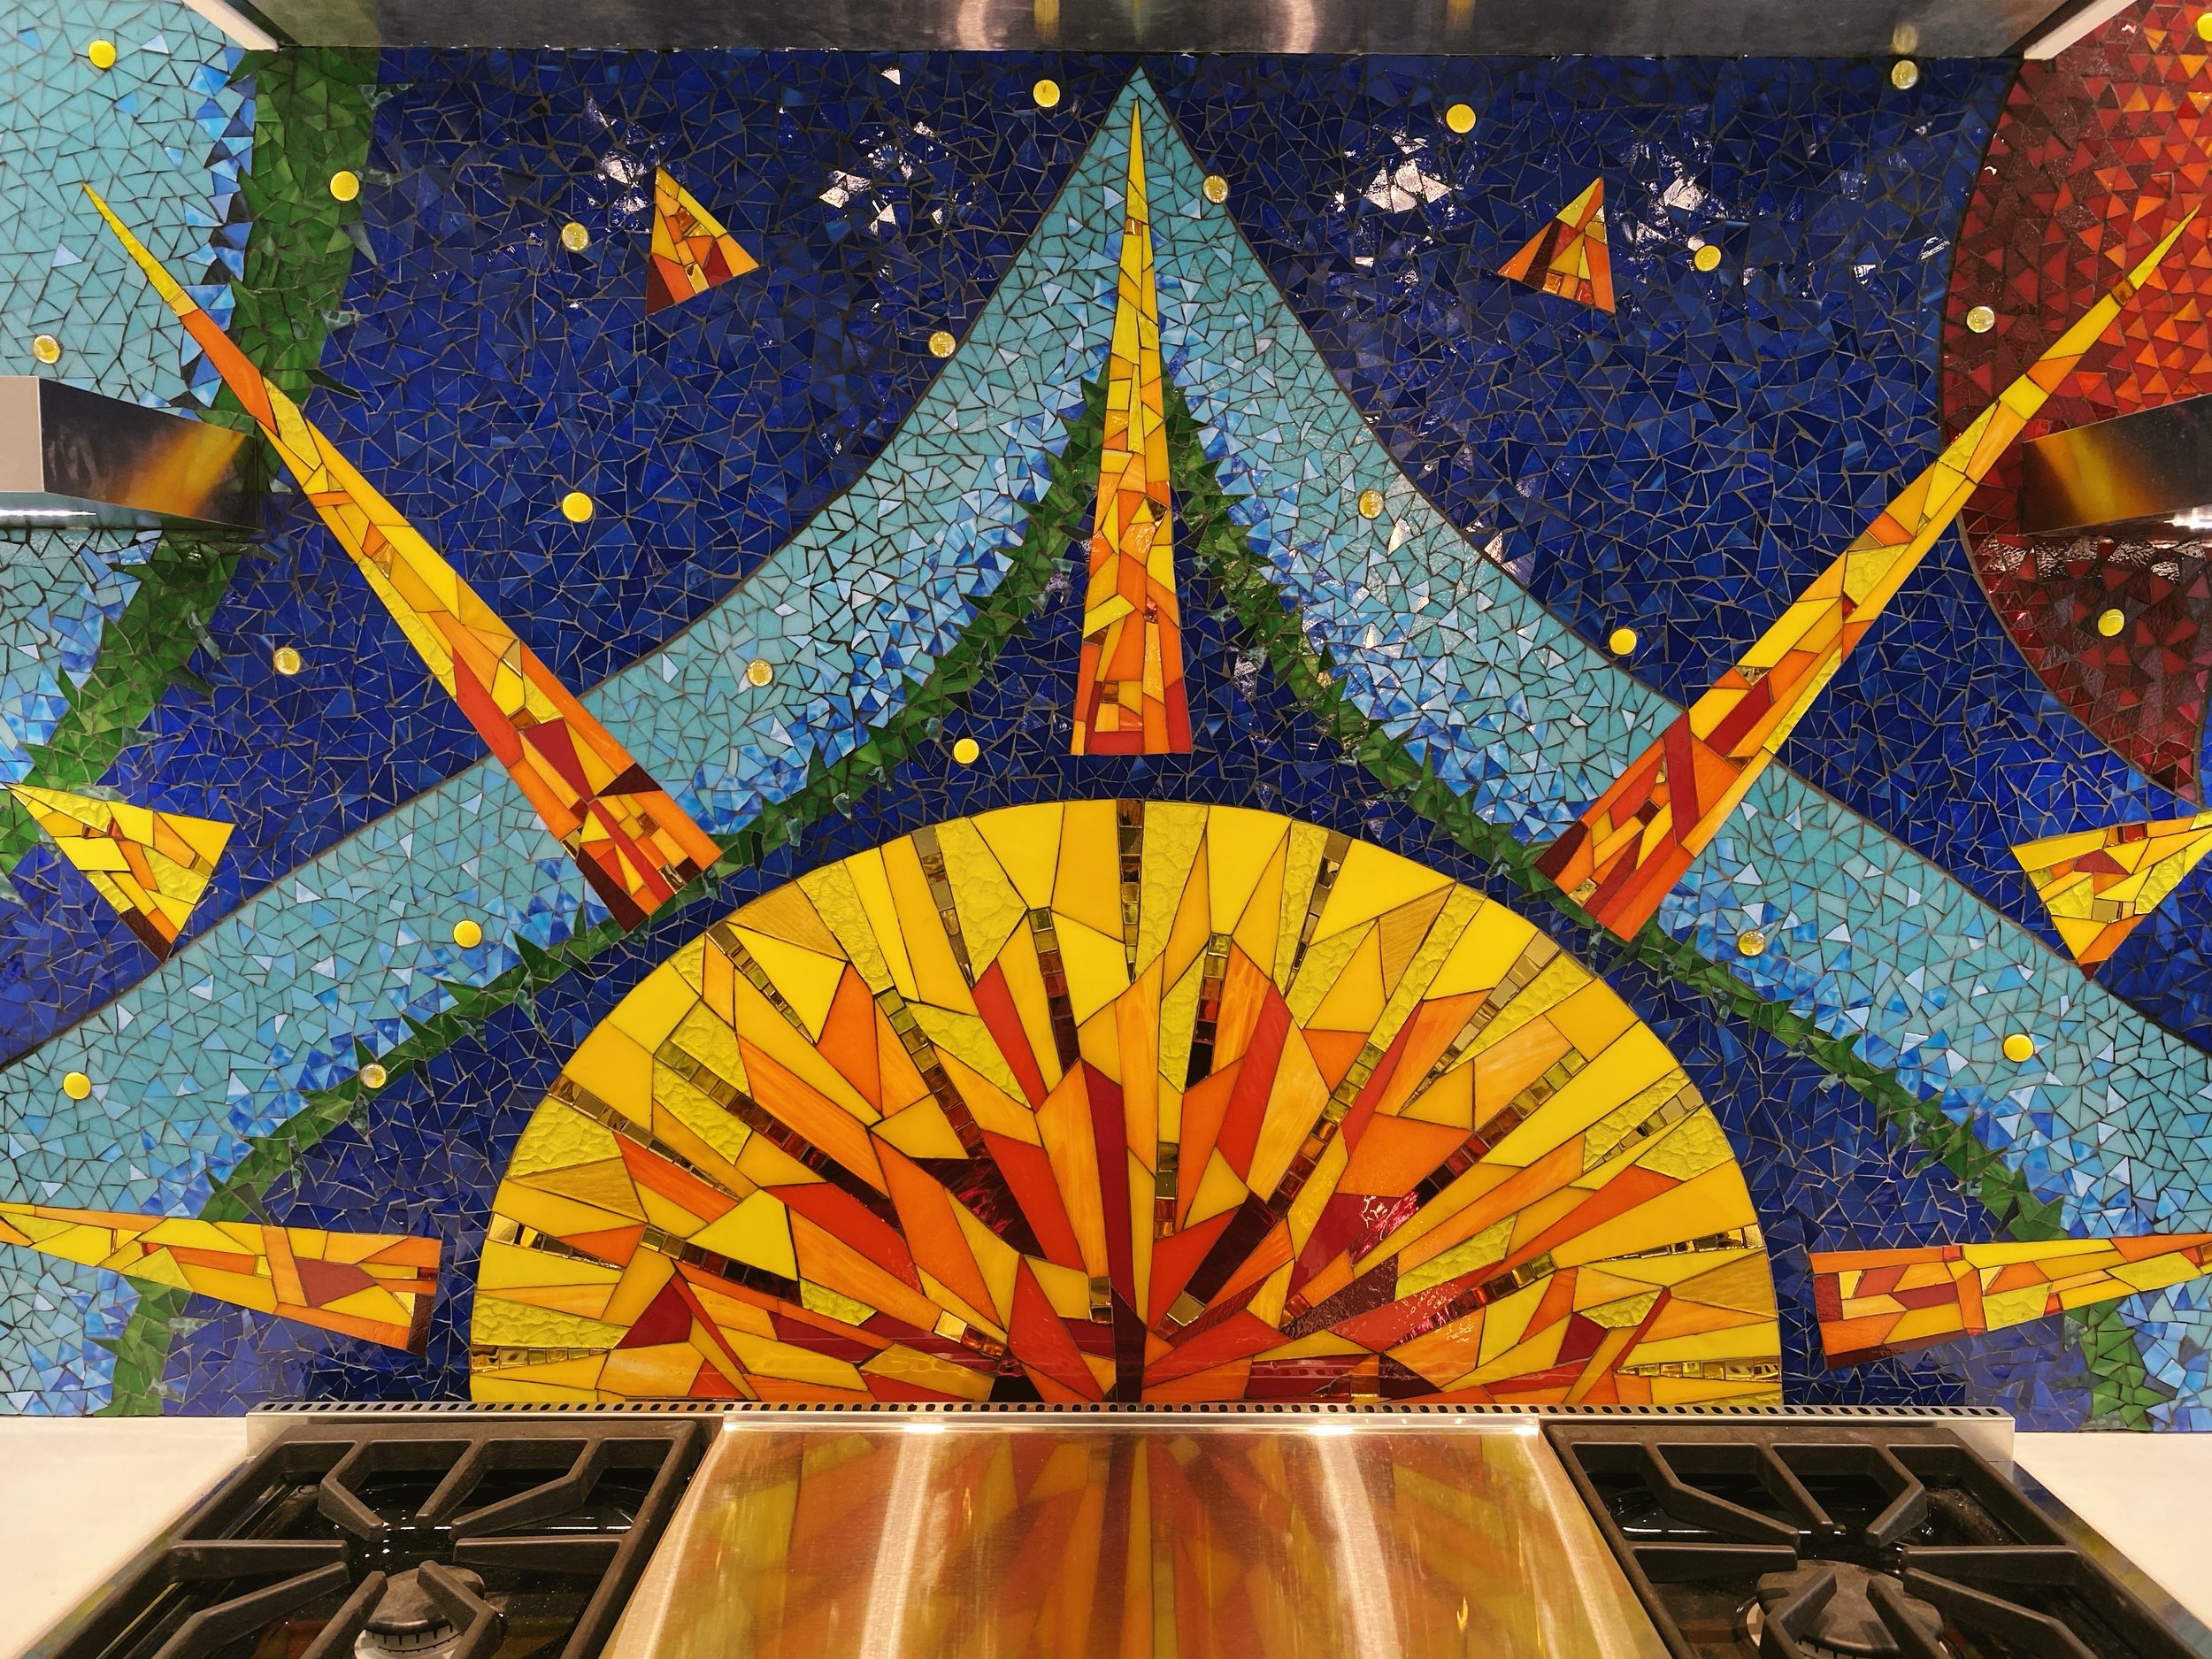
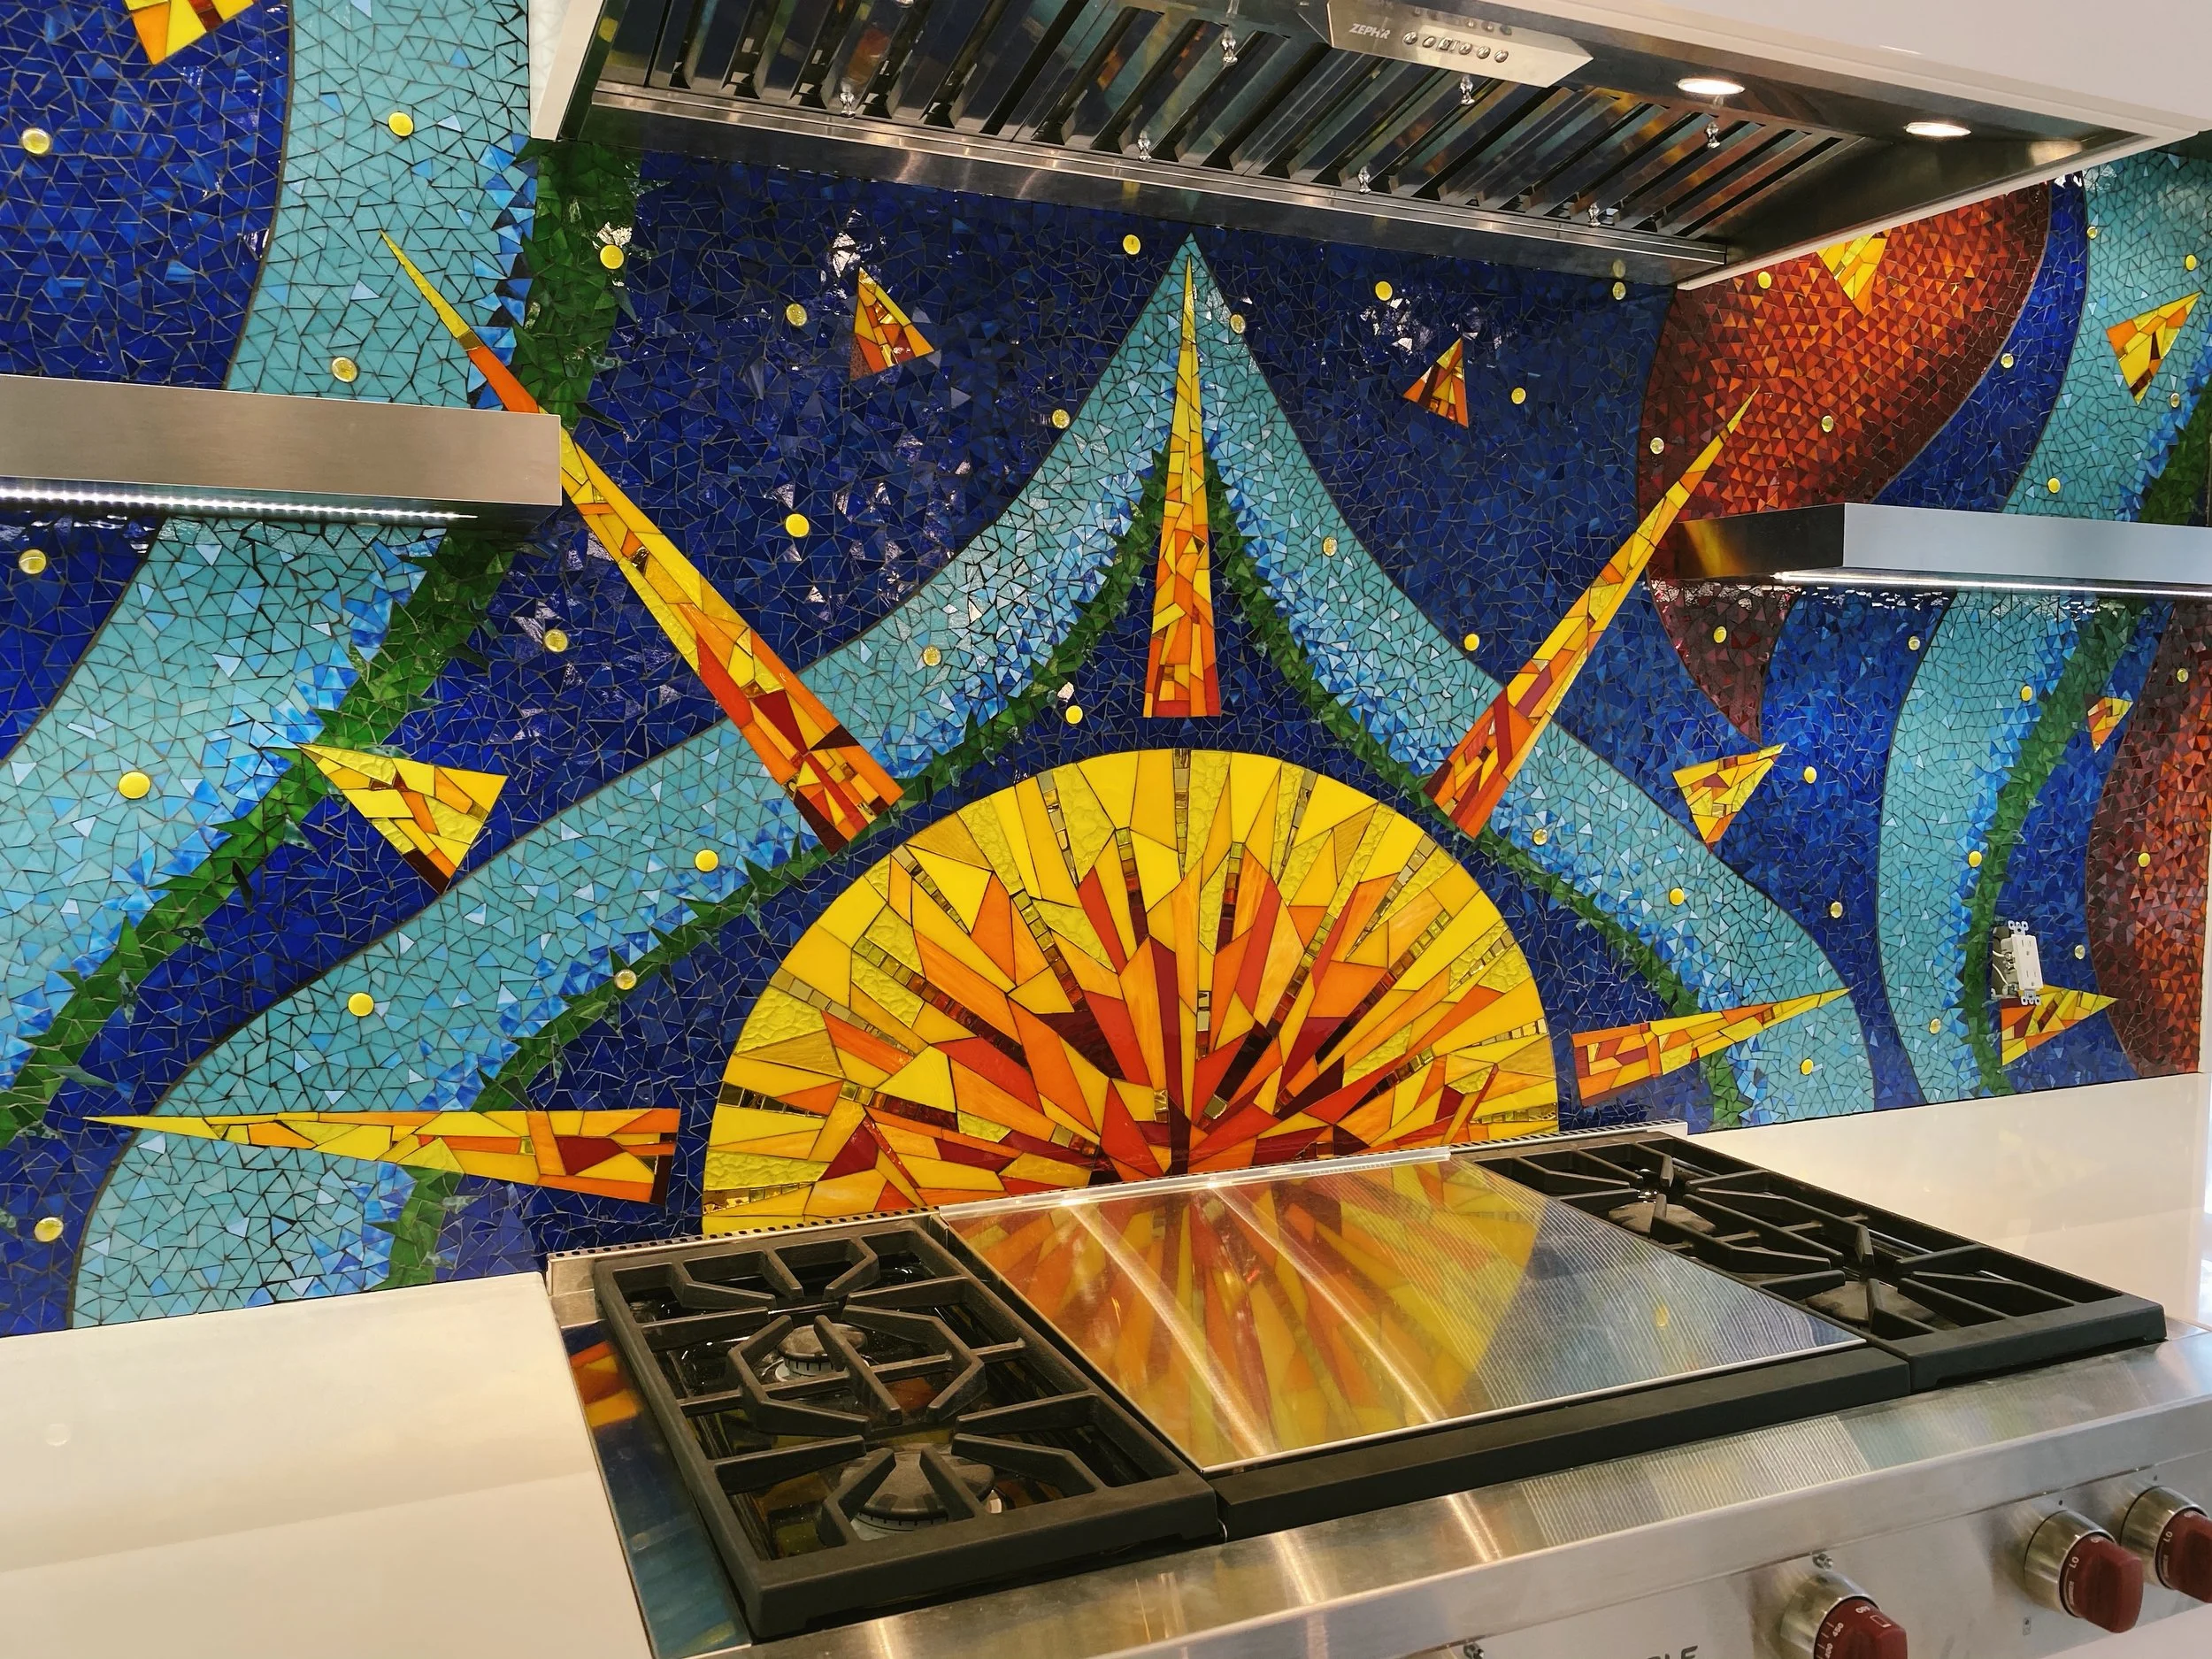
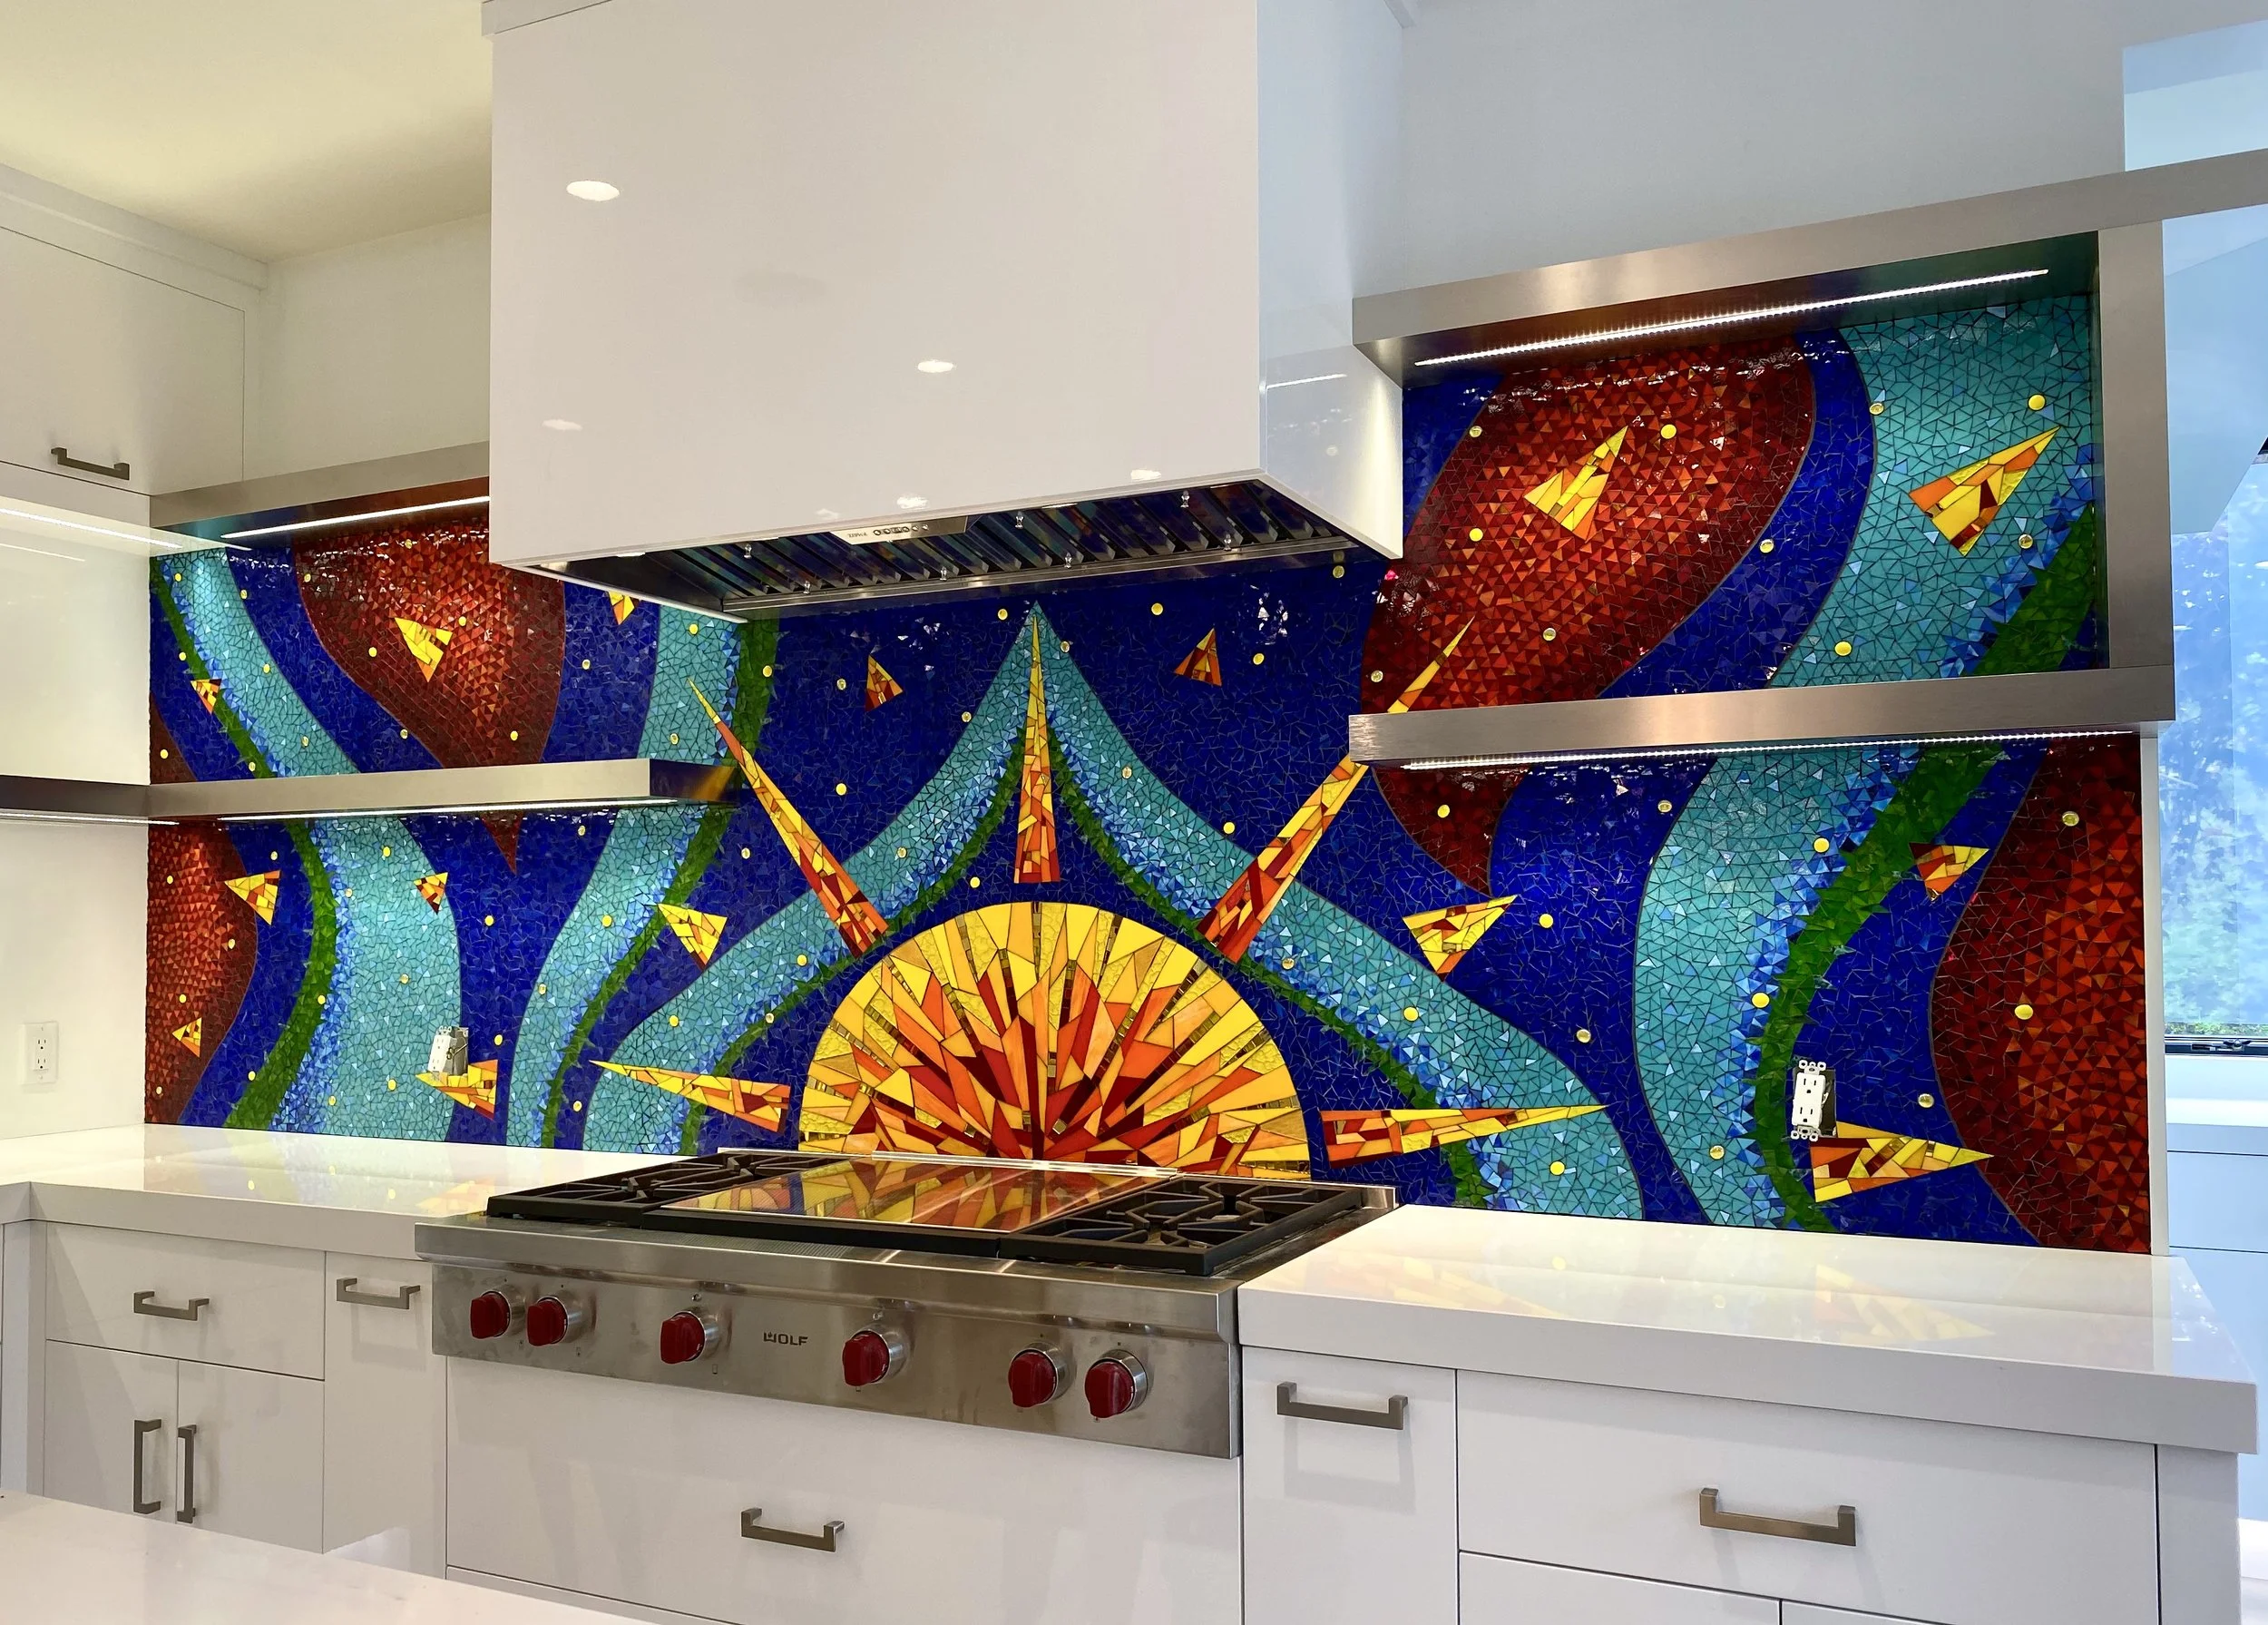
Sun Kitchen Mosaic Backsplash close-up showing orange and red glass mosaic sun rays with reflection in stovetop below

I didn't even anticipate the gorgeous reflection of the sun in the stovetop. That was a happy coincidence. In a home of clean white walls and modern design, seeing it finished and installed was dazzling. The clients are frequent hosts and their guests have told me how much they love it. They still tell me how thrilled they are with it every time I see them, which is the best possible outcome for a piece like this.

See the full gallery page for this commission.

Sun Kitchen Mosaic Backsplash by Dyanne Williams, angled view showing full cobalt blue and golden sunburst mosaic design, Lake Cable Ohio

Casa de Los Robles Mosaic

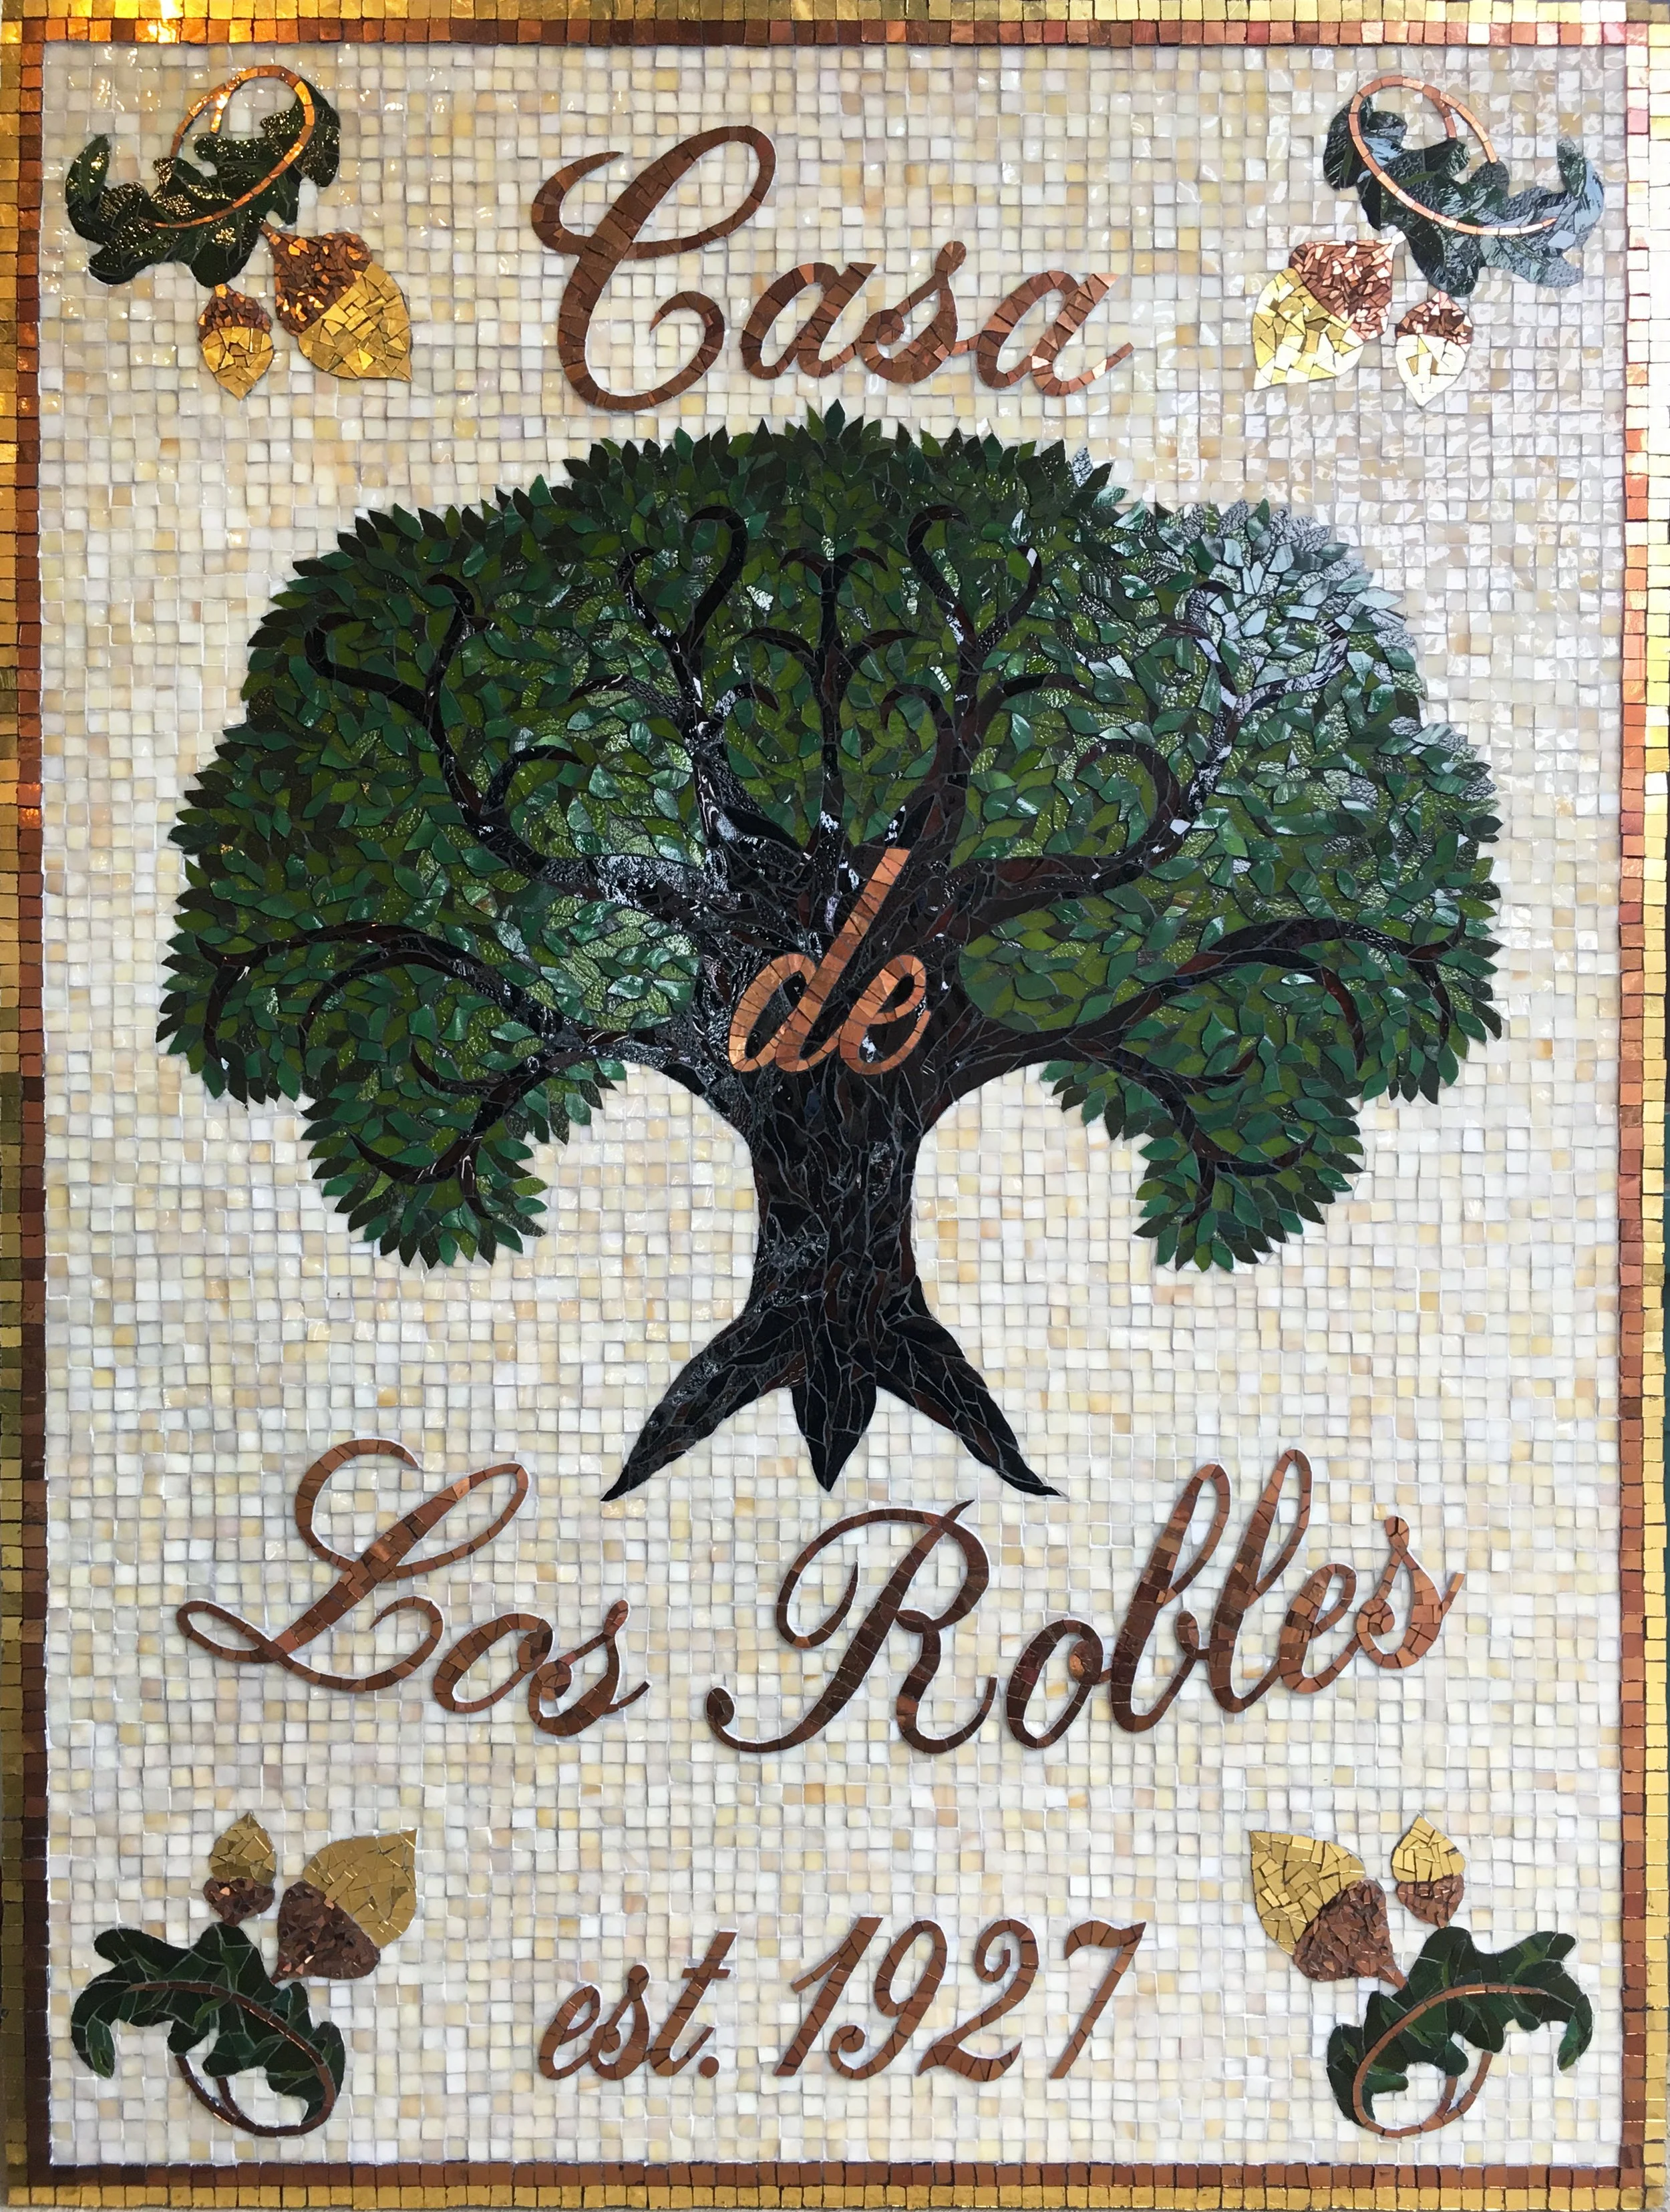
I loved making this plaque for a client’s home using stained glass and 24 karat gold smalti.

It was such an honor to get to make this beautiful plaque for my client’s home. She wanted something elegant to honor her home, Casa de Los Robles (House of the Oak), that was built in 1927.

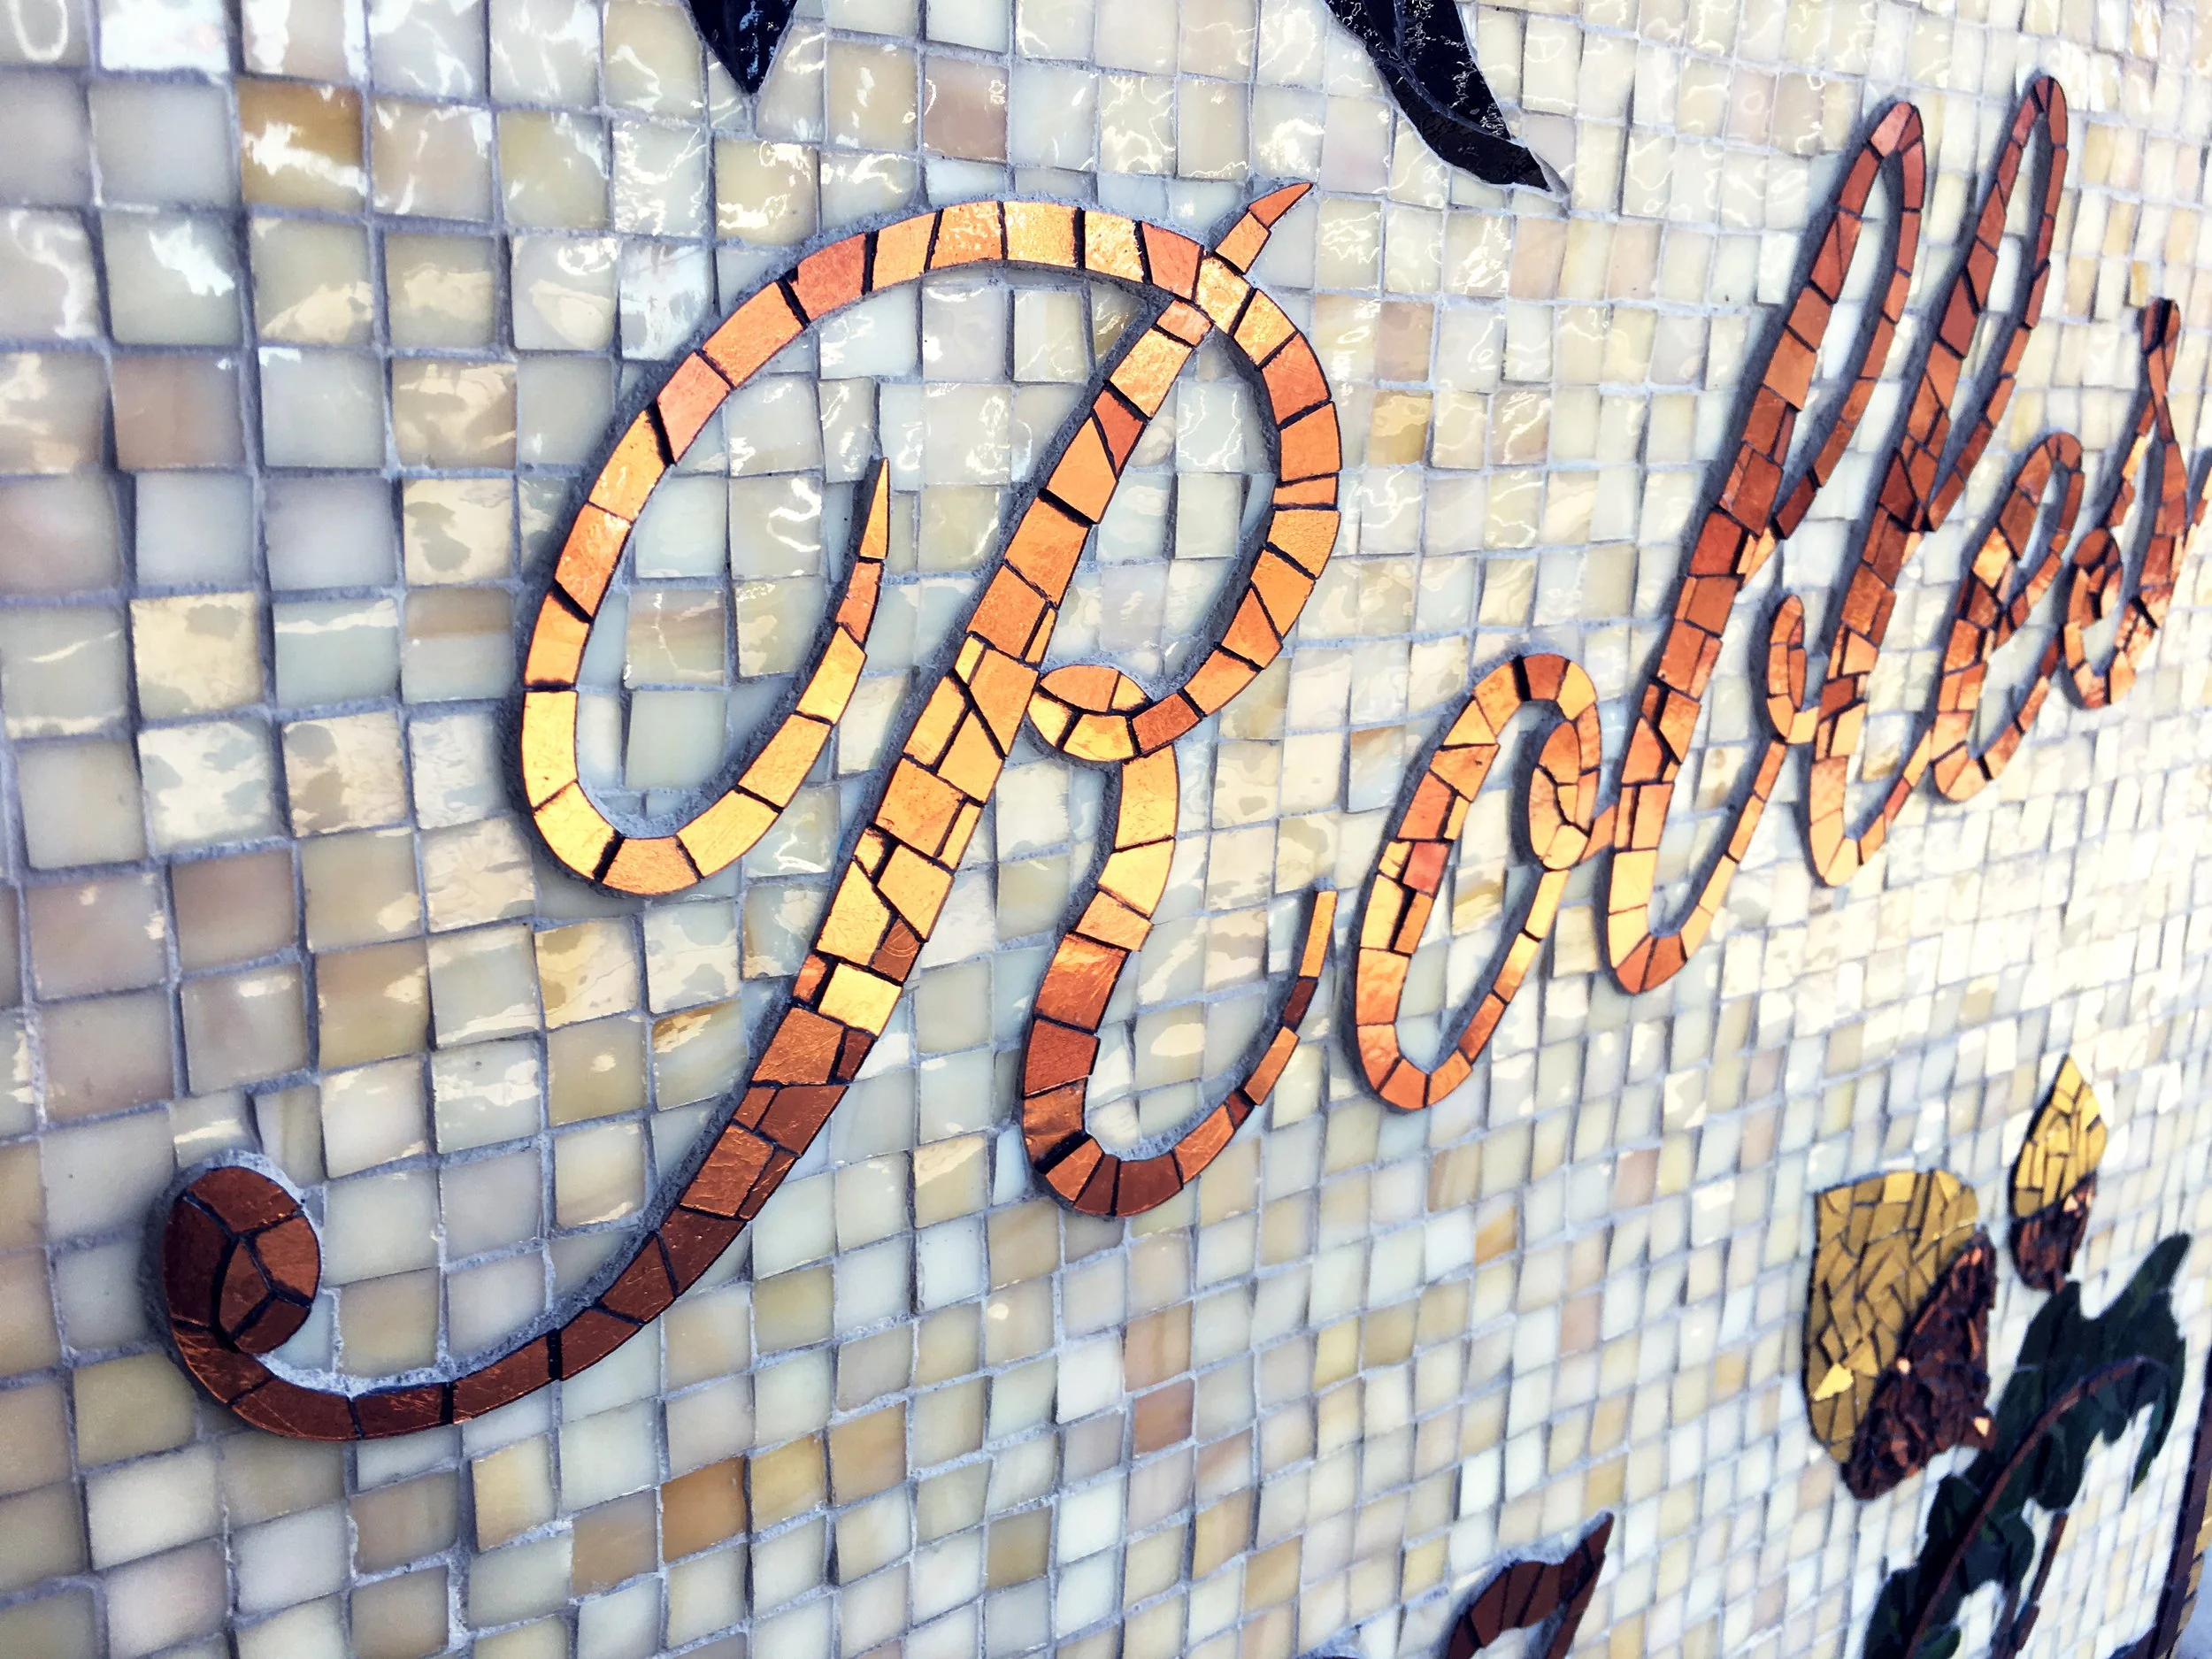
A major feature of this mosaic is the gold smalti, which is 24 karat gold leaf between layers of glass. This beautiful and coveted glass comes from the Orsoni glass company in Venice, Italy. I had the idea of working with gold smalti and the client loved it, but then we were left with the dilemma that she definitely wanted the “de” to be placed in the tree trunk. I could have used dark gold smalti for the background and yellow gold to stand out in the tree, but I personally feel that using different colors in font is less elegant. The USA supplier of the gold at the time didn’t have this darkest of colors that had a certain refraction that allowed it to stand out against both dark brown and cream glass. Fortunately, when I relayed the significance of this particular color, the supplier managed to either find some stashed away or get some from Italy before her regular shipment, which would have been several months if the factory even had any in stock. To me, this color totally makes the mosaic work, so I was elated.

Then I had to sculpt this thick glass using andamento that keeps the script lettering light and consistent. Instead of recessing this glass that is slightly thicker than stained glass, I kept its depth so that it rose above a bit to stand out and reflect the light cleanly. I also used this bronze gold smalti in addition to a more traditional yellow gold smalti for the acorns and the border. The rest of the mosaic is stained glass.

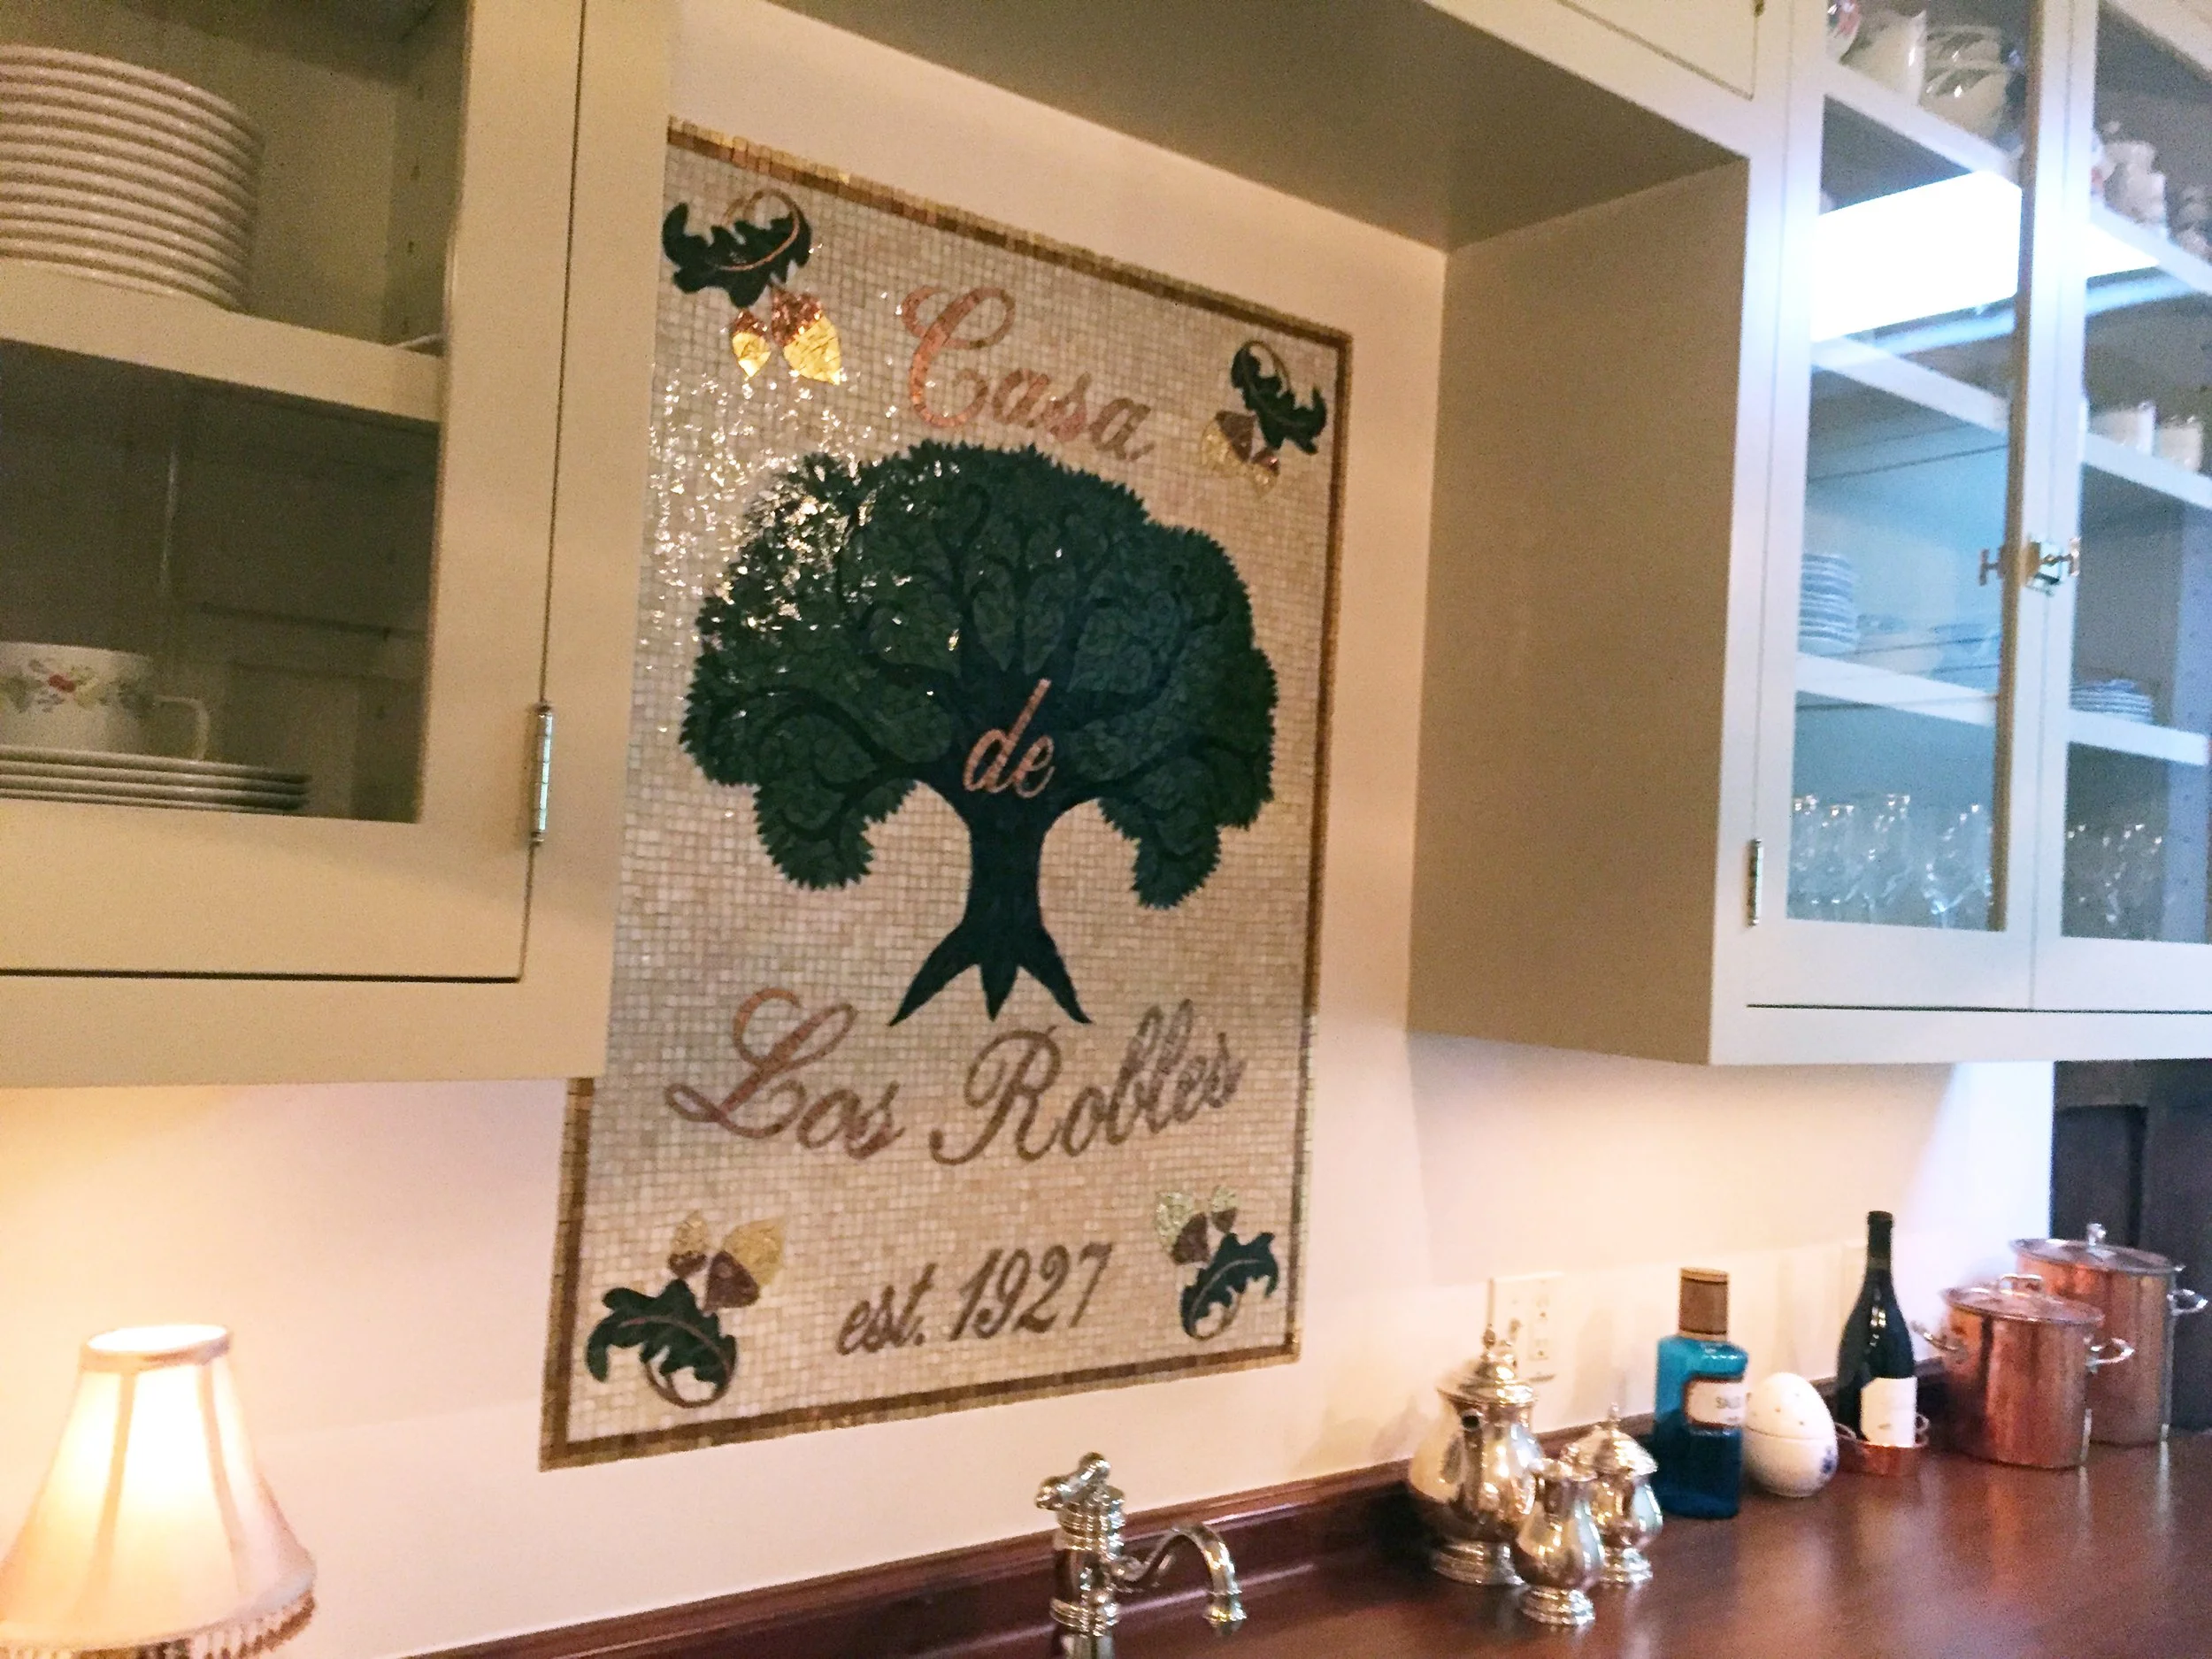
I created the Casa de Los Robles mosaic in one piece on Wedi board. I grouted it and shipped it to California to be installed, recessed, into the wall of the client’s butler’s pantry. The client was kind enough to send along this picture after the installation.