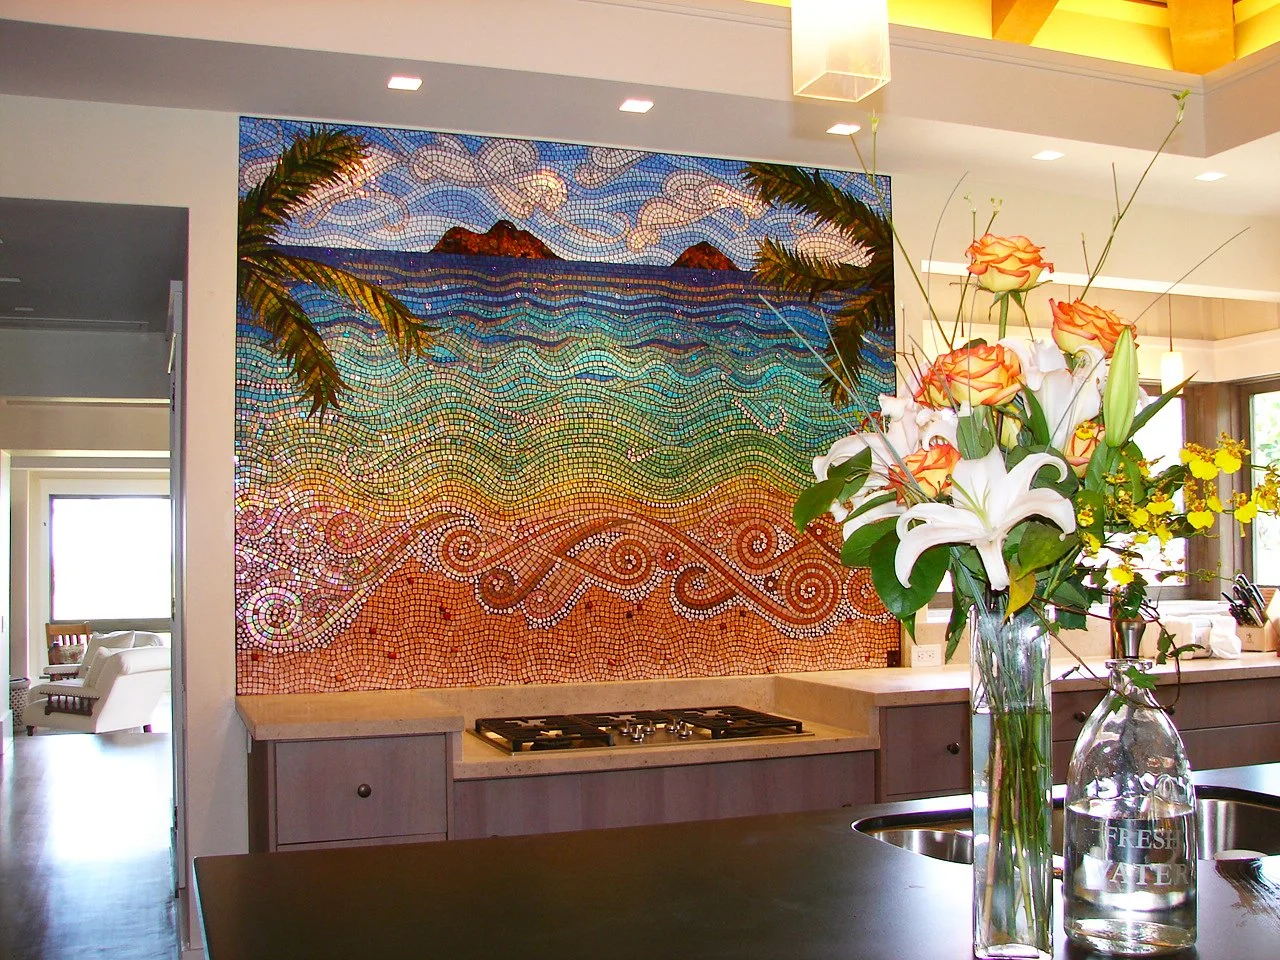
Dating back to 2008, this was the first large mosaic piece I created. I received a call from an interior designer about a piece that she wanted for herself. She and her husband were building their dream home in Kailua, Hawaii, and they wanted for me to create a backsplash to be put in their kitchen.
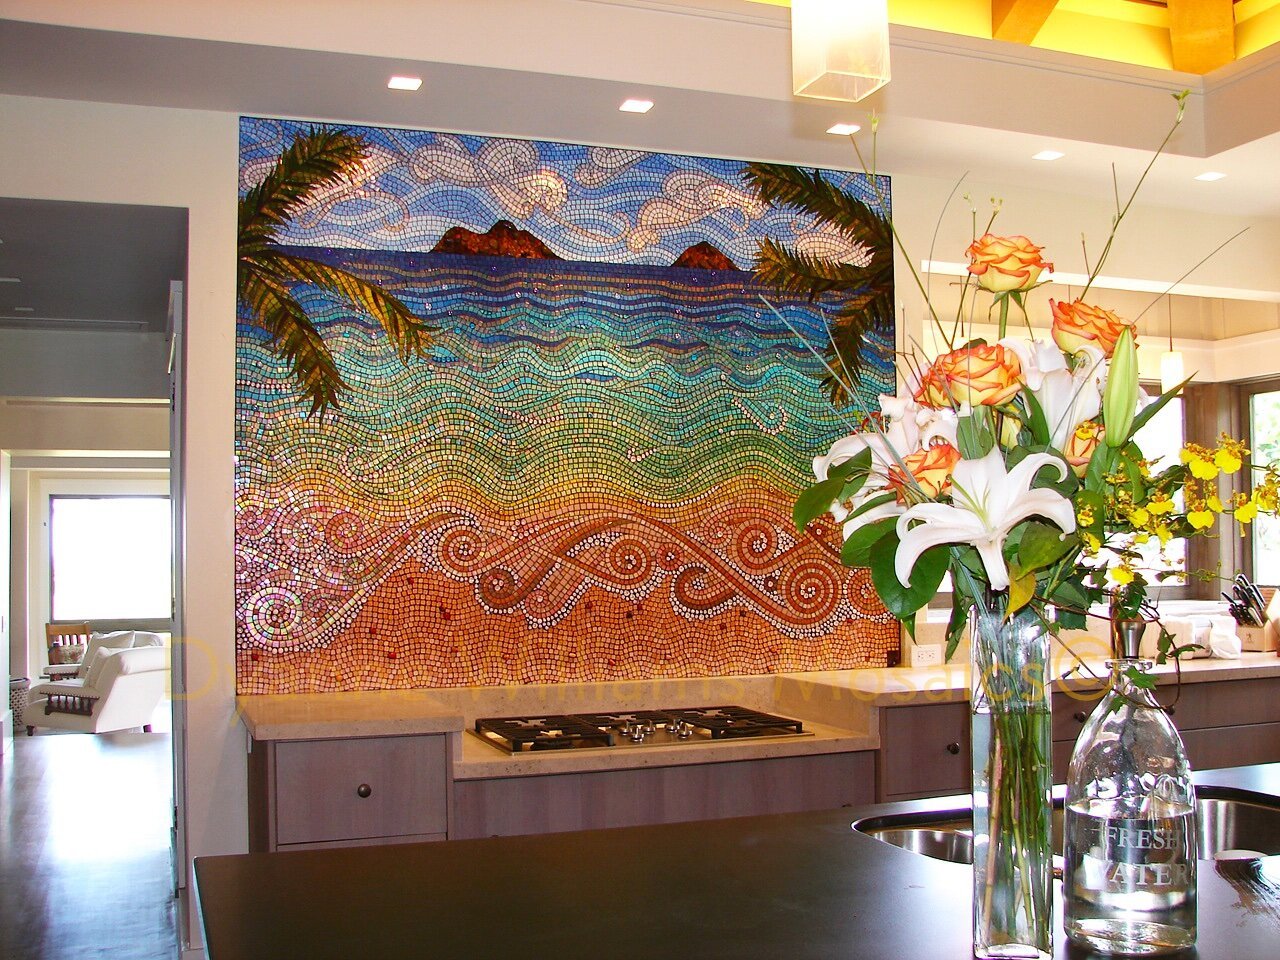
This is the mosaic that started it all for me as a commission artist. Dating back to 2008, the Mokuluas Islands mosaic was my first large commission, and taking it on felt equal parts thrilling and terrifying. Up to that point I had only completed two small local commissions in Los Angeles. This was a 69” by 89” backsplash for a dream home being built in Kailua, Hawaii, for a client who happened to be an interior designer herself. The stakes felt very real.
The client and her husband were building their home near the Mokuluas Islands but wouldn't be able to see the islands from the house. She wanted a mosaic that would bring that view inside, something realistic but also stylized, that would capture the landscape she loved and live with her every day in her kitchen. She sent me measurements and photographs of the islands to work from, and I began sketching.
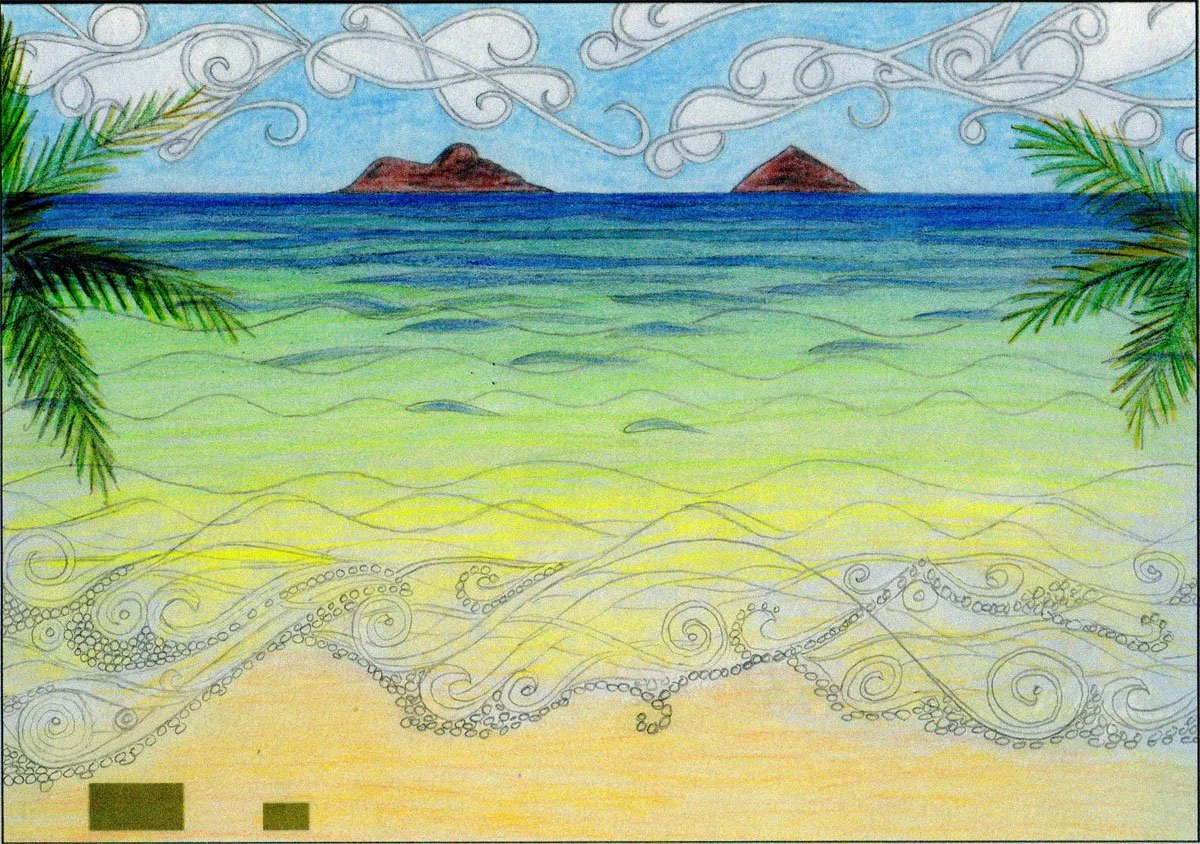
Final sketch of Mokuluas Mosaic Backsplash.
I started by establishing the cloud shapes, developing a flowing motif that would carry through the entire composition. From there I sketched the ocean waves using the same organic approach. After the client reviewed the sketch she asked if palm leaves could be incorporated, and I was able to work them into the sides of the composition without disrupting the elegance of the overall design. We also adjusted the dimensions slightly at that stage to make the piece more square, which worked better for the layout she had in mind.
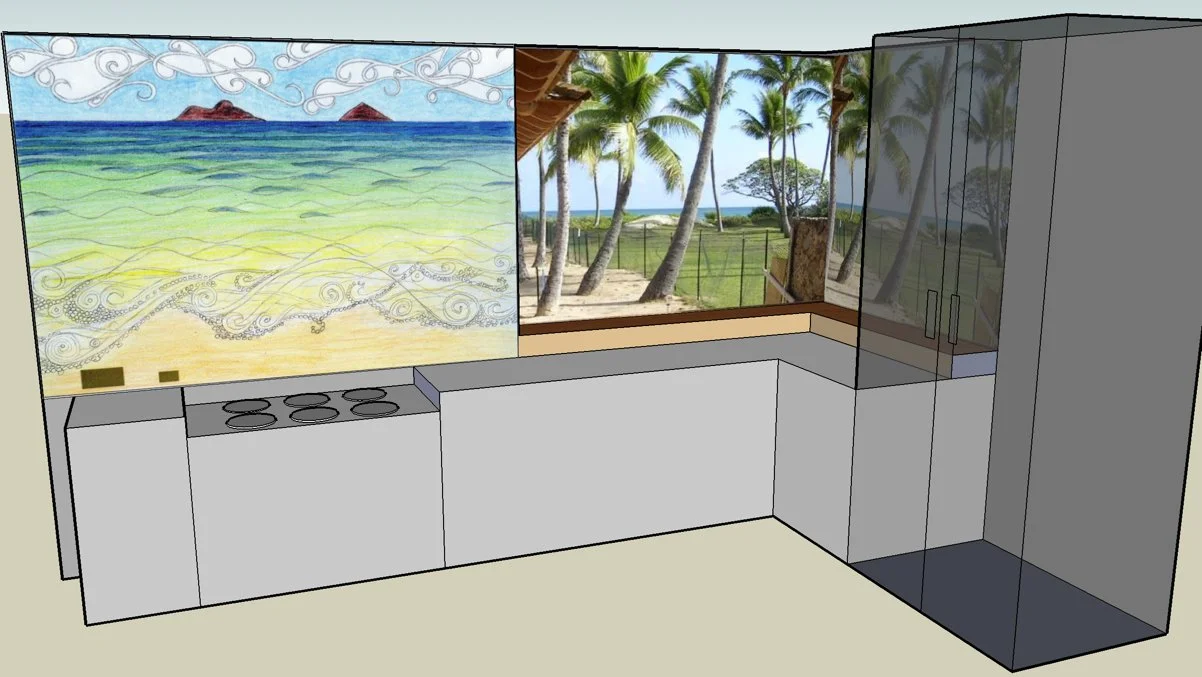
Sketch of Mokuluas Mosaic Backsplash in CAD rendering.
Once the design felt right I transferred the measurements into a CAD program. Because the kitchen wasn't built yet when I started the design, the CAD rendering was essential for showing the client exactly how the mosaic would read in the space and from what perspective.
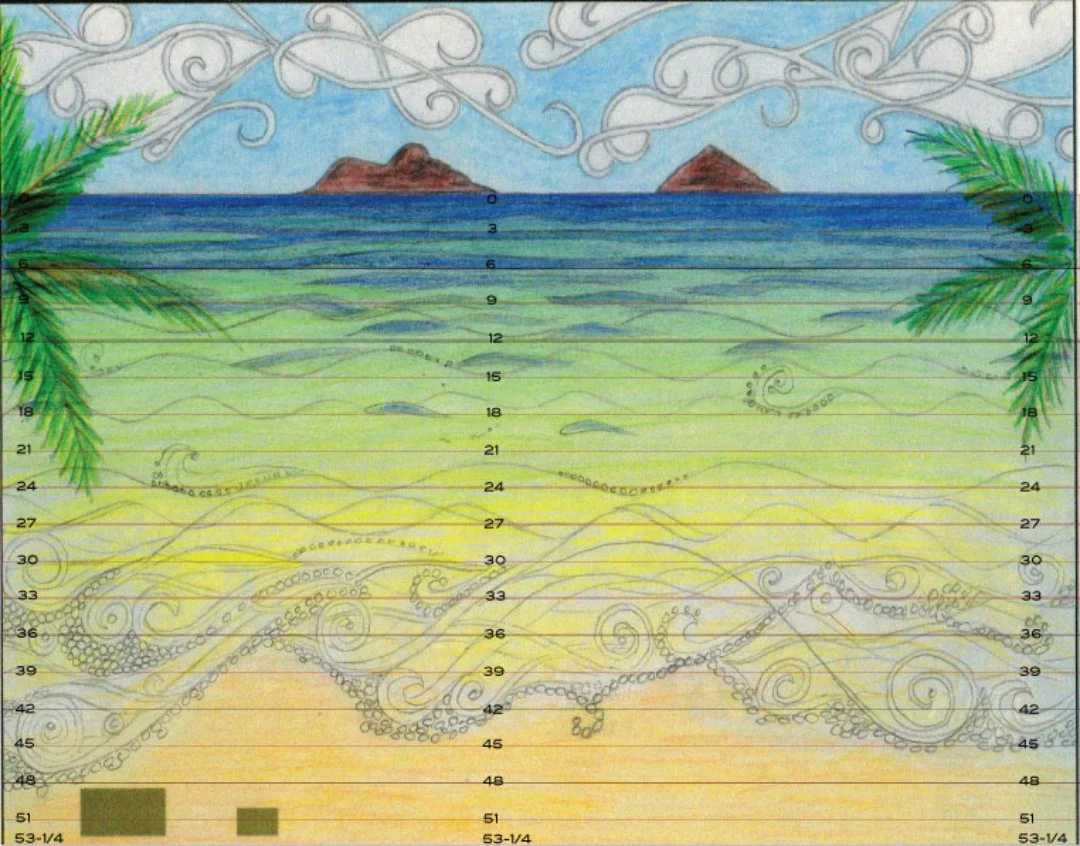
Guide version of sketch for Mokuluas Mosaic Backsplash.
Next I created a detailed guide version of the sketch with measurement lines marked at every few inches across the full height of the composition. Working at this scale, that kind of reference is invaluable for keeping everything on track as you build.

Glass selection for Mokuluas Mosaic Backsplash.
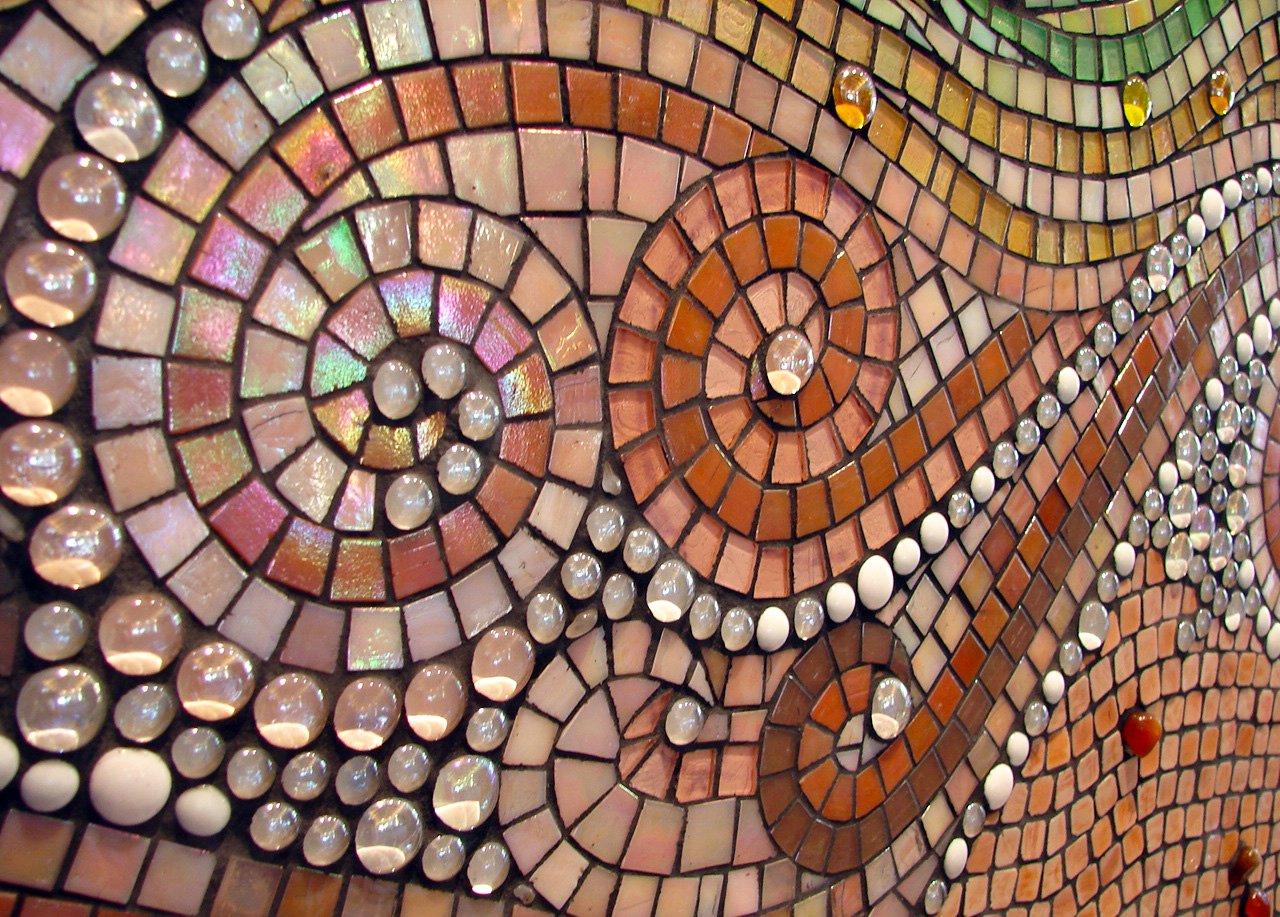
The client was clear that she wanted the piece to be as detailed as my fine art mosaics. She had admired my 3D spiral work, but that kind of dimensional surface isn't practical for a backsplash. Instead we found a wonderful compromise: using a mix of different thicknesses of glass, glass gems, and pebble stones to create visual and tactile depth without the impracticality of true relief.
I spent a lot of time selecting and sampling glass colors, laying out combinations and living with them before committing. The palette needed to move through the deep blues of the ocean, the shifting greens and aquas of the shallows, and the warm sandy tones of the beach. I was genuinely thrilled when the client approved my first round of color choices.
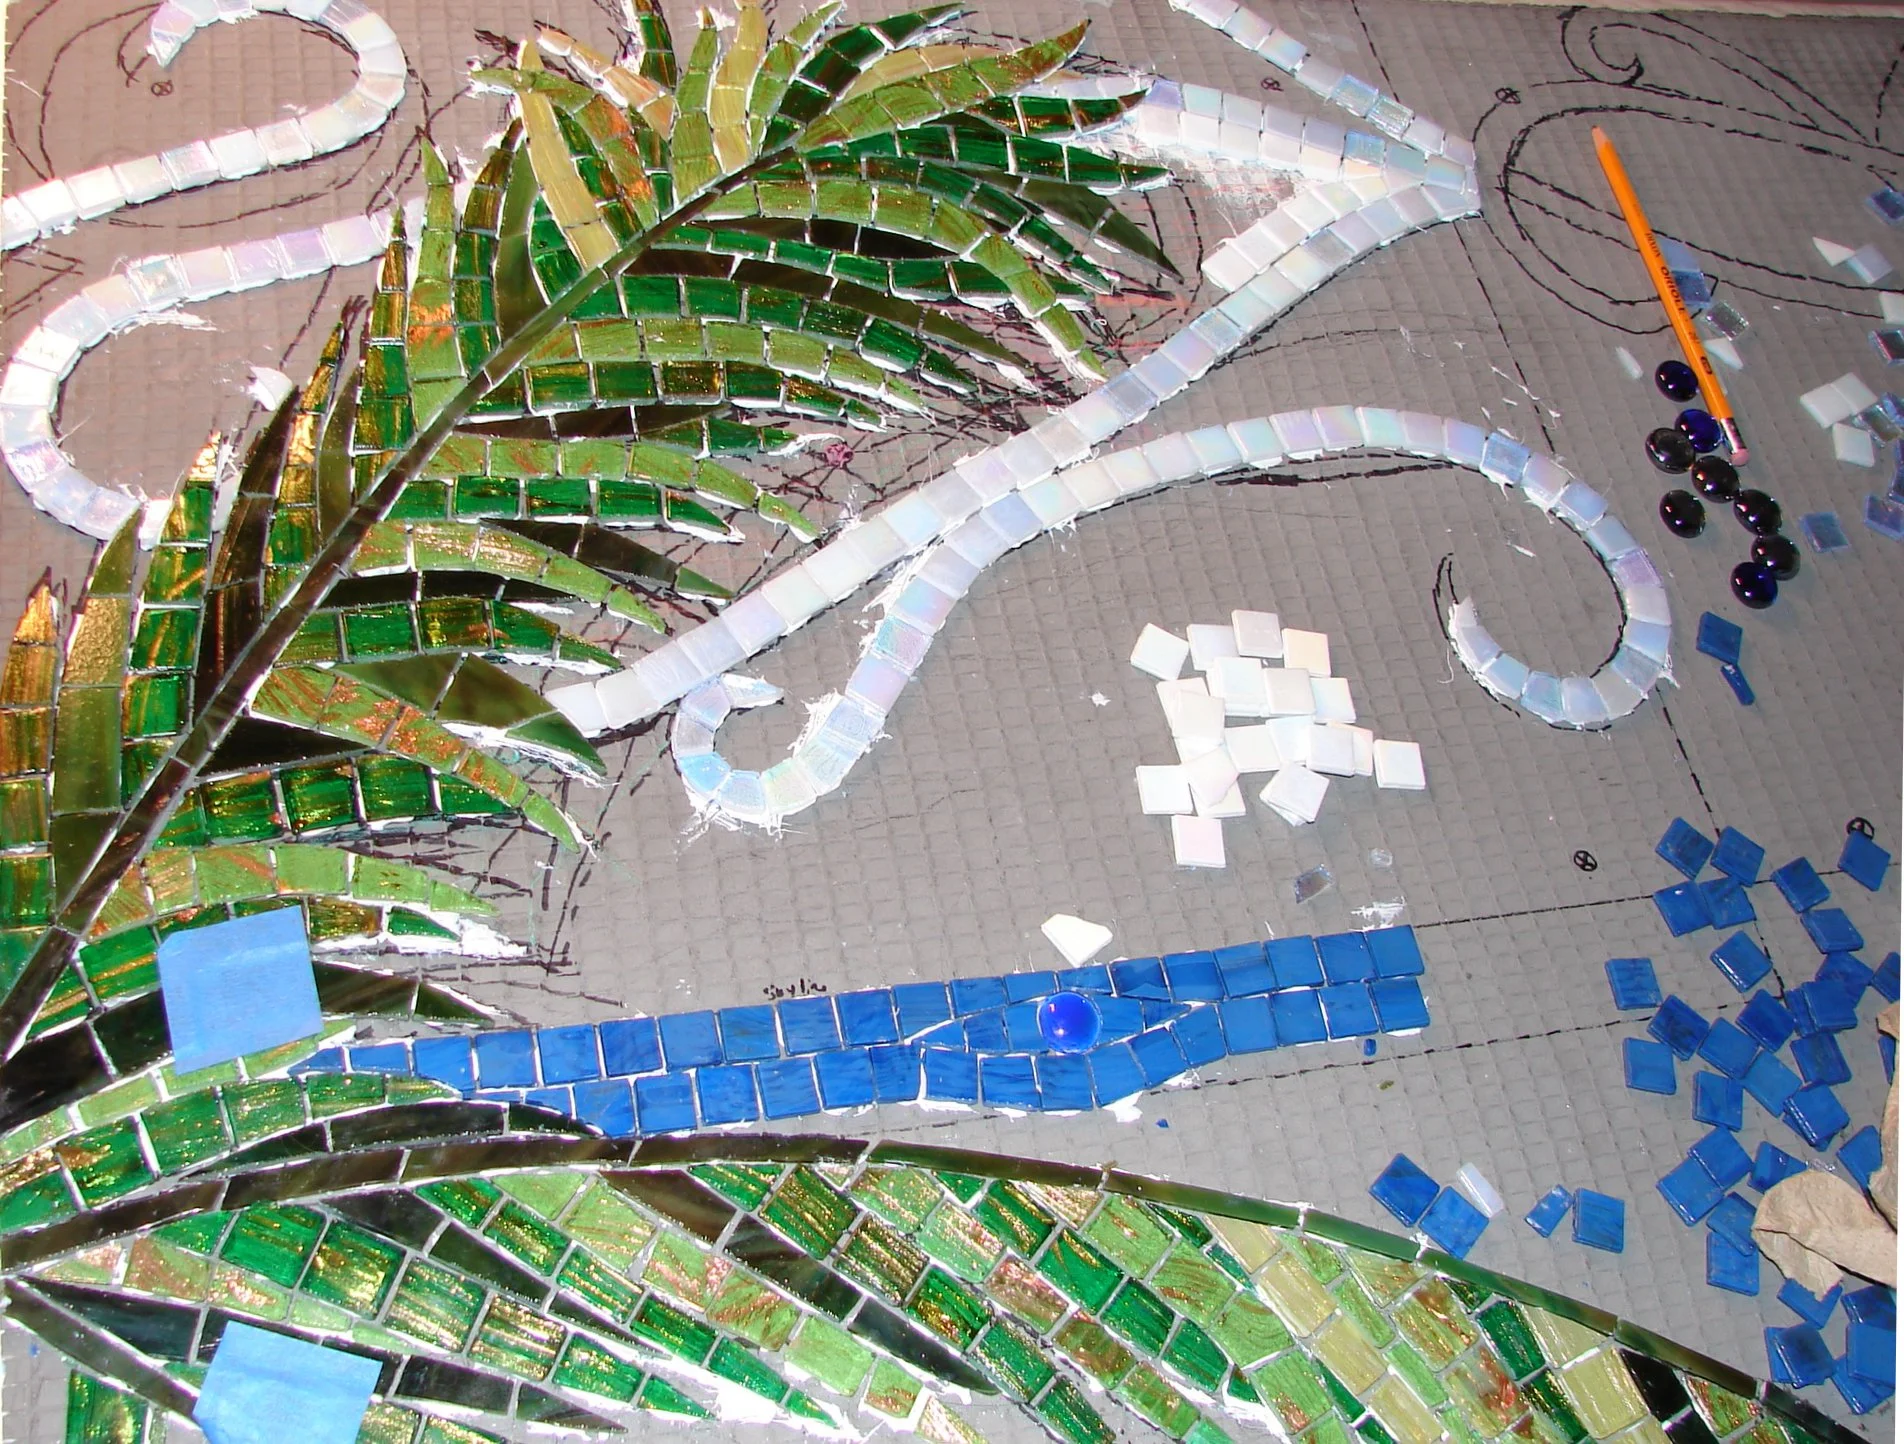
Palm Fronds, work in progress.

Palm Fronds, completed.
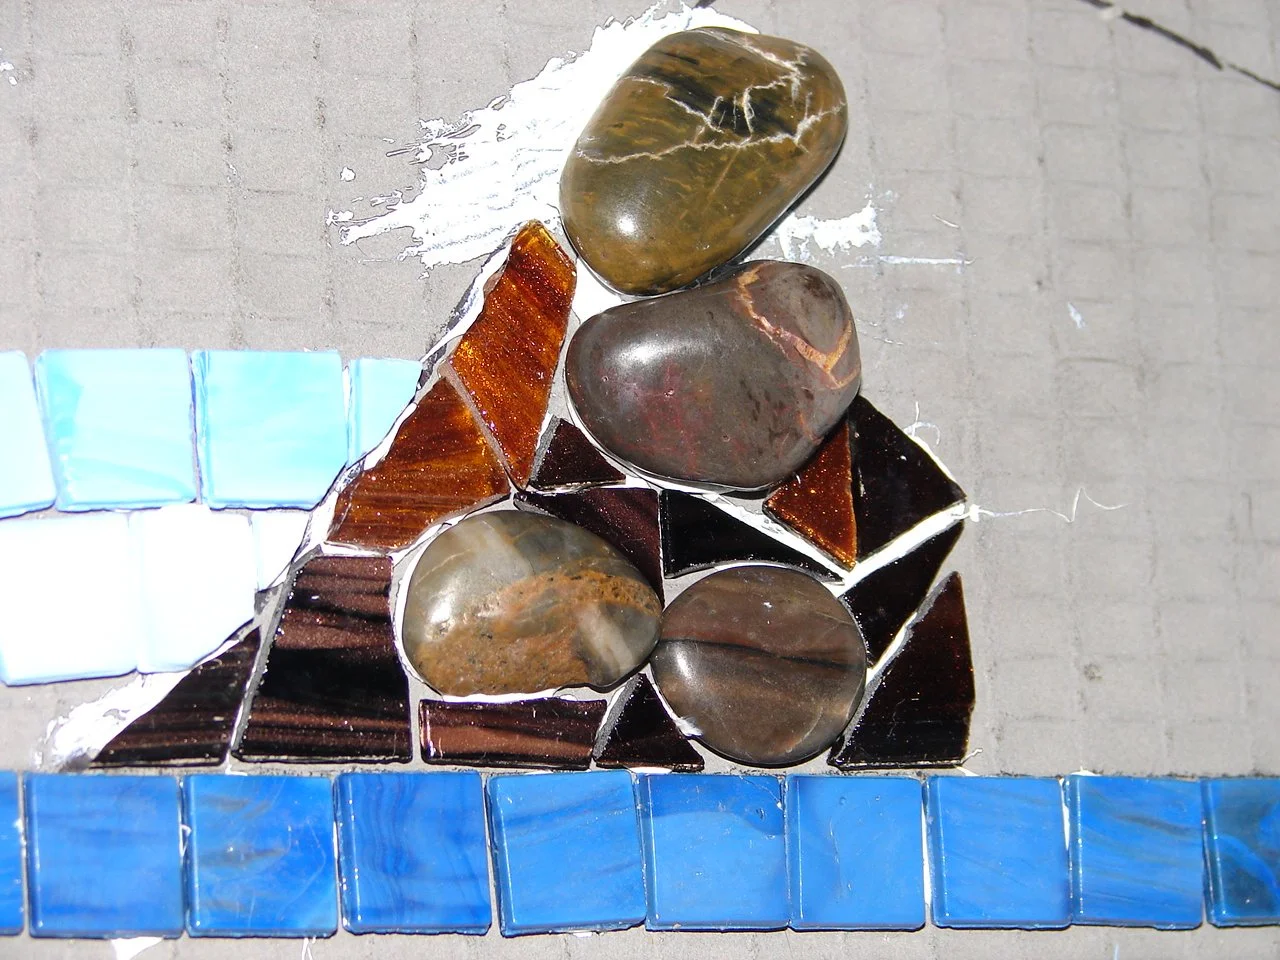
Islands, work in progress.
Islands, completed.
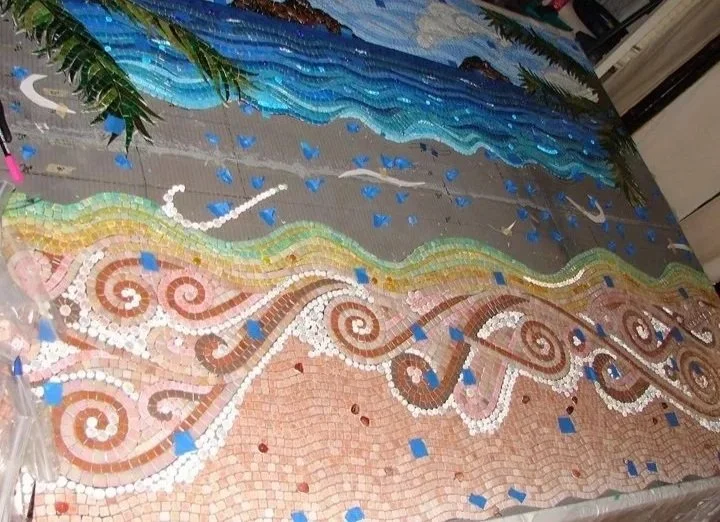
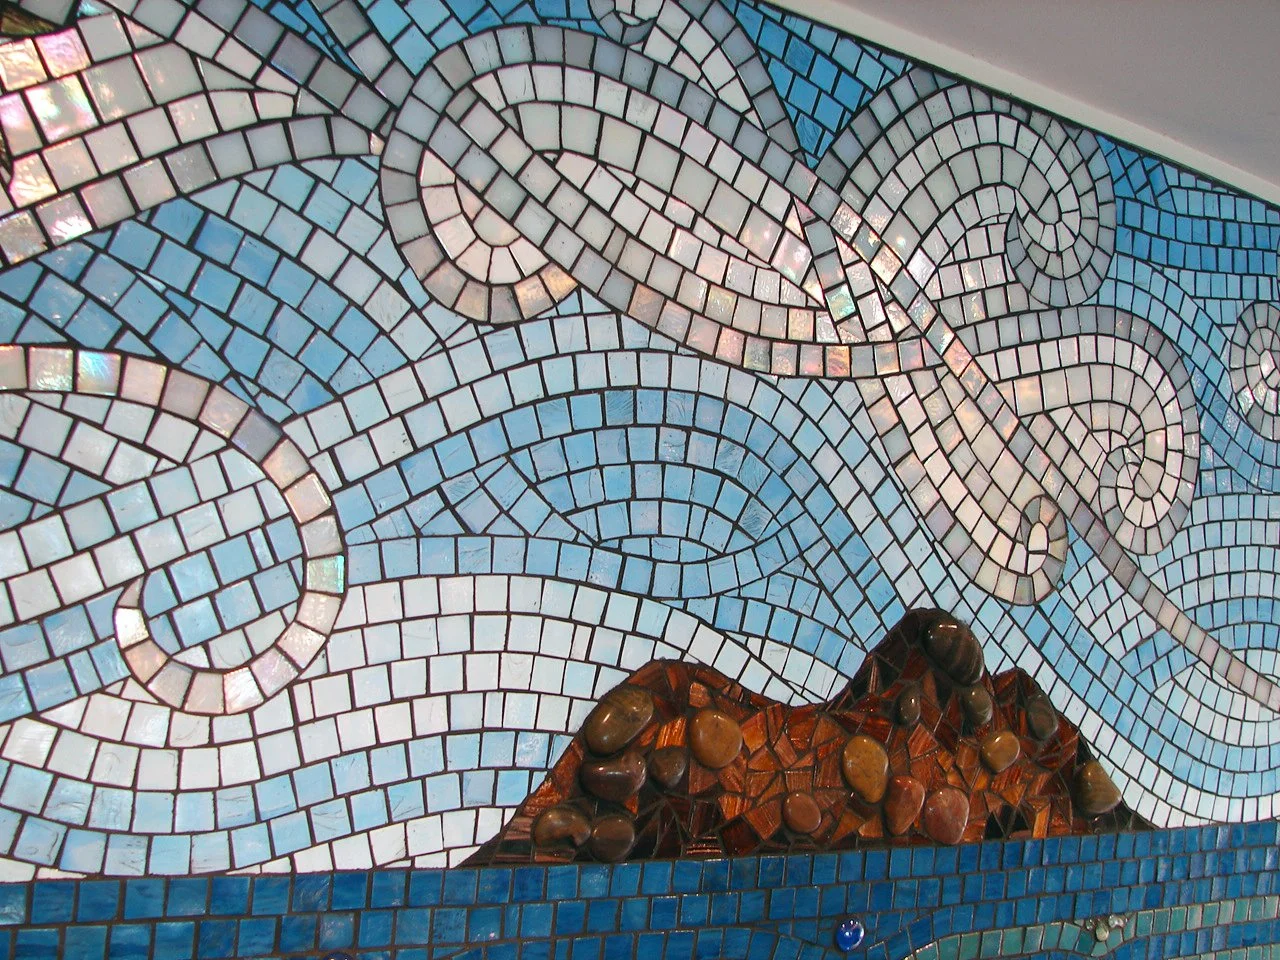
Mokuluas waves, work in progress.
Mokuluas waves, completed.
Once everything was set I mapped the color shifts onto the backer board as a guide, so the transitions between sections stayed controlled and no single color overwhelmed another. I built the piece starting with the palm leaves, then worked through the clouds and the islands. For the water I worked from both the top and bottom simultaneously so the wave colors and intensity would build toward each other and meet in the middle without any awkward jumps.
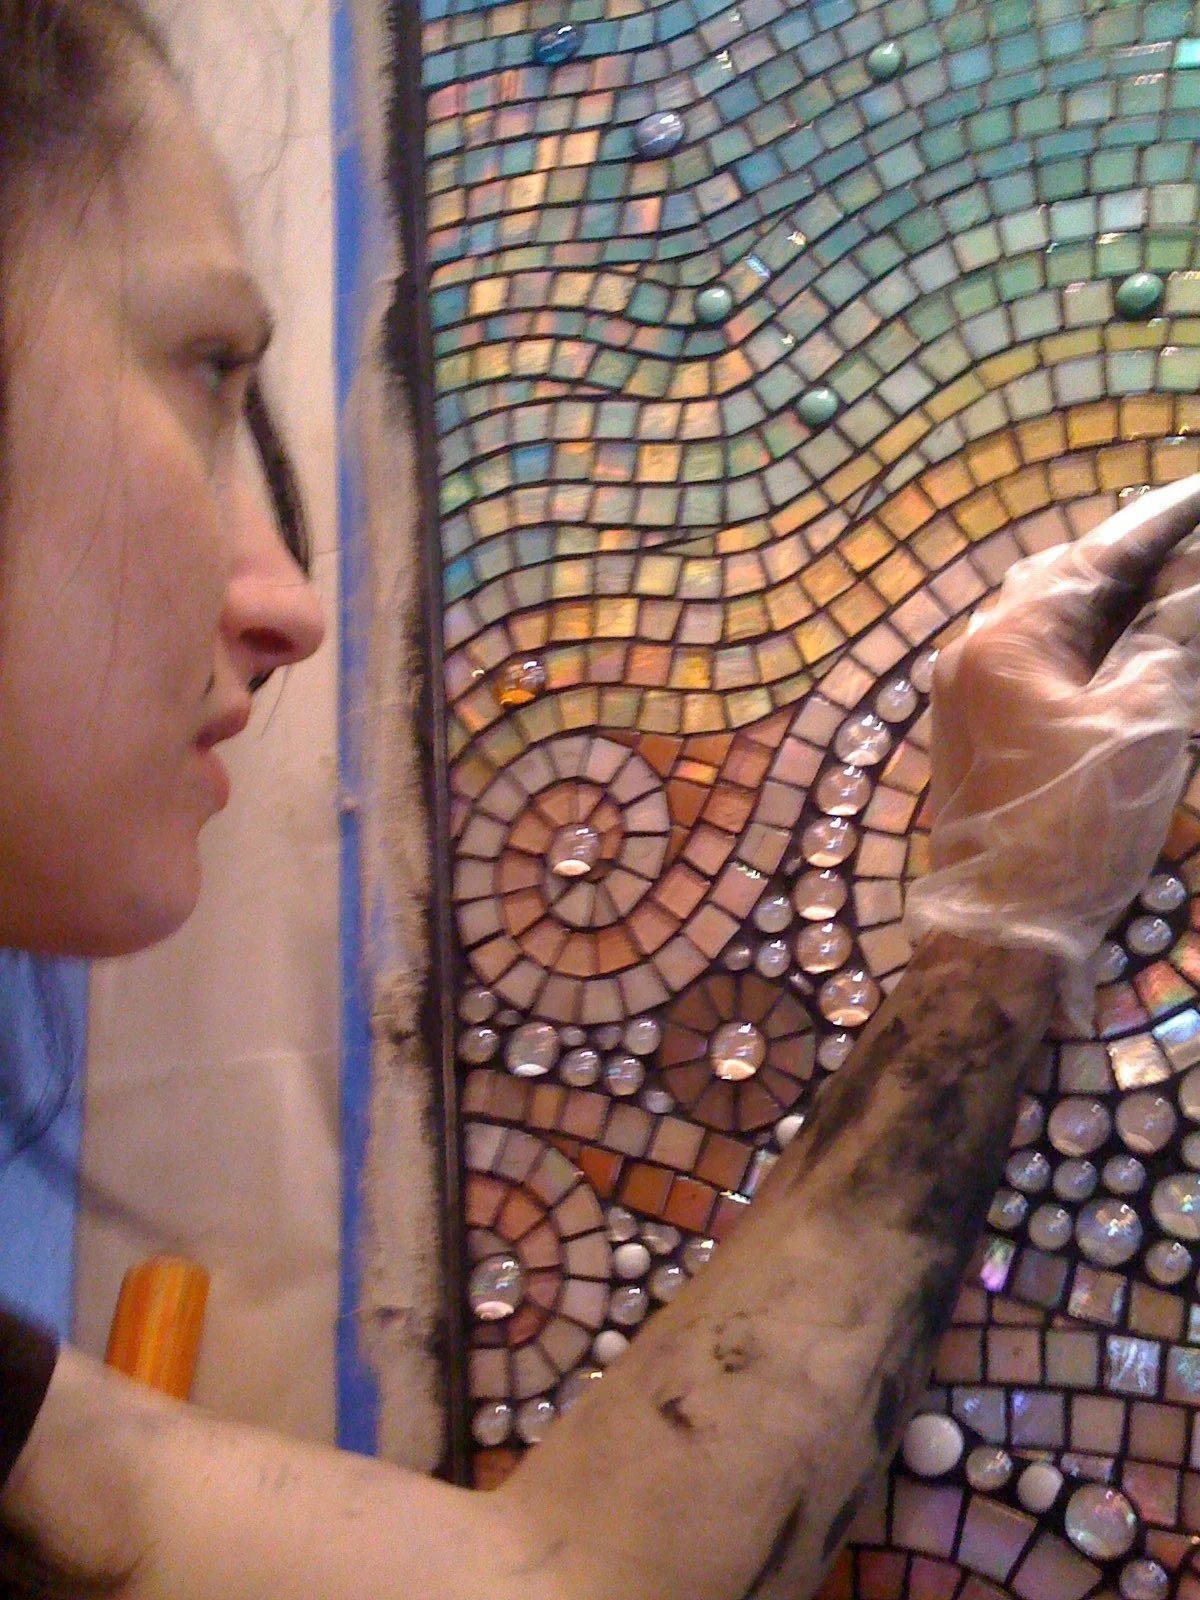
Fuzzy pic of me grouting. iPhone cameras weren’t as good back then!
Like the Sun Kitchen Mosaic Backsplash, this piece was built on Wedi board panels and cut into sections for shipping to Hawaii, where the builder's team installed it. I used white silicone as the adhesive since this is a kitchen installation and waterproofing was essential. White adhesive also brightens translucent glass from underneath, which made a real difference in how luminous the finished piece would look.
A year after installation I traveled to Hawaii to grout the mosaic.
Getting to see the finished piece in person, and to see the actual Mokuluas Islands that had inspired it, was a genuinely moving experience. The way the water and clouds seem to shift and move as the light changes on the mosaic throughout the day, and as you move around the room, is something the photographs simply can't capture. The client noted that herself. It's one of those pieces that lives differently in person than it does in any image, and knowing it's in someone's home bringing that landscape to life every day means a great deal to me.