This is the second video about the creation of my Afghan blue mosque mosaic.
Video transcript for deaf or hard of hearing:
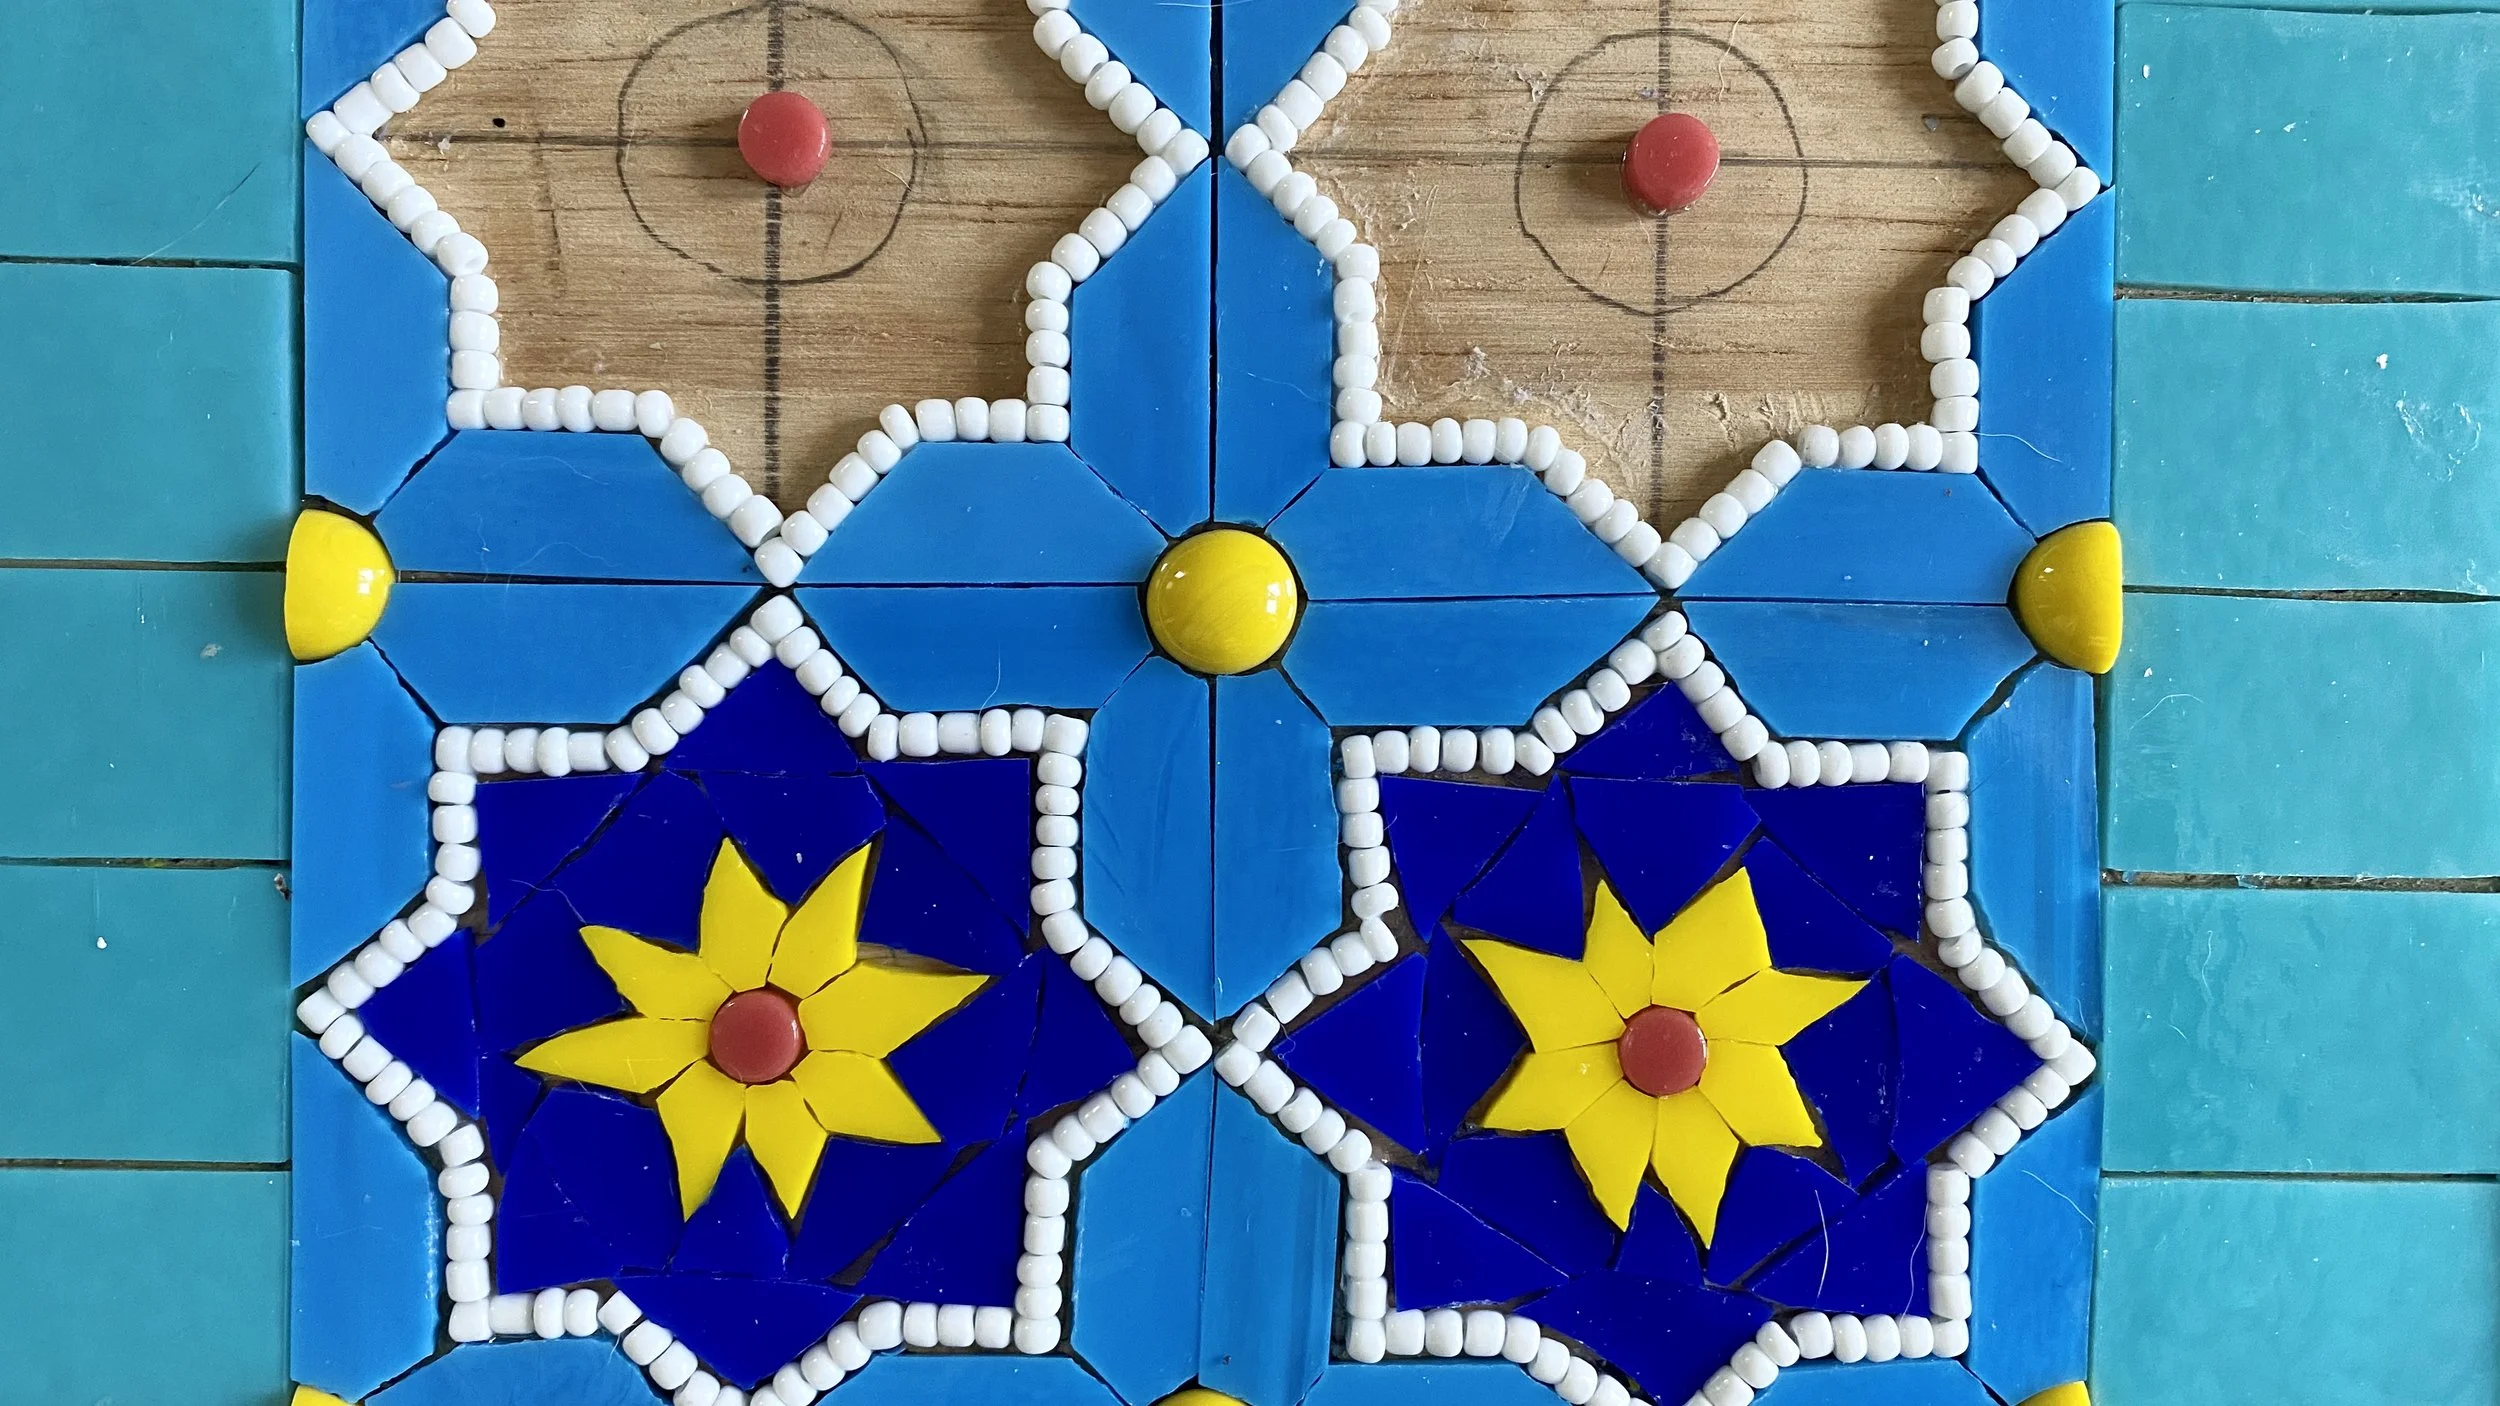
Hi Mosaic Aficionados! Here I’m going to continue work on the Afghan Blue Mosque mosaic. Now that the basic structure of the mosaic is laid out, I’m going to start on the first decorative tiles.
I began by making a vellum template of the 8 point star design I chose for this section. There are 60 identical tiles in this section, so this will help keep them fairly uniform.
I remembered while sketching out this section that I wanted to put bold yellow circles in the corners. To make these, I created bars using the cutting mat you’ve seen me use before, then used the glass cutter to cut them into slight wedges instead of squares. Then I just placed them into the circle so they fit snuggly together.
I skipped ahead a bit here… I was doing a little trial and error to see what materials I wanted to use, how I would create the cuts, and in what order I wanted to lay out the glass. Since this project is all about repetition and consistency, I want to create a strategy first so that all the tiles come out looking pretty uniform.
I decided the one place I’m not going to try to get super precise is the yellow flower at the center of the design. I figure that it will give it the handmade touch that all mosaics need.
Really, to cut those little pieces into identical microscopic elongated pentagons would be ridiculous and almost impossible, so I’m justifying with the “handmade touch” statement.
I wasn’t really happy with how close in color the turquoise and blue of the tile background is, so I was really lucky that when I stopped at the Wissmach glass factory I found a perfect blue. It’s hard to see the difference because they’re so close in color, but it will make a big difference in the mosaic.
Here I’m cutting the new blue into 7/16 of an inch bars on the cutting mat so I can swap out that color. That will allow me to cut them into 480 rhomboids to fit around the stars.
Next I need to remove the old blue glass. I lightly sprayed those pieces with water, then I chiseled them out as delicately as possible so as not to disturb the rest of the glass, especially those tiny little beads.
Then I put in the new glass pieces. It’s pretty hard to fit them around the white beaded stars, so I’ve decided to change the order for how I create the rest of this section. I’m going to lay out the background rhomboid bars first, then place the beads inside.
This way is working much better! Not only is it easier and quicker, but then the edges of the blue glass are crisper because I didn’t have to trim them with mosaic wheels.
Next I just need to lay out the glass beads in the interior of the star. This part is also easier because of placing the blue glass first, so I became full of hubris and thought I could lay down the glue for the entire star first.
It’s still not that much easier. I had to wipe up half the glue because it was getting too dry.
Now I know for the rest of the stars.
So then I just need to place my yellow flower and tthe cobalt blue glass around it. You’ll notice that I am being pretty loose with the placement of the cobalt. This is because I’m going to use cobalt grout, so precision of these pieces is unnecessary.
I timed myself making these sections and it will probably take about 66 more hours to complete this section. It’s mind numbing for me to think about having to do all this repetitive work, so if I show you, it will be a super compressed time lapse.
I appreciate you too much to bore you with watching the same thing 60 times.
Before I go today, I just want to show you where I left off for the day, which was putting the glass gems and circles in place in this section so that they won’t be moving around when I’m trying to place the rest of the glass tomorrow. Thank you so much for watching!!