It was such an honor to have the opportunity to make such a stunning backsplash for my client in Kailua, Hawaii! This video shows the creation of the Mokuluas mosaic from beginning to end, but before iPhones took good pictures. ;)
Video transcript for deaf or hard of hearing:
I’m going to take you way back to 2008 to one of the first major commissions of my professional mosaic career. I had done a couple small commissions before and finally got my website together when I got a call from an interior designer in the Bay area.
She wasn’t calling for a client, but for herself. She and her husband were building their dream home in Kailua, HI, and wanted me to make two mosaics for their home. Today I’m going to show you the making of Mokuluas, the Hawaiian art wall backsplash.
This was a new build, so since it didn’t exist yet, I received a pdf file with
elevations from the architect. There were still some variables, so I believe this is the image I sketched up with the red dots to let them know which measurements I needed to proceed.
The client sent me these two images of the Mokuluas islands. They are just around the cove from the new home they were building, but since they didn’t have a view from their property, they wanted this mosaic to bring the islands into their home.
The client and I knew we wanted it to be slightly stylized, yet realistic, so I started first by showing her how an idea I had for the clouds, a motif that would carry through to the ocean waves.
Then I sketched the ocean waves.
Again, the kitchen wasn’t built yet, so I put the measurements into a CAD program to create a layout to make sure the client understood the perspective.
Then the client wanted some palm leaves to frame the mosaic. There was also some talk at this time about adding a turtle. I believe I made some sketches with a turtle, but really felt it took away from the elegance of the design.
Then the builders sent me updated measurements, making the proportions slightly squarer.
This was the final design thrown into the CAD layout.
The next step was to show the client the palette of glass I would use for the mosaic. I ordered samples of every color from a few different glass lines and pared them down to this. I spent a lot of time finding the perfect combos, so I remember being thrilled that the client immediately approved the glass.
Next I laid out the shifts of water color on the design as well as the backer board I would be working on. It would be easy with a free flowing, wavy design to get crooked or get carried away with one color and not leave enough room for all the transitions.
Then it was time to begin the construction.
I started with the palm fronds,
Then the stylized clouds
And the pebble islands filled in by gold streaked glass to make sure they still catch the light.
I took some pictures for the client without the painter’s tape.
I need to leave some pieces of glass unattached so the panels can be screwed into the wall with washers, so as I’m working the blue tape is to hold them in place.
Now onto the water. I worked from both the bottom and top to make sure the colors and intensity of the waves would come together properly.
Also as a note, I used white silicone for this project. I want it to be waterproof because it will be in a kitchen in a humid climate. Plus much of the glass is translucent, so using a white adhesive makes the glass bright and shiny.
I cut the mosaic into dozens of pieces and shipped the mosaic to Hawaii. The builder sent me these pics before lighting was installed in the home.
The next year I went to Hawaii to grout the mosaic. I was busy working the whole time, but here are a couple pictures of the home and property I managed to take.
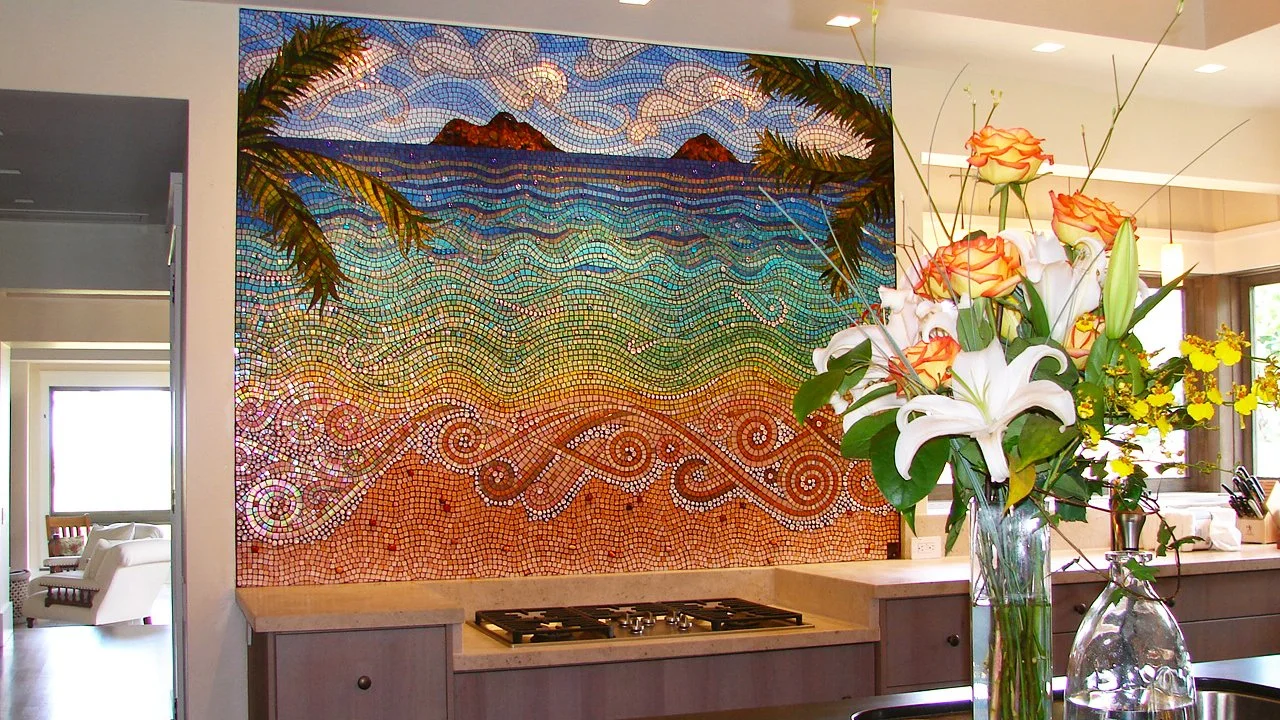
And finally the mosaic was finished. This was right before inexpensive cameras and phone cameras started getting really good, so the pictures don’t quite show the movement of the mosaic.
When you are in the room, because of all the shine and iridescence, the water appears to move and the homeowner reported that the colors change throughout the day.
Thank you for taking this trip back in time with me!