I don’t have progress pictures of making my 3D spiral mosaics because I made them in the early 2000s and my technology made it hard to take good pictures in my studio. You’ll see this during the one progress pic I’m including in this post. I’ll have to rely on descriptions of the process.
I had the idea of making mosaics with more depth, that leapt out of the 2D realm, and couldn’t let it go because I hadn’t seen anything like that before. I remember that my first successful 3D spiral mosaic was the seventh attempt. I was relatively new to mosaics and had to do a lot of trial and error to make it work.
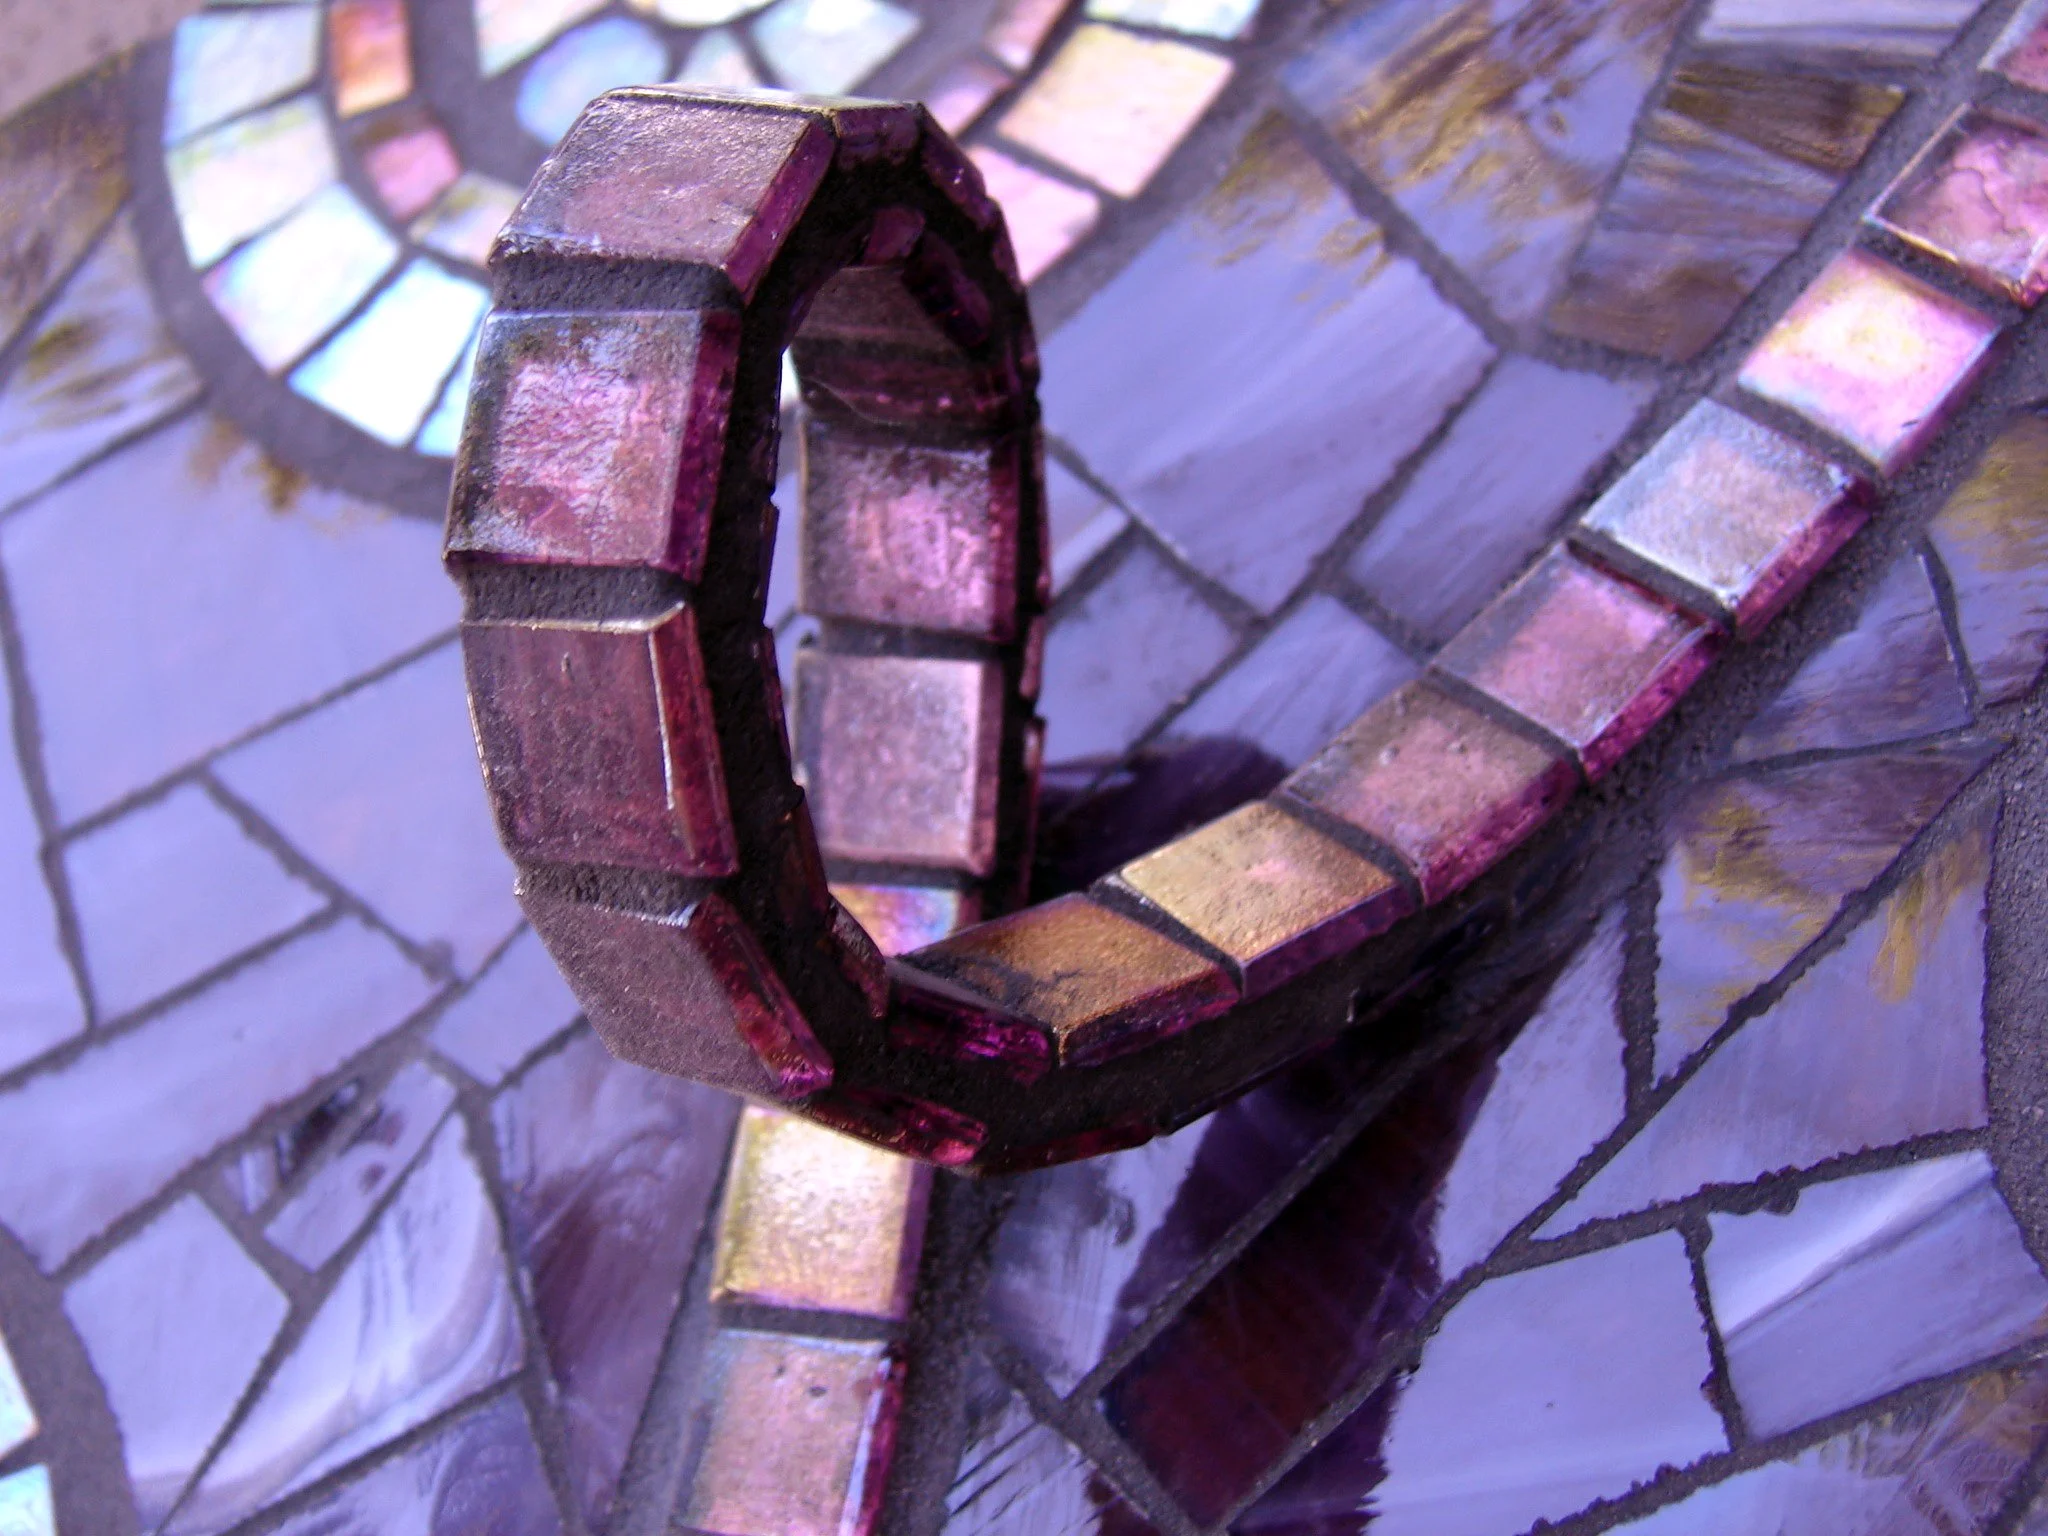
I used iridescent pink stained glass tiles for this first one because it’s what I had on hand. I learned later that molded glass tiles such as Sicis Iridium work better because the smooth edges make for cleaner grout lines along the spirals.
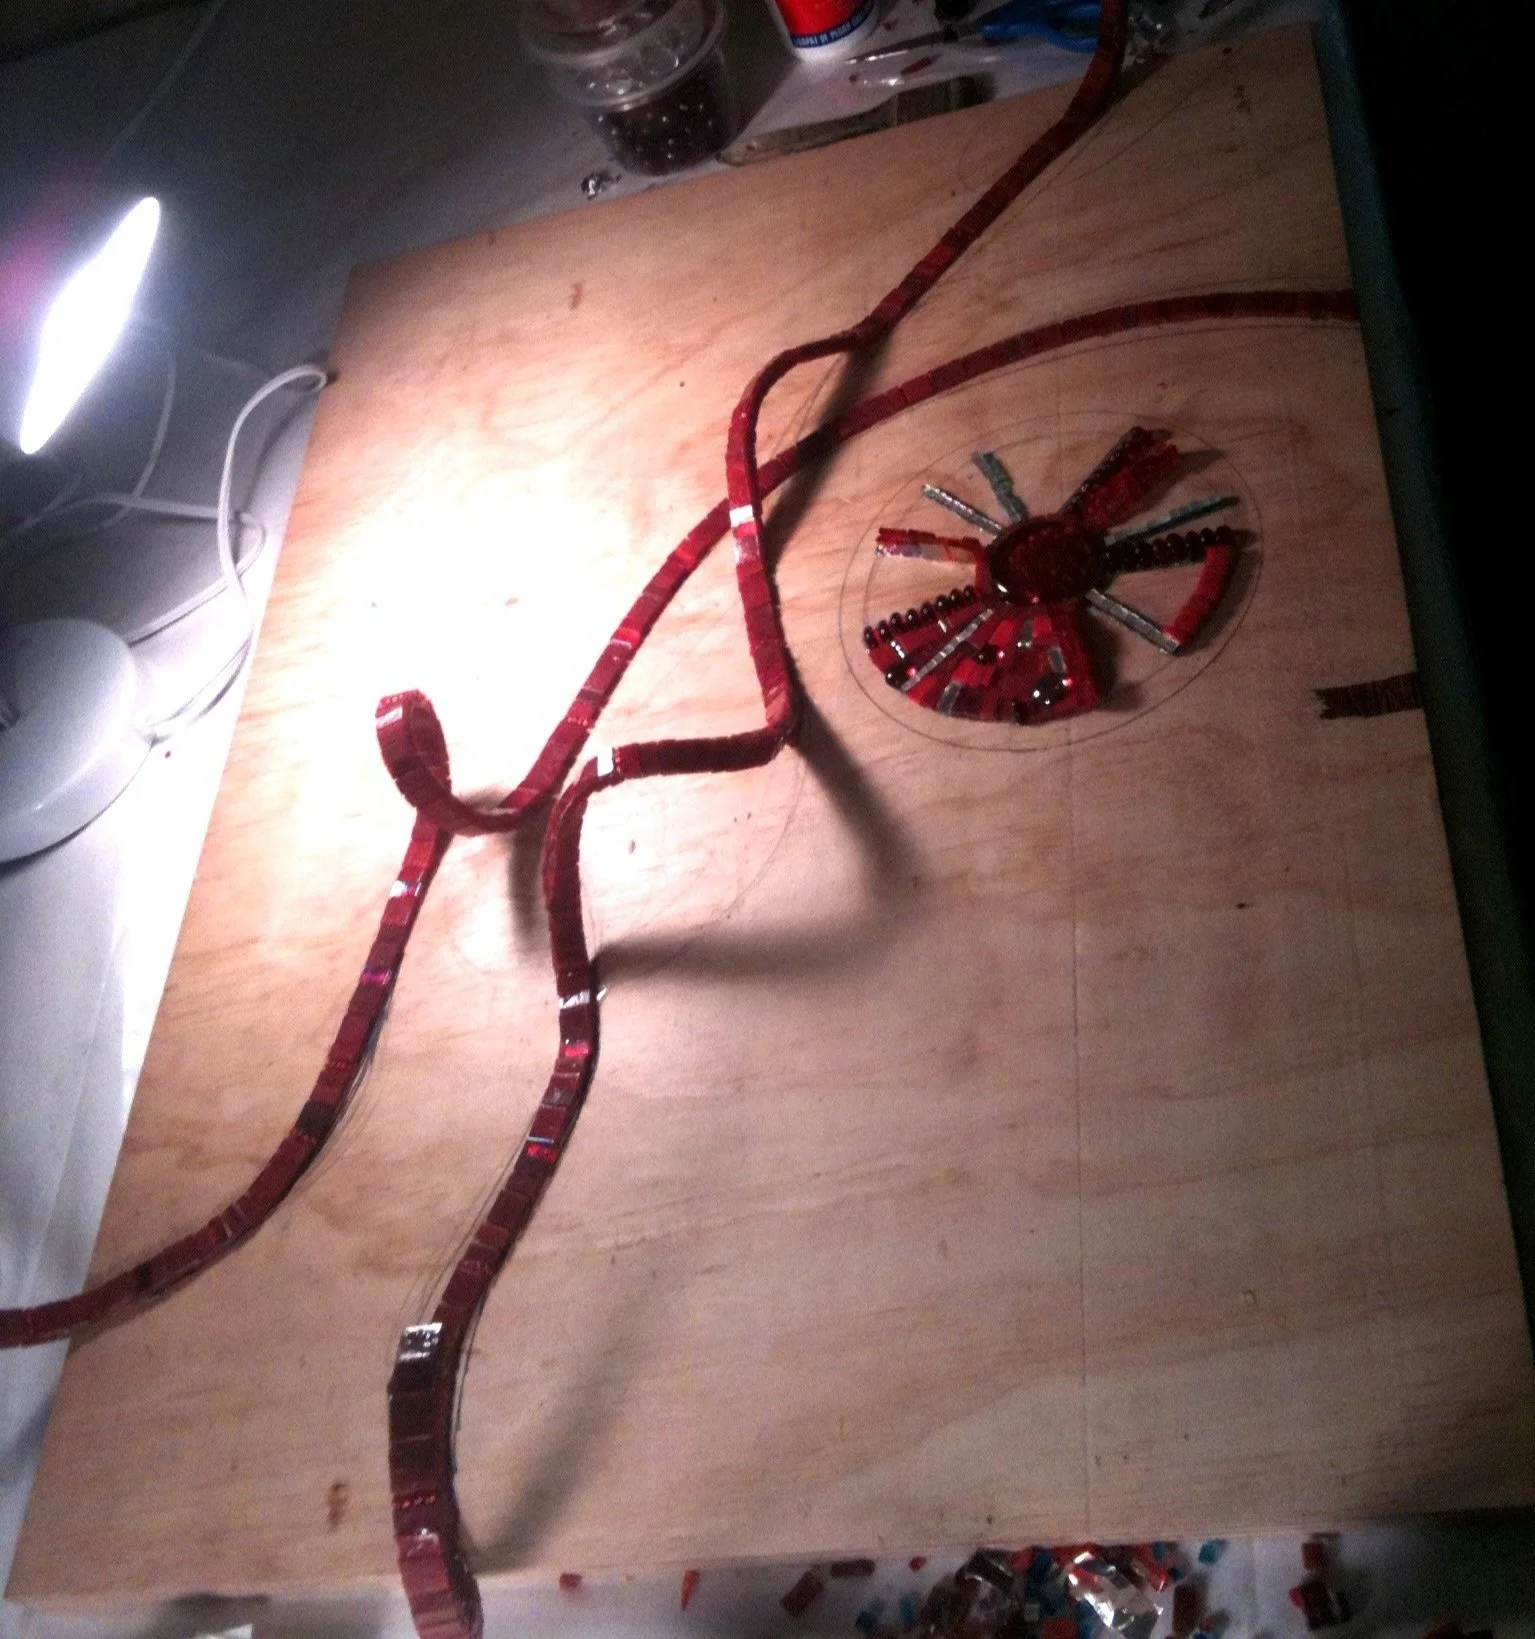
I don’t have pictures of the metal structure underneath, but this is a picture of Ruby Aspirations in progress so that you can see the spirals isolated. The metal structure that finally worked were these metal strips I found at an art supply store. I think they are for building models. They are just flexible enough to bend when I warm them a bit, but strong enough to hold the shape and not warp enough for the tiles to pop off. I started by cutting the strips in half with metal cutters. I then warped them into shape and used a metal punch tool and hammer to puncture holes where the tack nails would hold the metal on the plywood. I used Household Goop and the tack nails to hold the strips in place in their spiral shape. Then I used a hammer to flatten the ends of the metal so that the transition from wood to metal would be as smooth as possible. I again used Household Goop to adhere the glass tiles onto the metal strips. There is some flexibility to the metal even when they are held in place, so I needed to use a very strong adhesive with flexibility. Please note that you should always wear an organic vapor respirator when working with toxic adhesives such as Household Goop or E9000. Finally, I finished the rest of the mosaic as I would any mosaic.
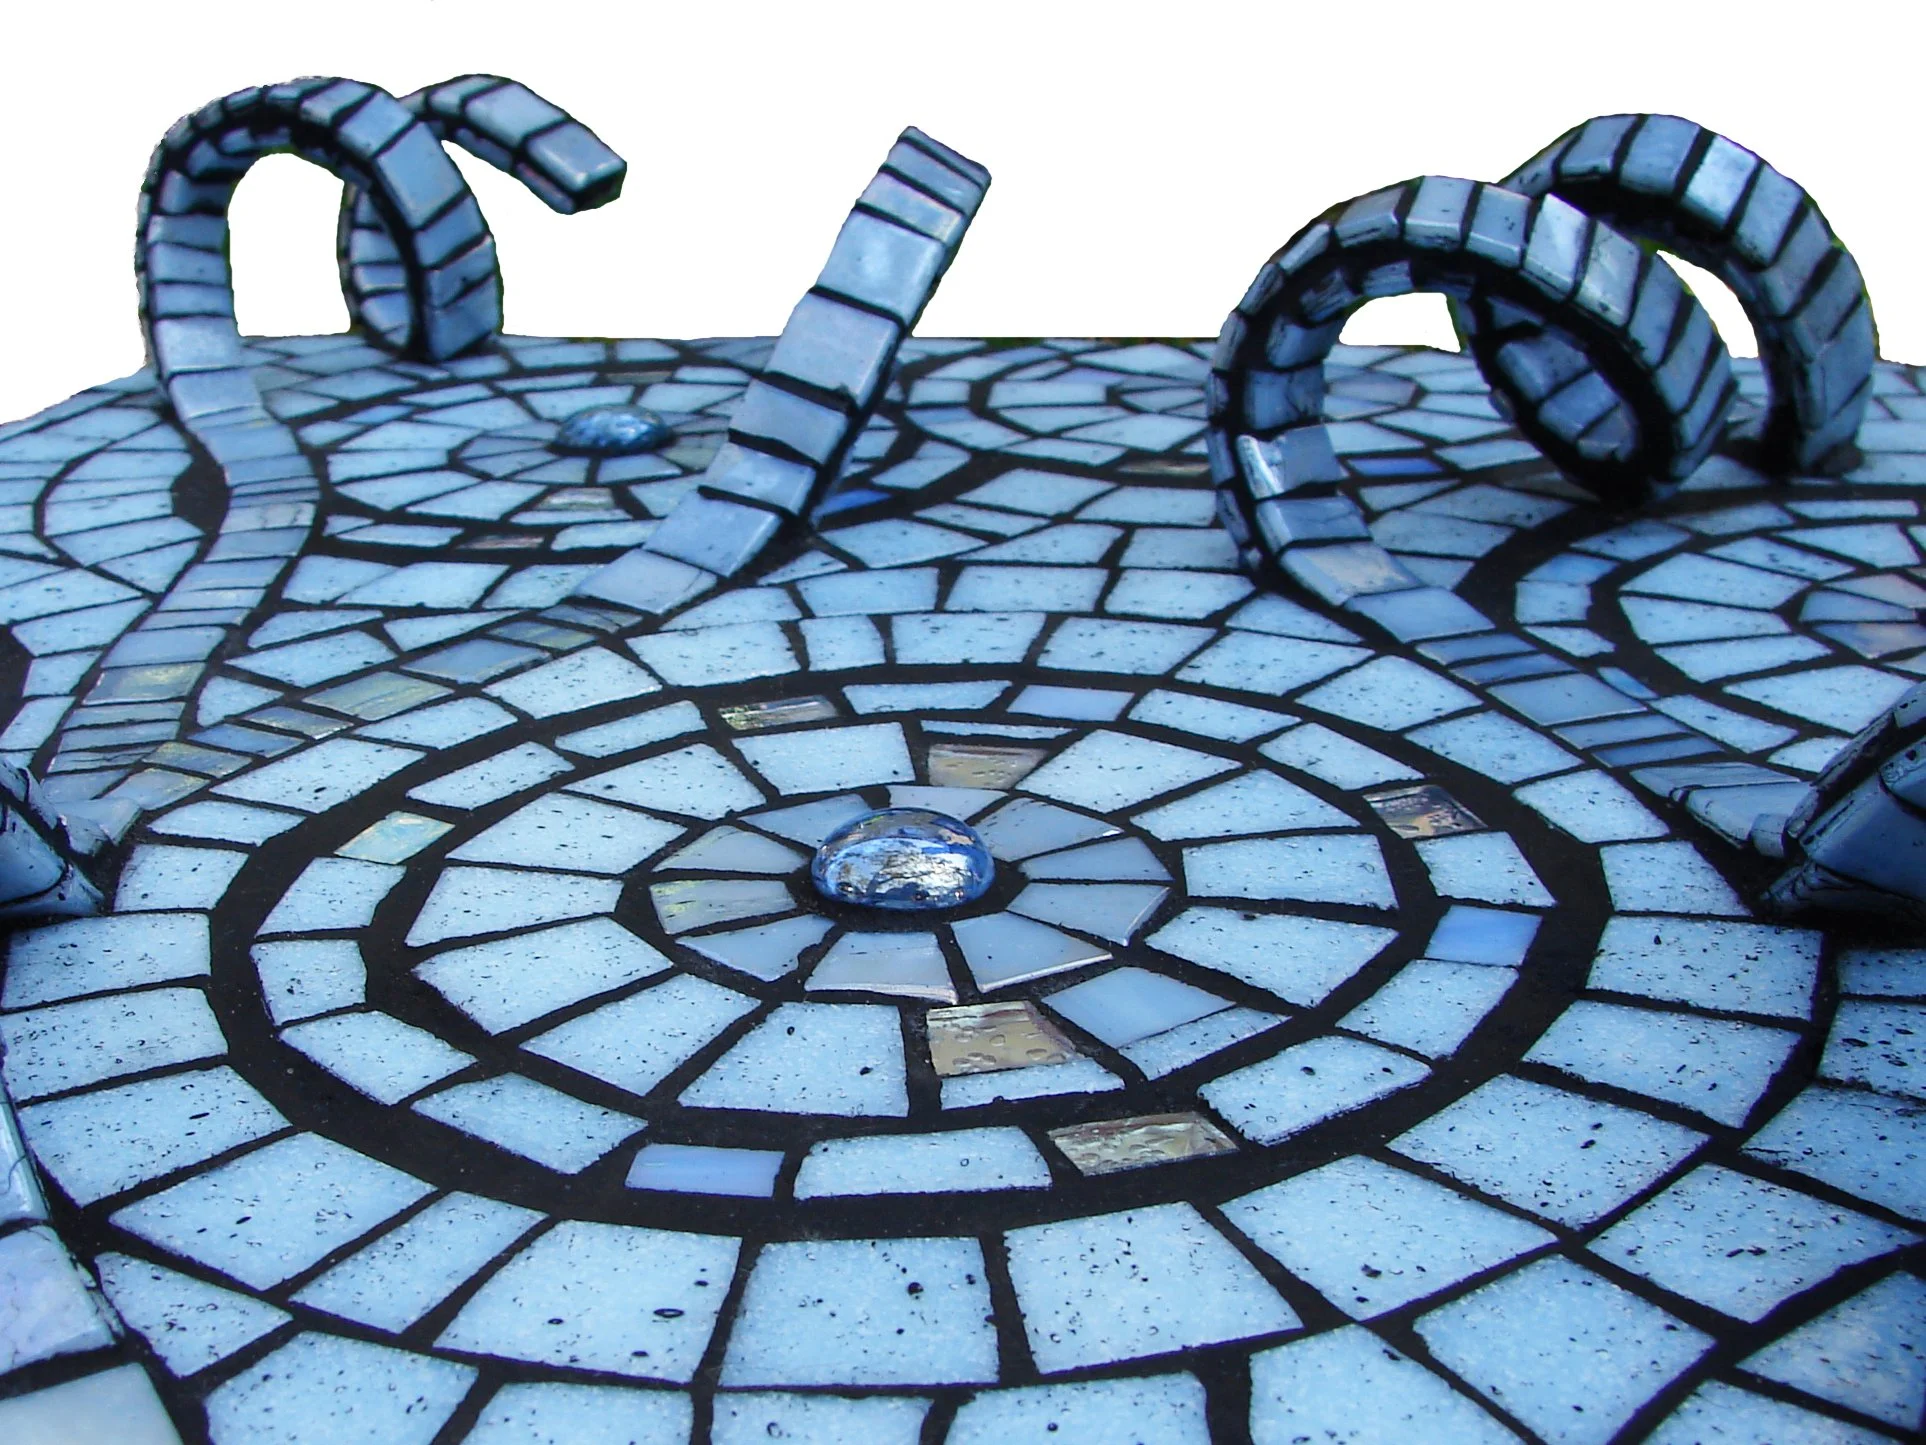
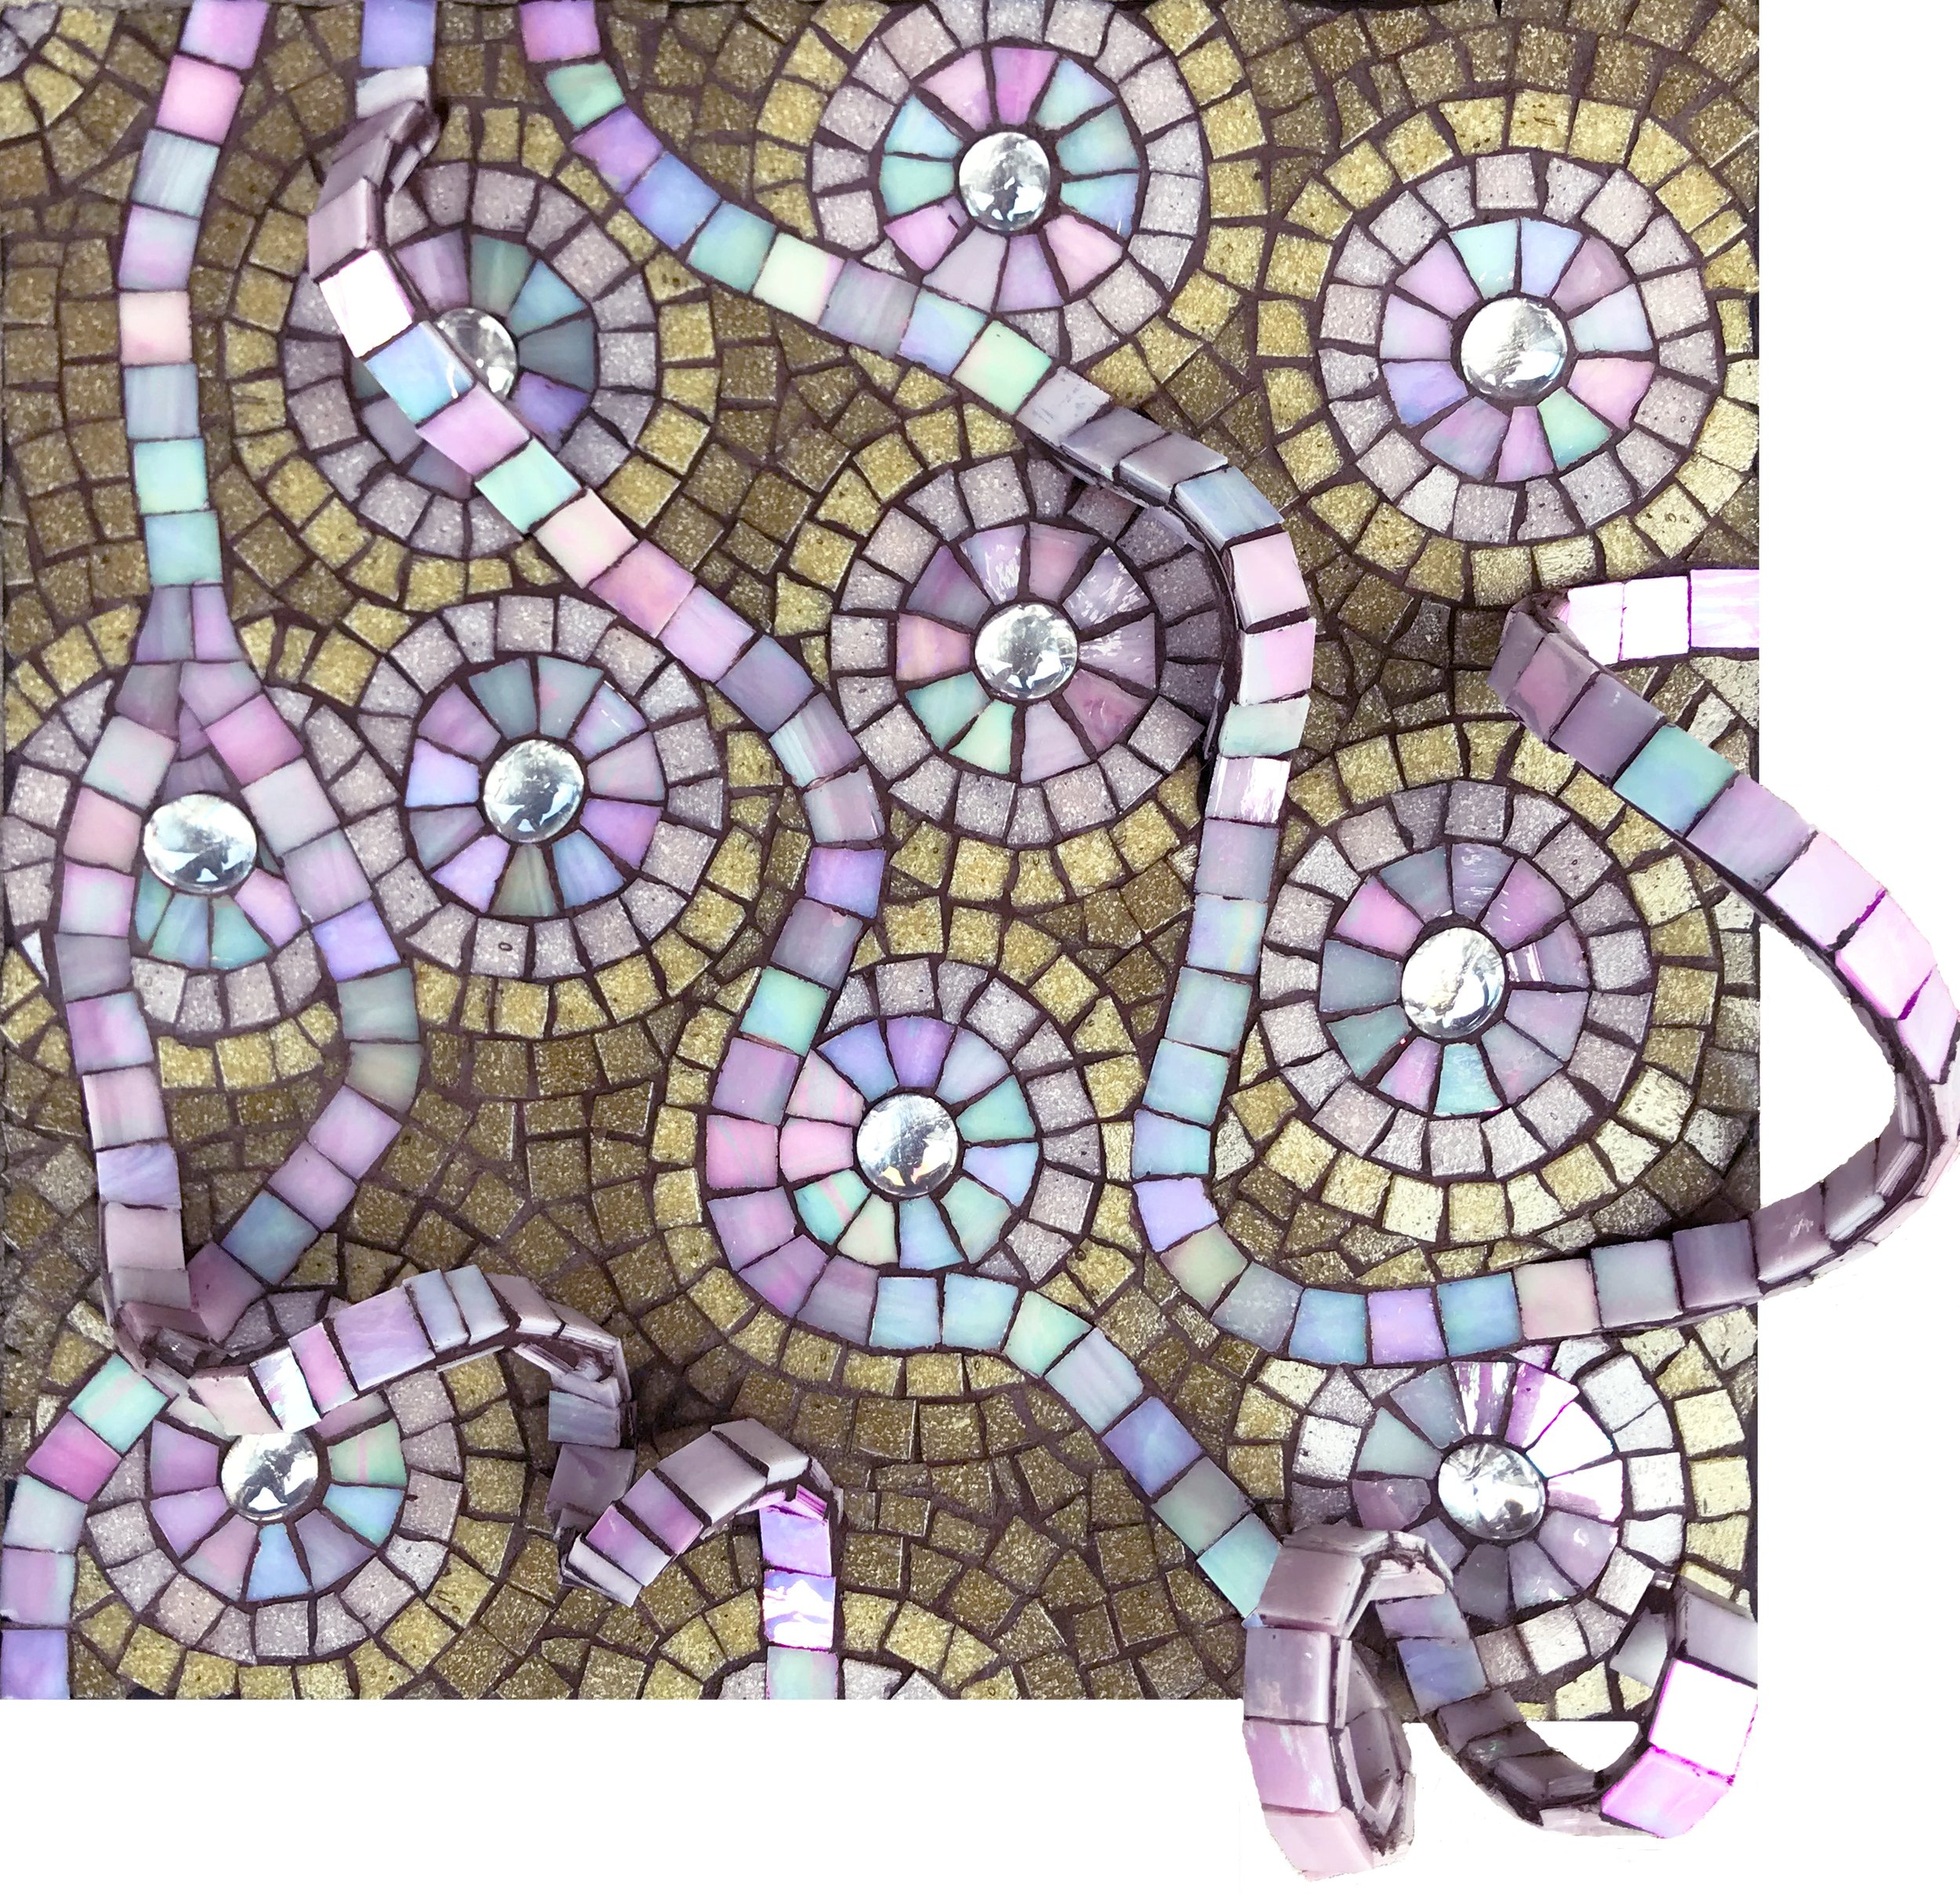
For Blue Aspirations, I decided on a monotone look. I used a porous vitreous glass with a matte feel in the background to differentiate between the background and the super shiny glass of the spirals and accents.

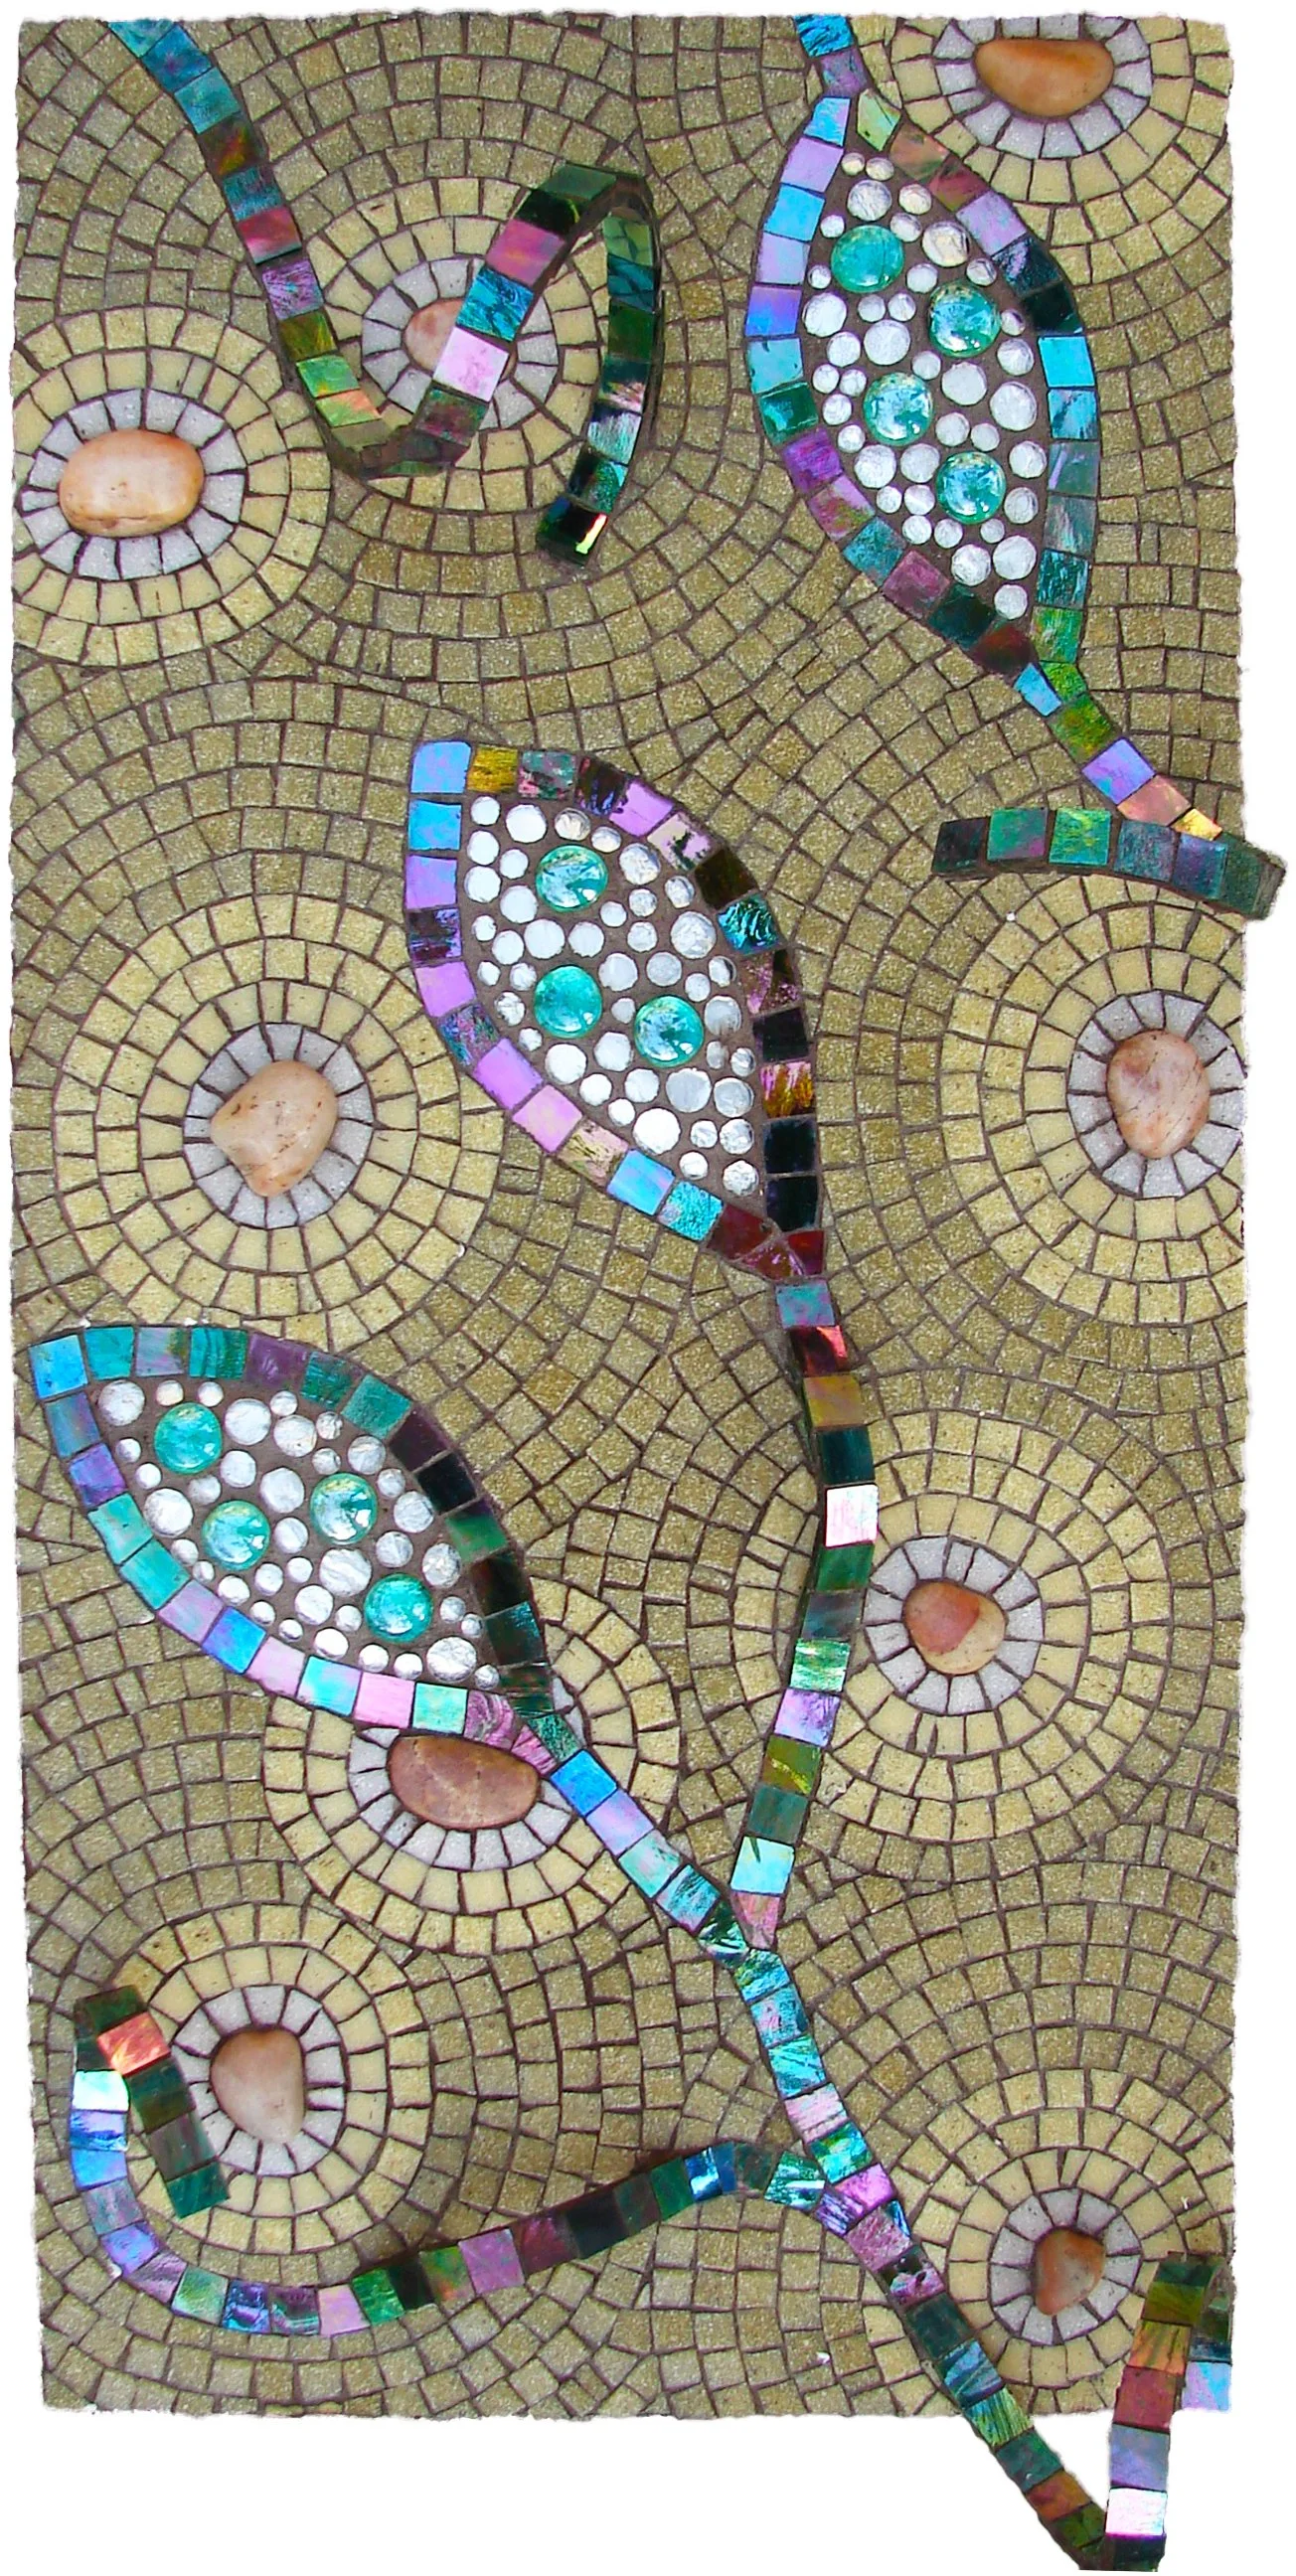
For Pods, I chose my favorite organic, earthy glass tiles for the background, and shiny stained glass to have the pod spirals grow out of the earth. I also used mortar to slightly raise the pods to give them dimension also. This is one of my favorite mosaics I’ve made, but I’ve noticed it’s not a fan favorite! That happens with art!!