Dating back to 2008, this was one of my first large mosaic pieces I have done for my career. I received a call from an interior designer about a piece that she wanted for herself. She and her husband were building their dream home in Kailua, Hawaii, and they wanted for me to create a backsplash to be put in their kitchen.
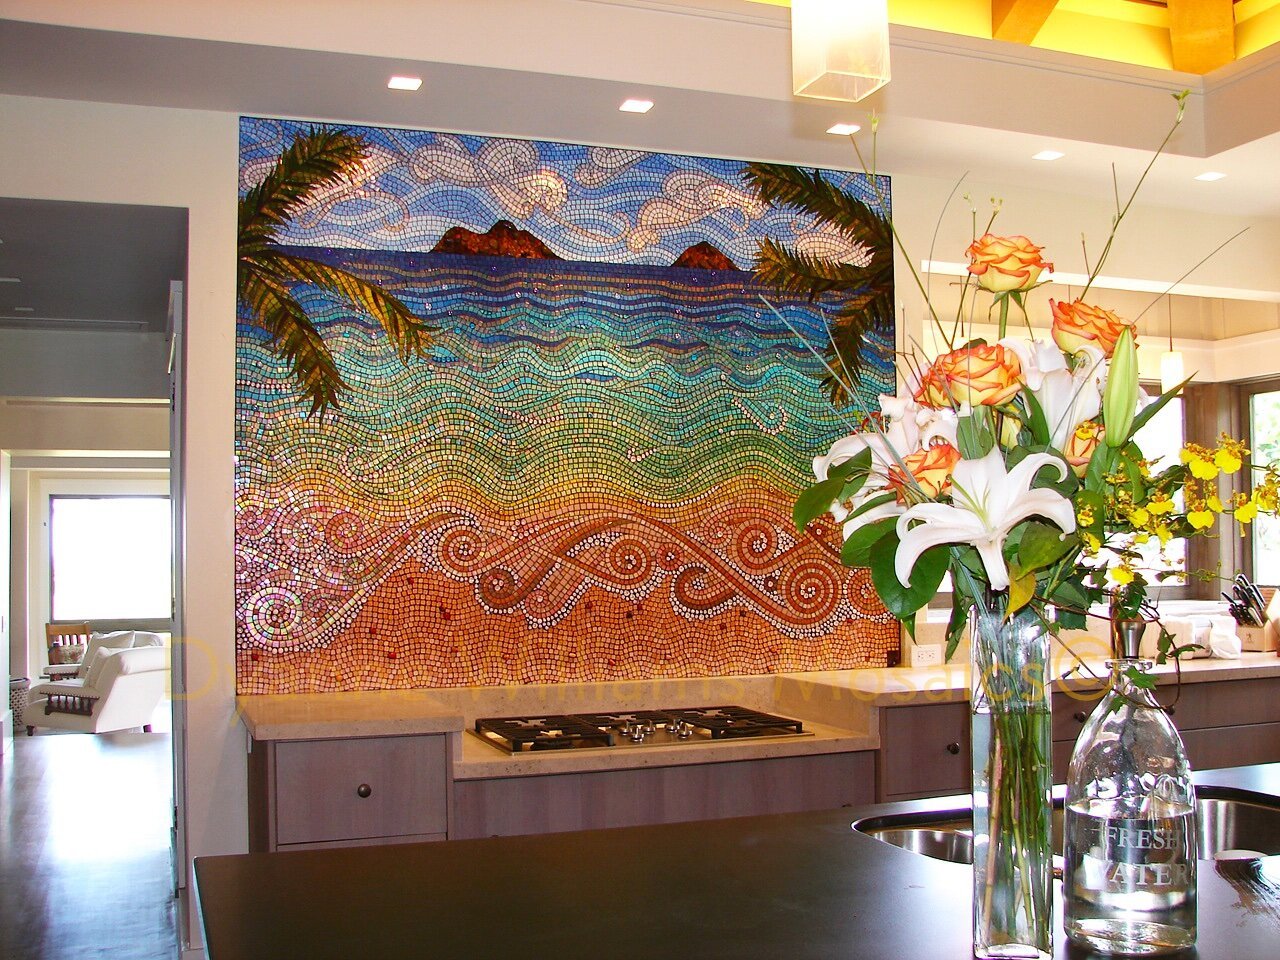
Since the home was not yet built, I has asked for the measurements of all the walls surrounding the kitchen so that I knew what size I was going to create this piece to be. She also sent me two pictures of Mokulukas Islands that were located near their new home. Since they could not see the Islands from their house, so they wanted for me to create a mosaic in order to show the landscape in their own home.
The client and I knew she wanted the piece to be realistic, but also stylized, so when I began my drawing, I first started with the outline of the clouds. I created this motif drawing that would also carry through the whole piece. I then sketched the ocean waves and using the same technique. After my sketch design was created, I put the measurements into a CAD program so I could show the client and also so that way they knew the perspective that was going to be shown.
After the sketch was created, the client then decided that they wanted to add in some palm leaves. I was able to incorporate them on the sides of the piece, without taking away from the piece as a whole and the elegance of the overall design. After I added in the palm trees and sent it over to the designer, we then changed the sizing for the overall piece slightly so that it was more square and it would then fit better in the layout the client wanted.
Once everything was sketched out and placed in the CAD layout, I then showed the client the glass colors I had chosen and would be using on their mosaic. I ordered samples of lots of different colors and I also spent a lot of time picking combos of colors that I liked the best and thought that would be the best fit for the overall design. I was extremely happy when the client liked the glass colors that I had picked the first time!
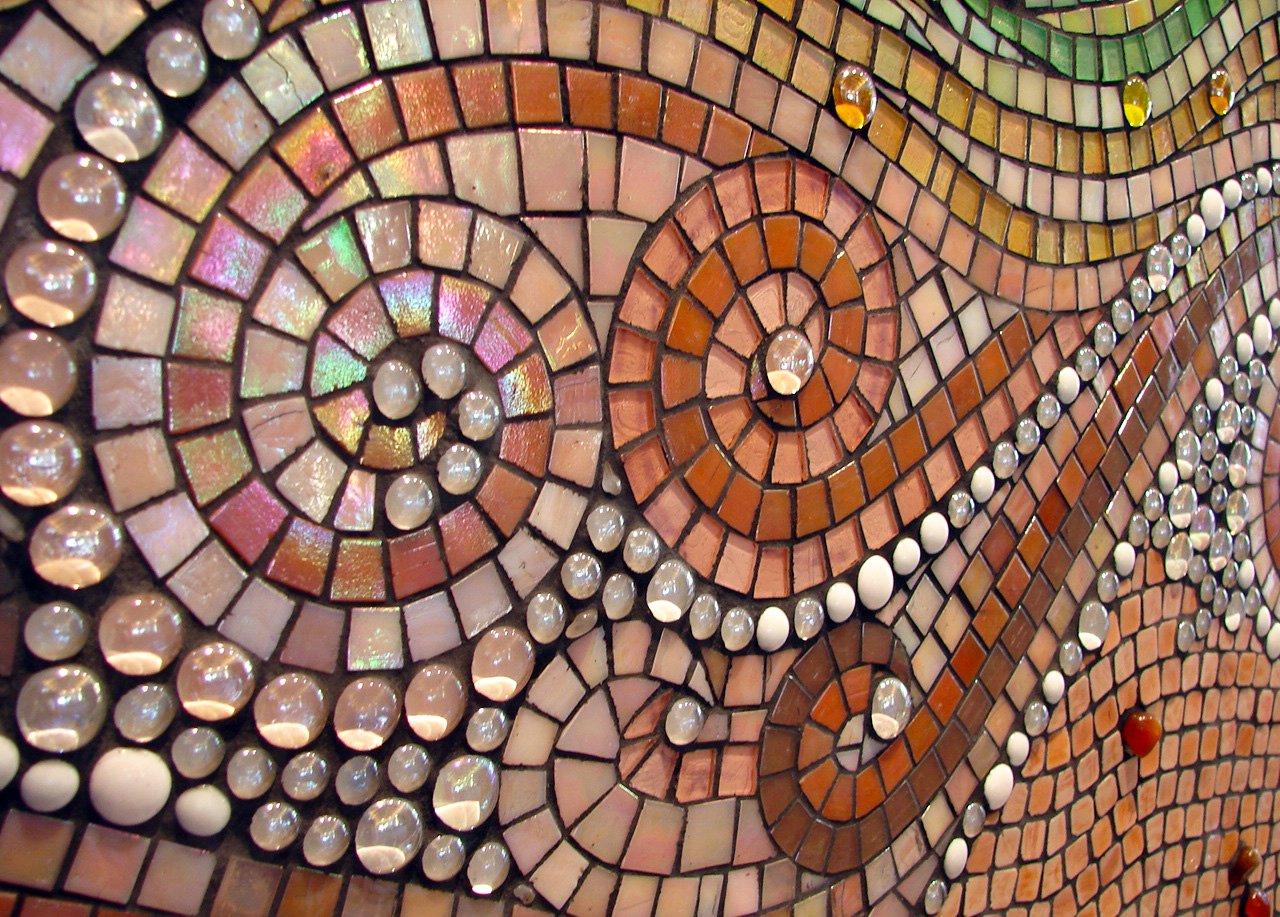
After I choose the colors, I then laid out the watercolor shifts I was going to use and I put them on the backer board as well so that I knew where to follow on this specific design in order to keep it in line so it did not go all over the place. This also allowed for all the transitions of colors and so that one color would not get taken over by another color.
Finally it was time to begin the piece and I first started with the palm leaves and then I worked my way to clouds and then the Mokulukas islands using both glass and stone so that they would stand out in the piece.

Next up was creating the water. I made sure to work from both the top and the bottom to make sure the colors and the intensity of the waves would show through as well as come together properly and not look out of place. For this project, I also used some white silicone as an adhesive because it will be located in a kitchen so I wanted to make sure that it was going to be waterproof. A white adhesive is also helpful when glass is translucent because it makes it brighter and shiny too.
When the piece was complete, I cut it into dozens of pieces and then had it shipped to Hawaii for the client. The builder then had sent me photos of it being installed into the home and a year later I got to go to Hawaii to grout the mosaic. Even though I was there for work, I got to see their property and I even got to see the Mokulukas Islands in person that I had created for the client.
When you view the mosaic, the water and clouds appear to move because of all the lights and iridescent colors that I used, however pictures do not do it justice since this piece was in 2008, before quality phone cameras were invented. The client even stated that the colors change throughout the day too!