VIDEO: Copper I Mosaic: Choosing Tessera

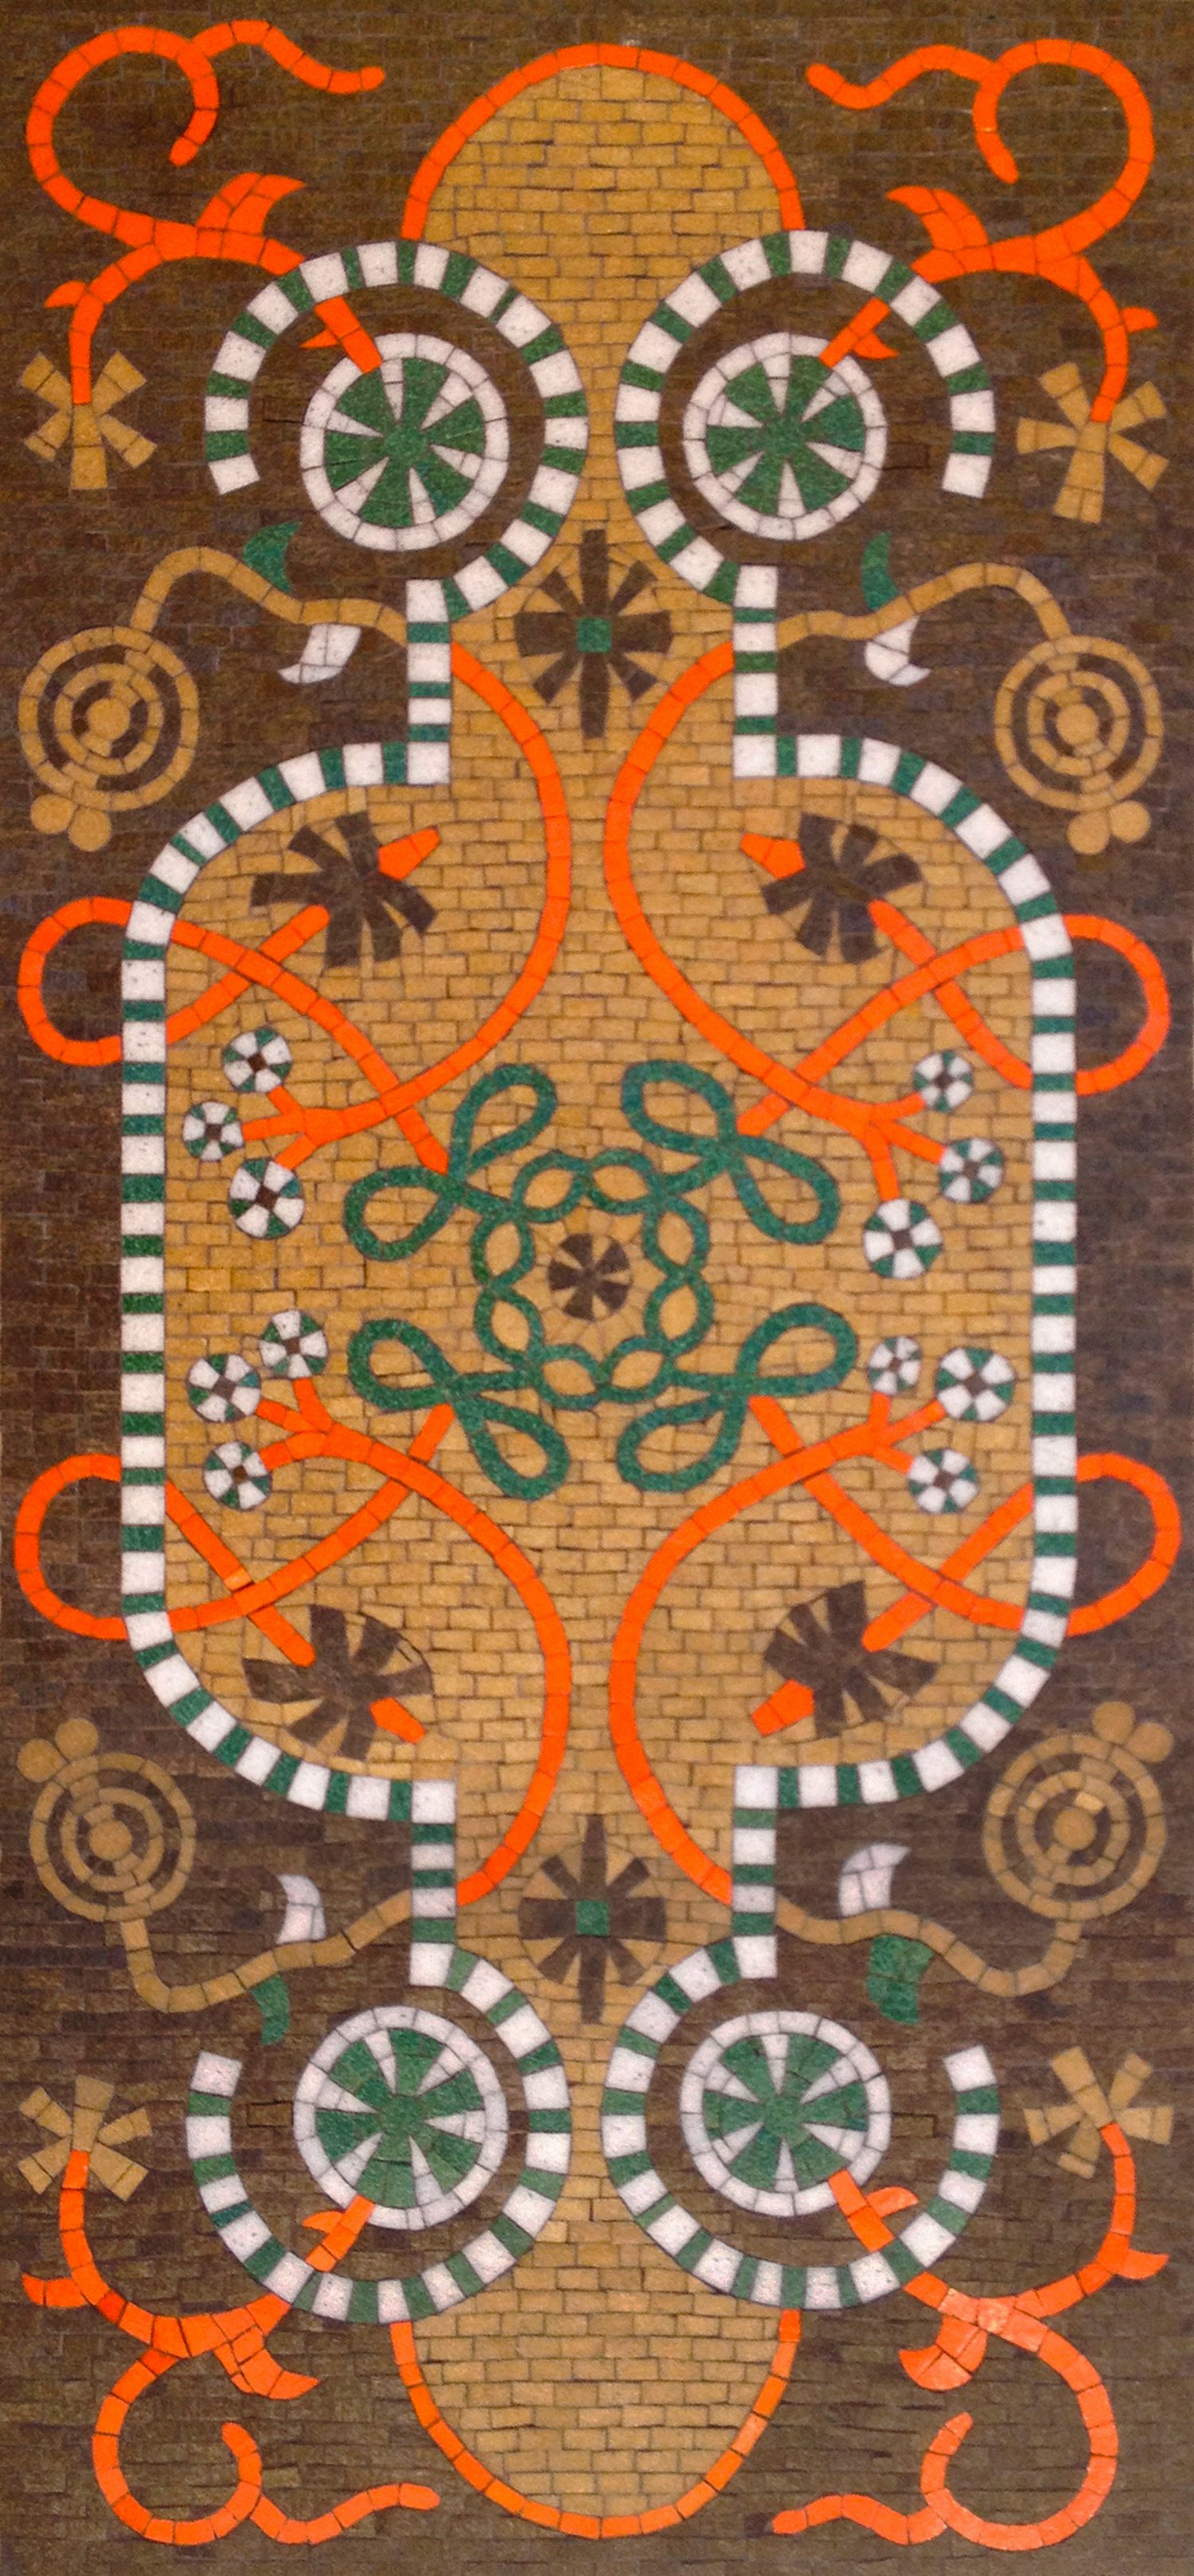
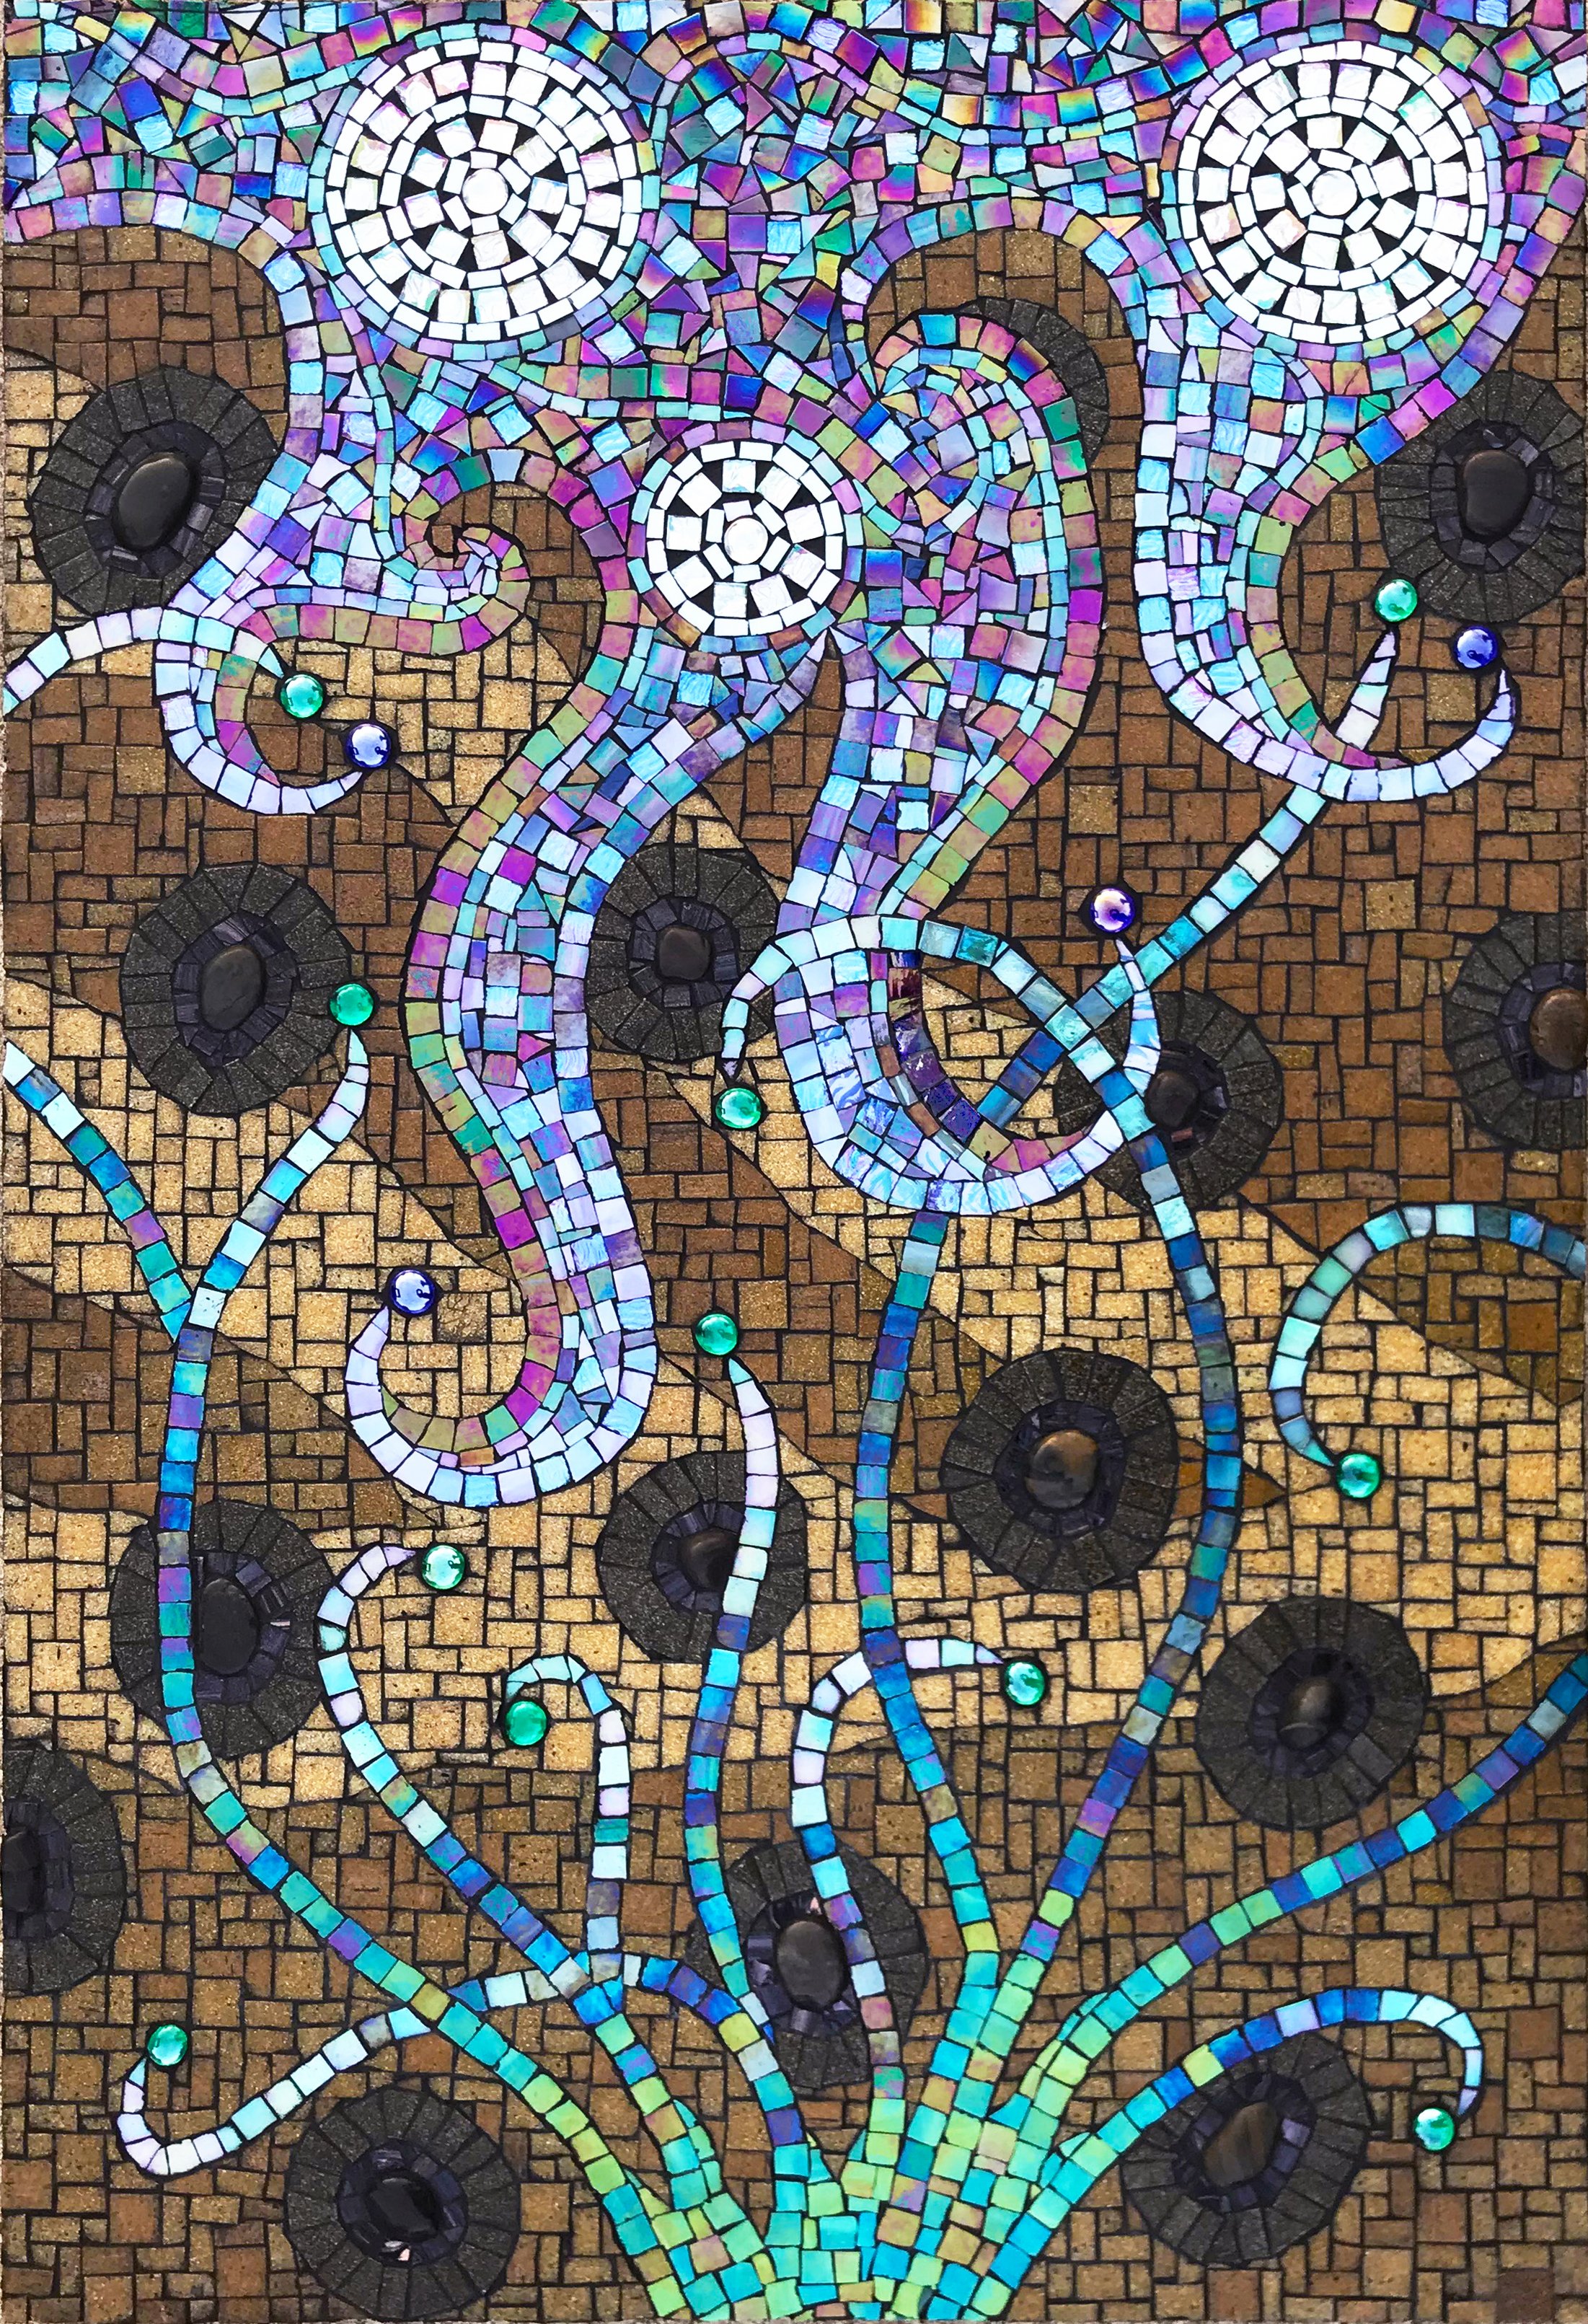
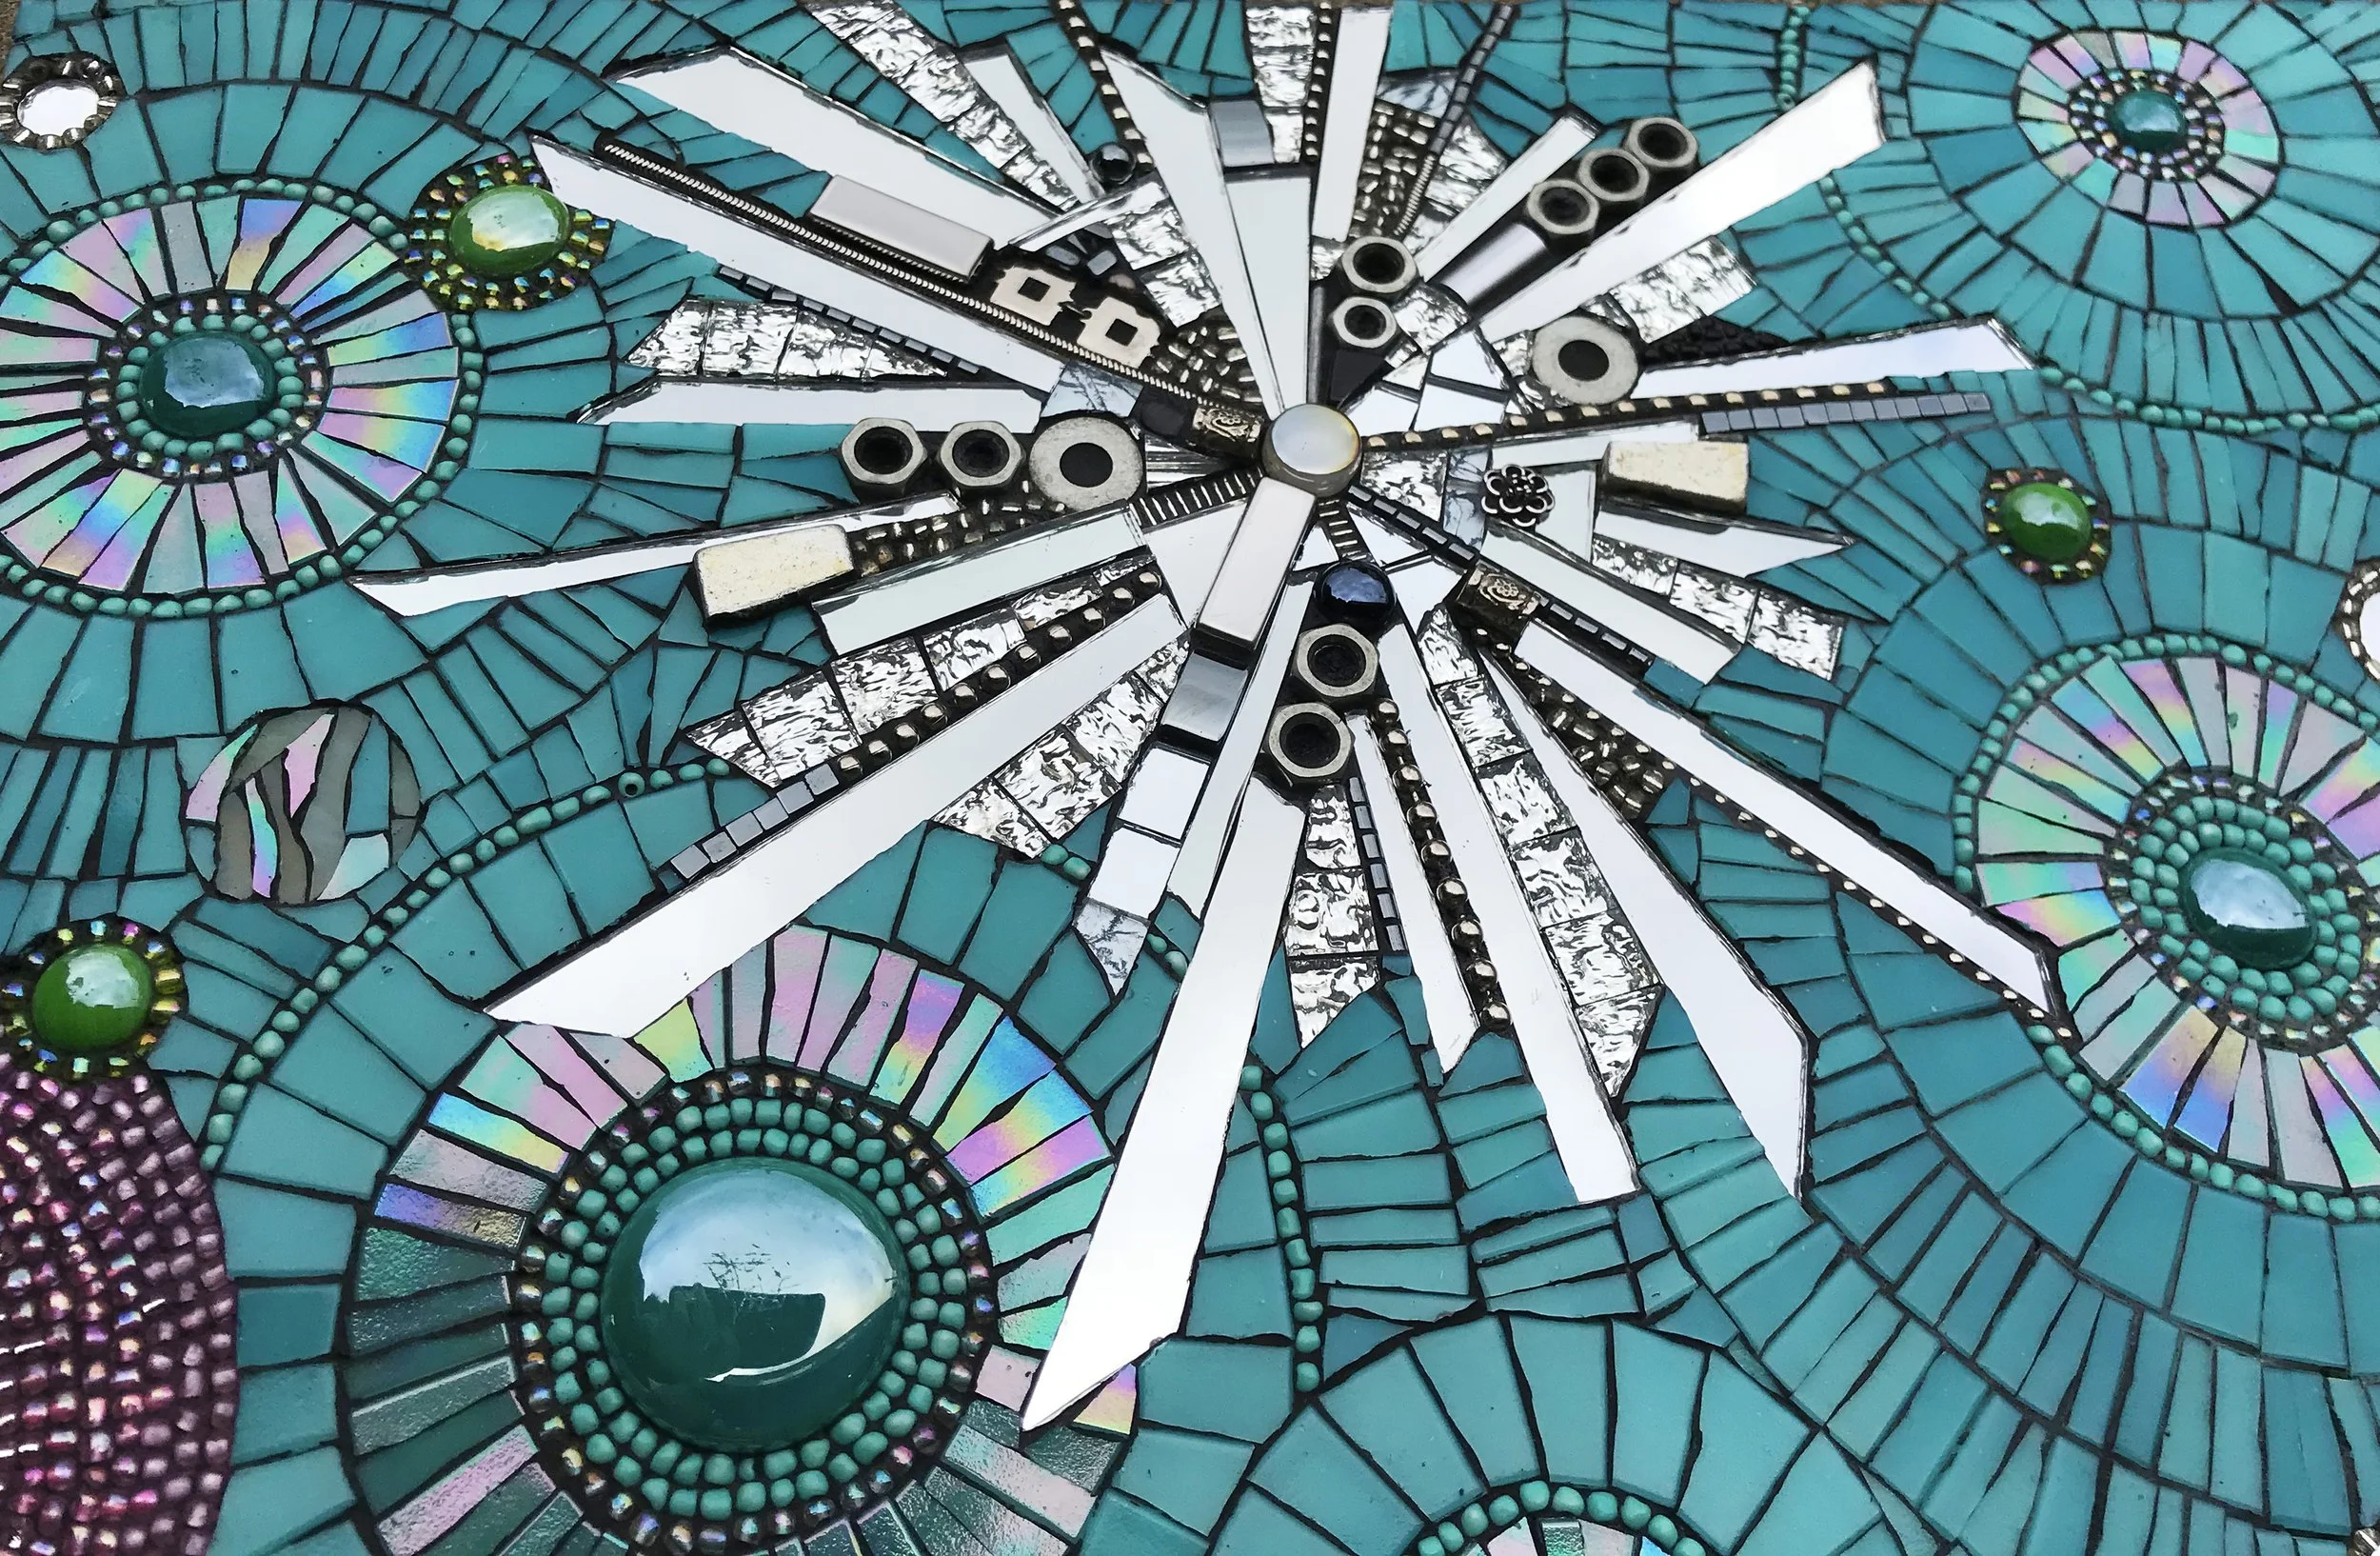
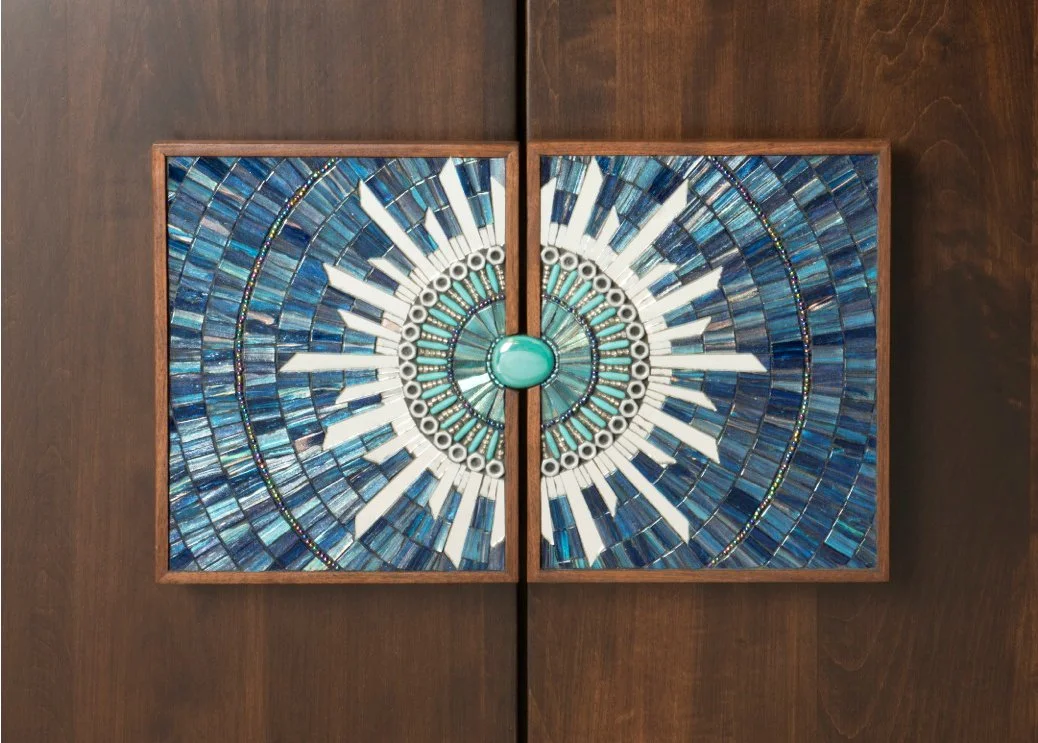
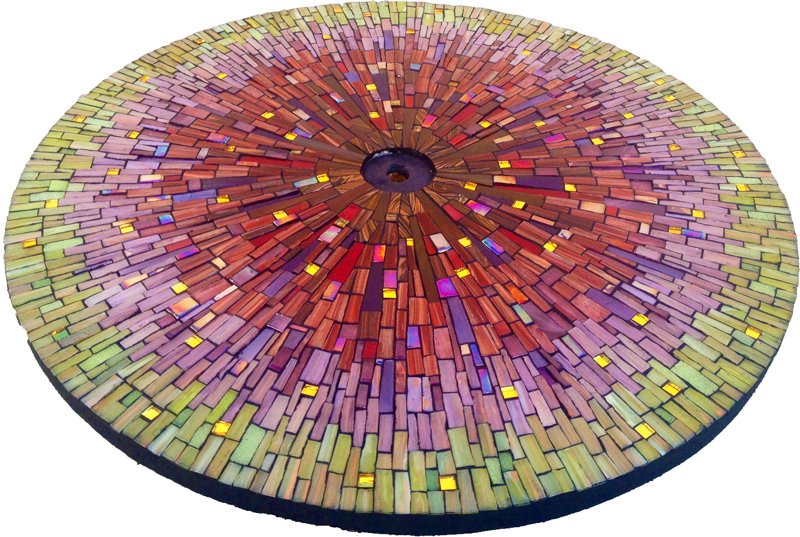
Copper I is the first mosaic in my series based on the allure of oxidized copper. This first video explores finding the right tessera for the mosaic and is the first in the series of six videos.

Video transcript for deaf or hard of hearing:

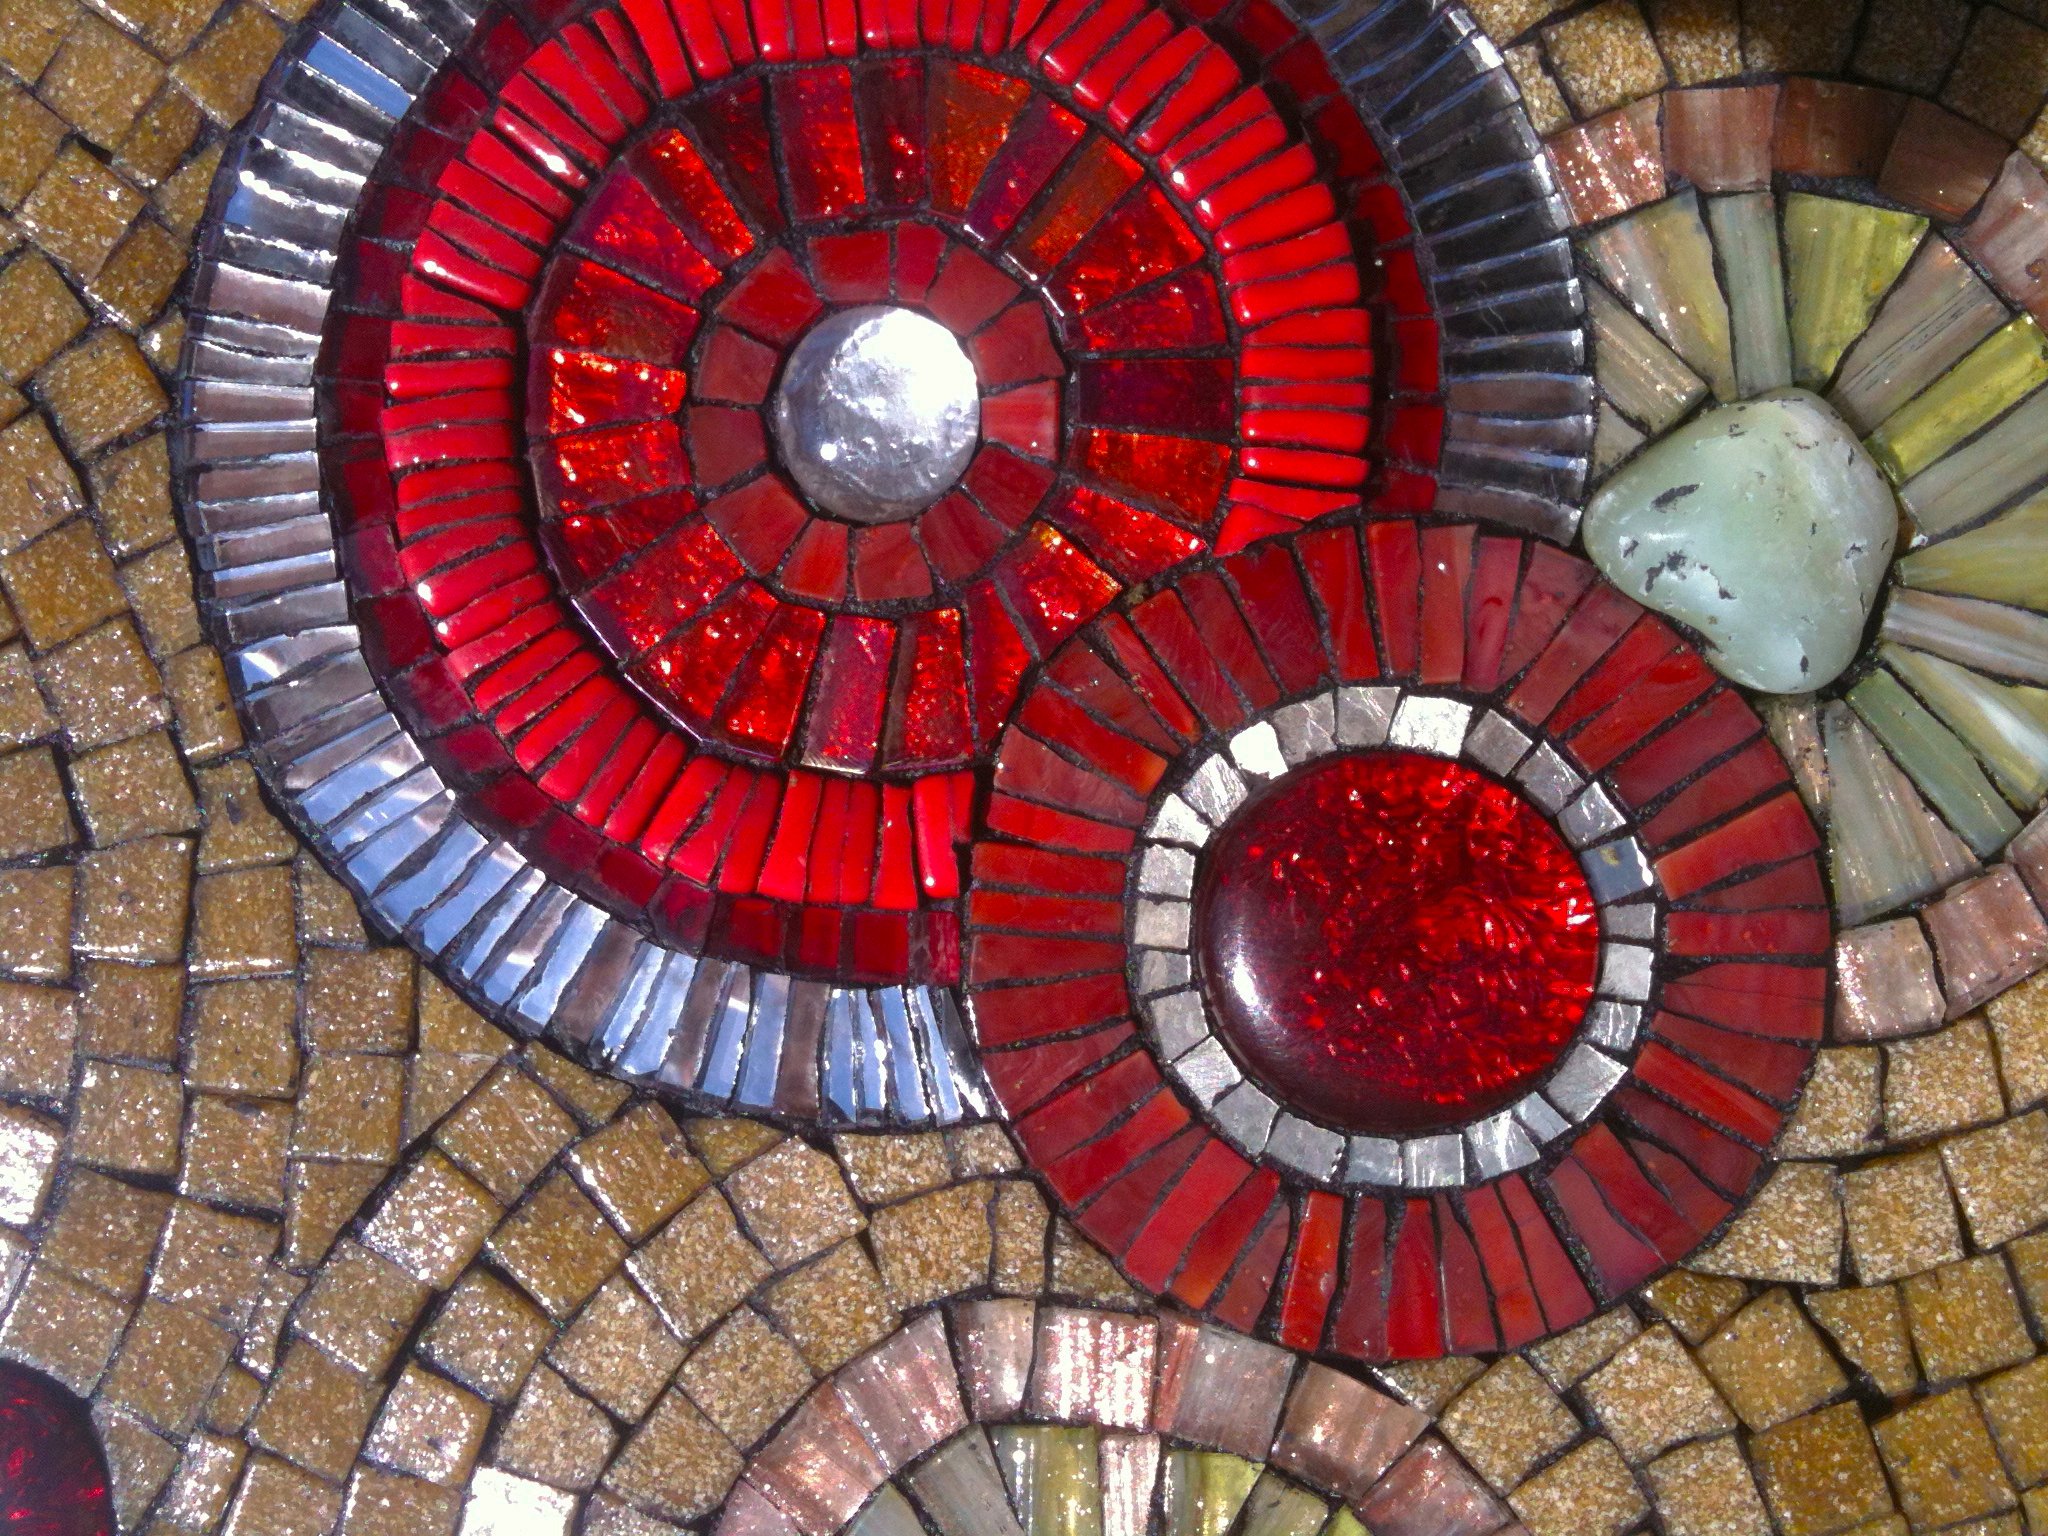
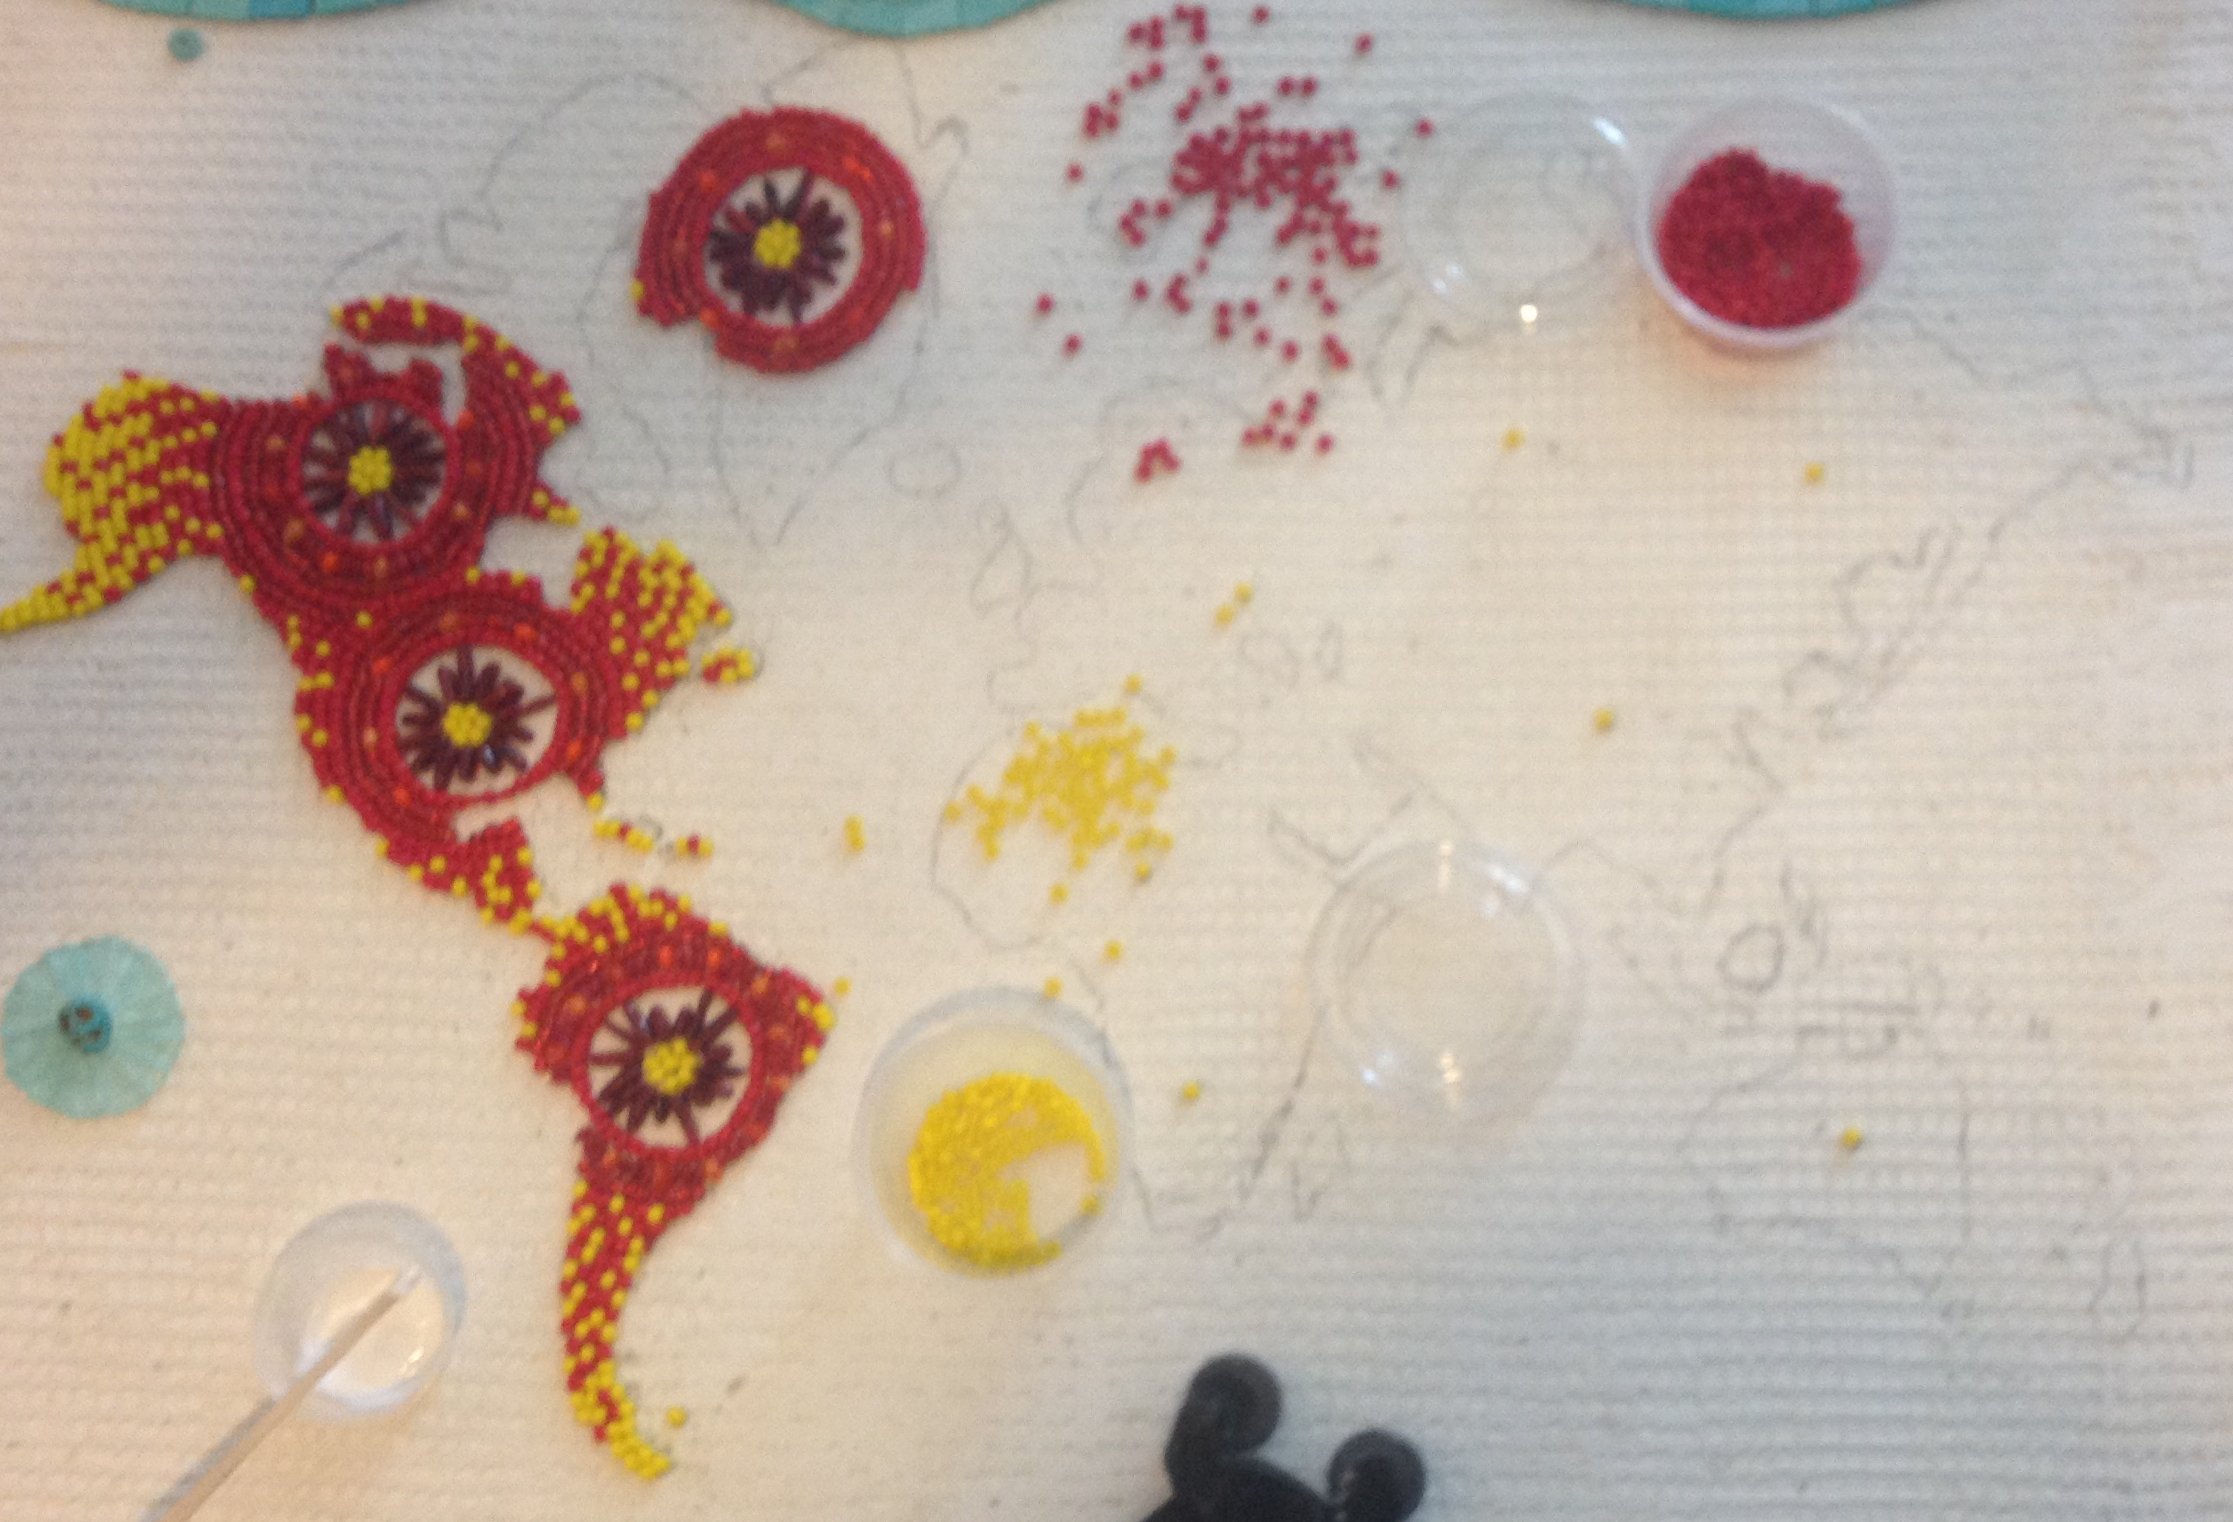
Hey everyone! So during these Corona times I’m waiting for some glass to be delivered from Italy so I can finish up a project that will go to Florida; it’s a large driveway mosaic. And in the meantime I’ve been working on some mosaic gifts for my family, but they are gifts so I can’t show those to you. So what I though I’d show you today is, um, I am starting a new mosaic, a personal project, um, that is based on the idea of copper, oxidized copper. So I’m going to be picking out materials and I though I would show you some of the fun supplies I’m going to be working with and how I go about selecting them.

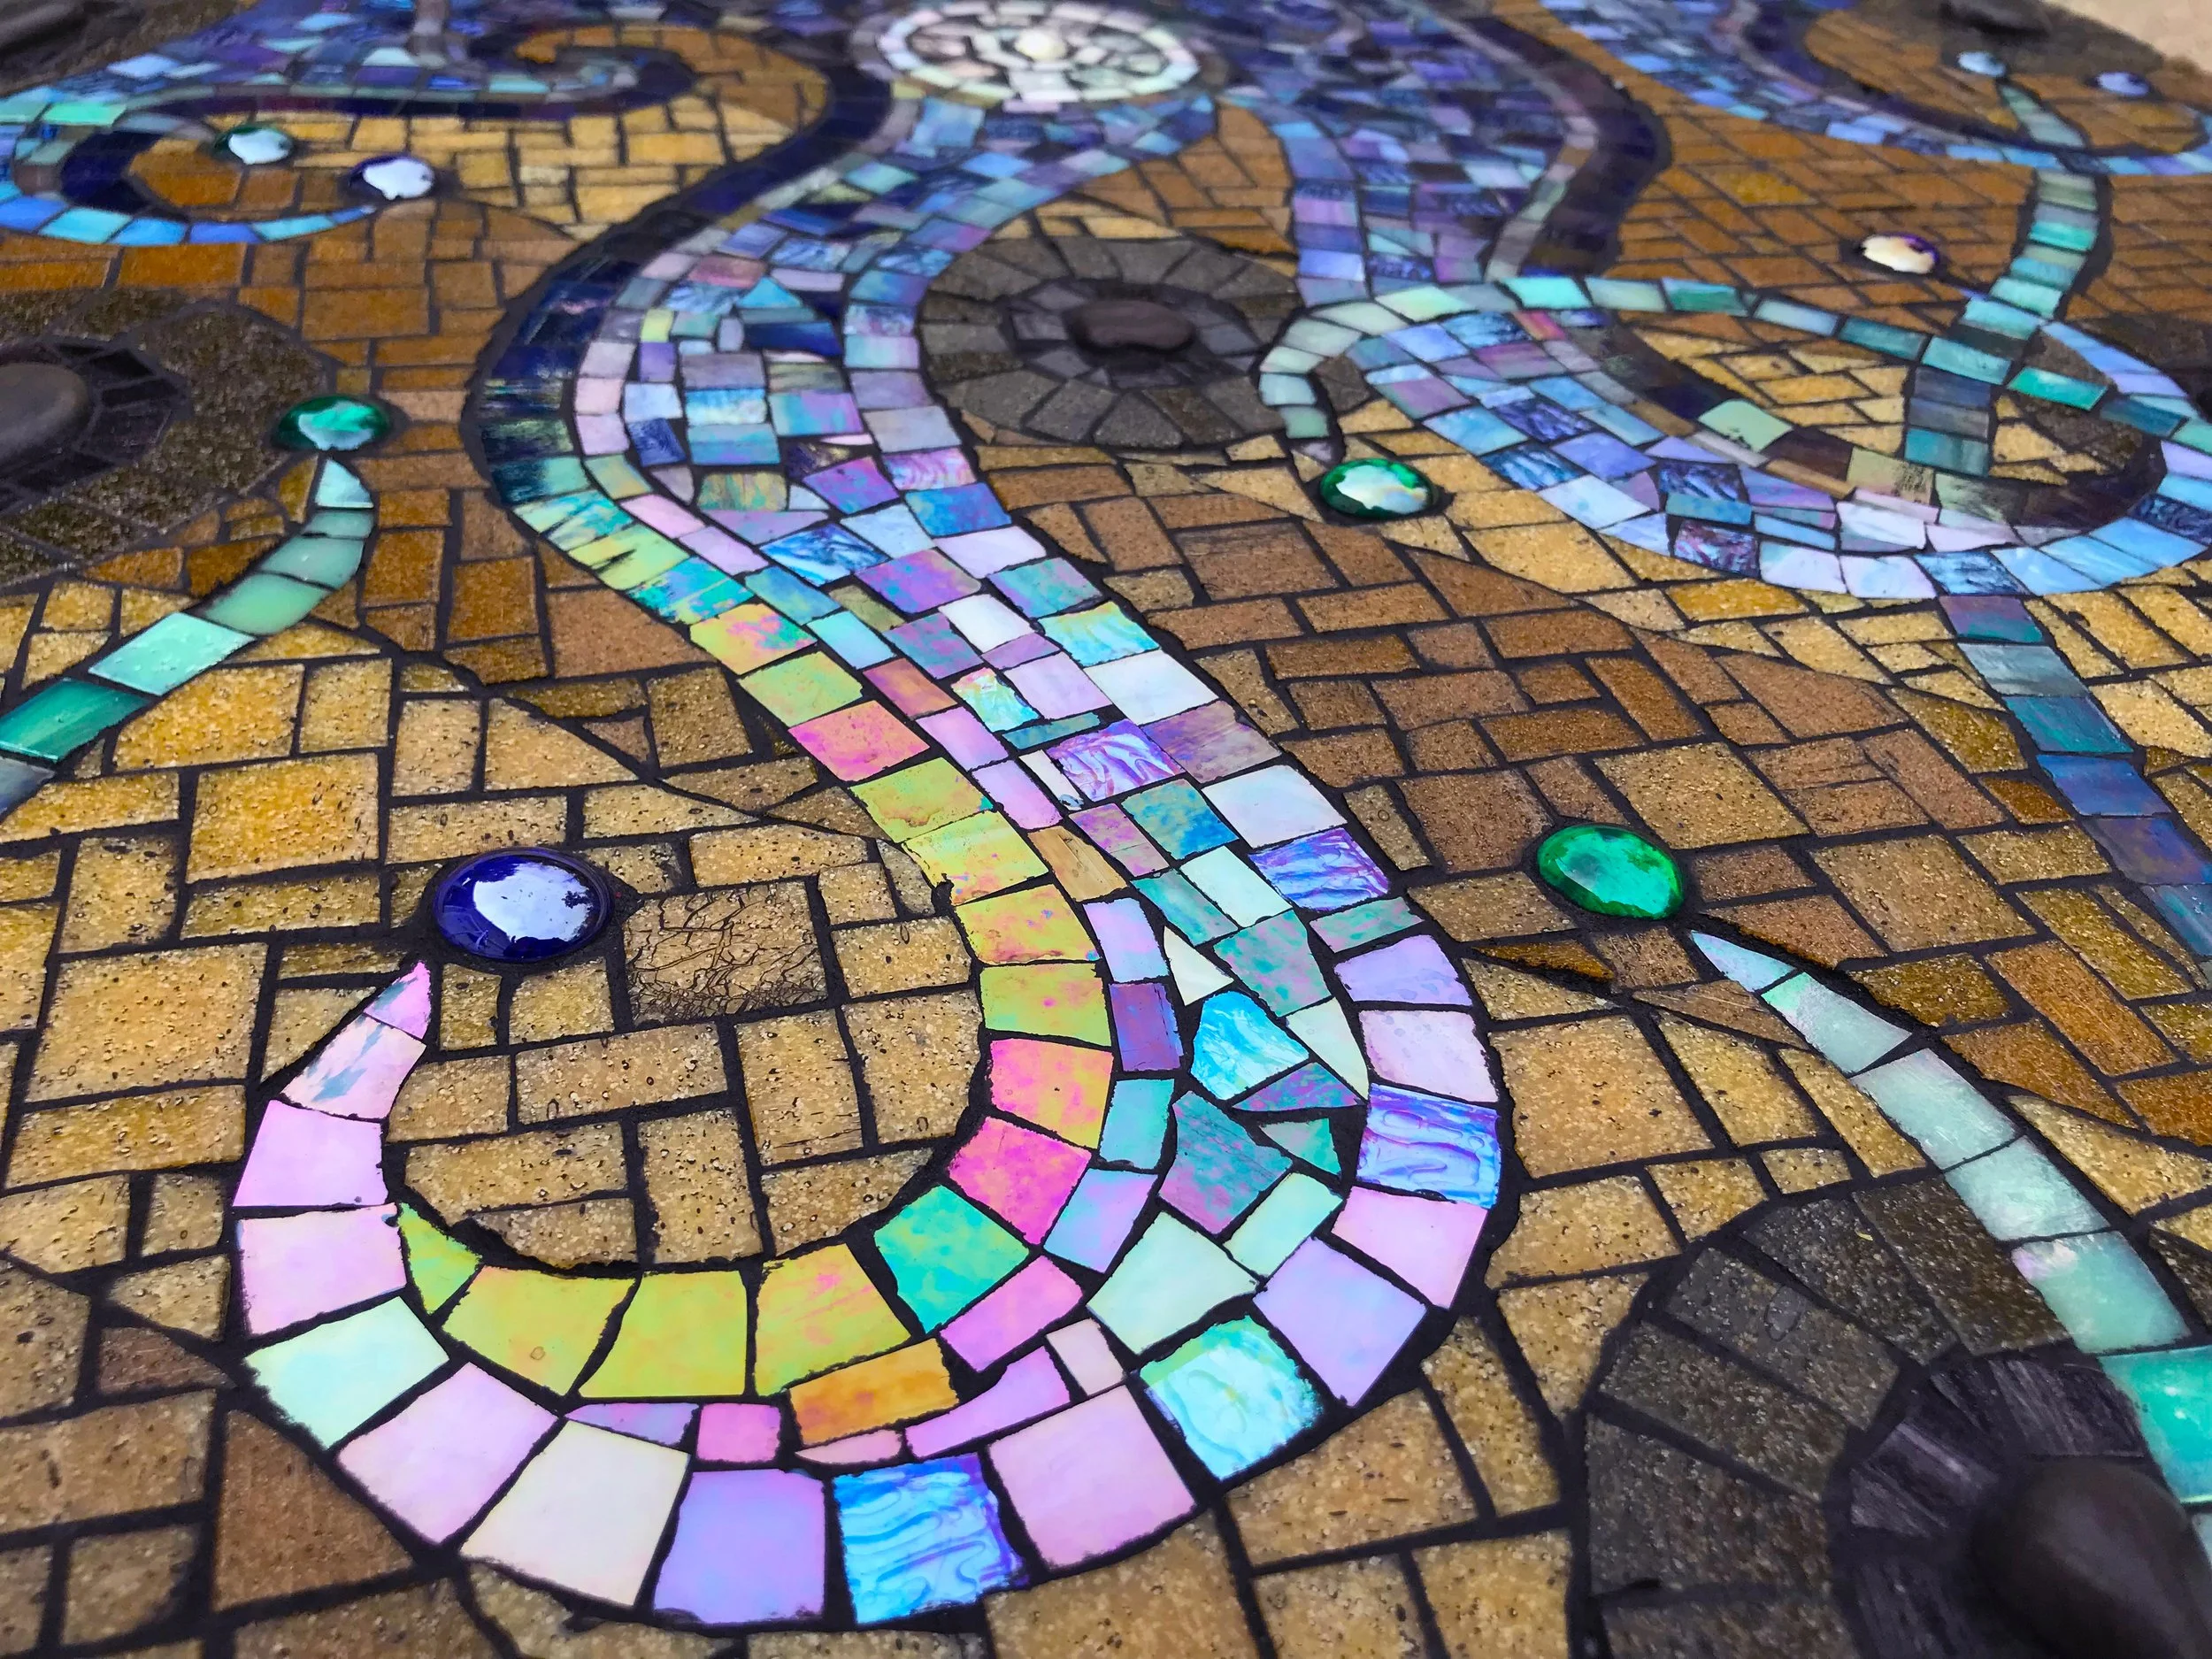
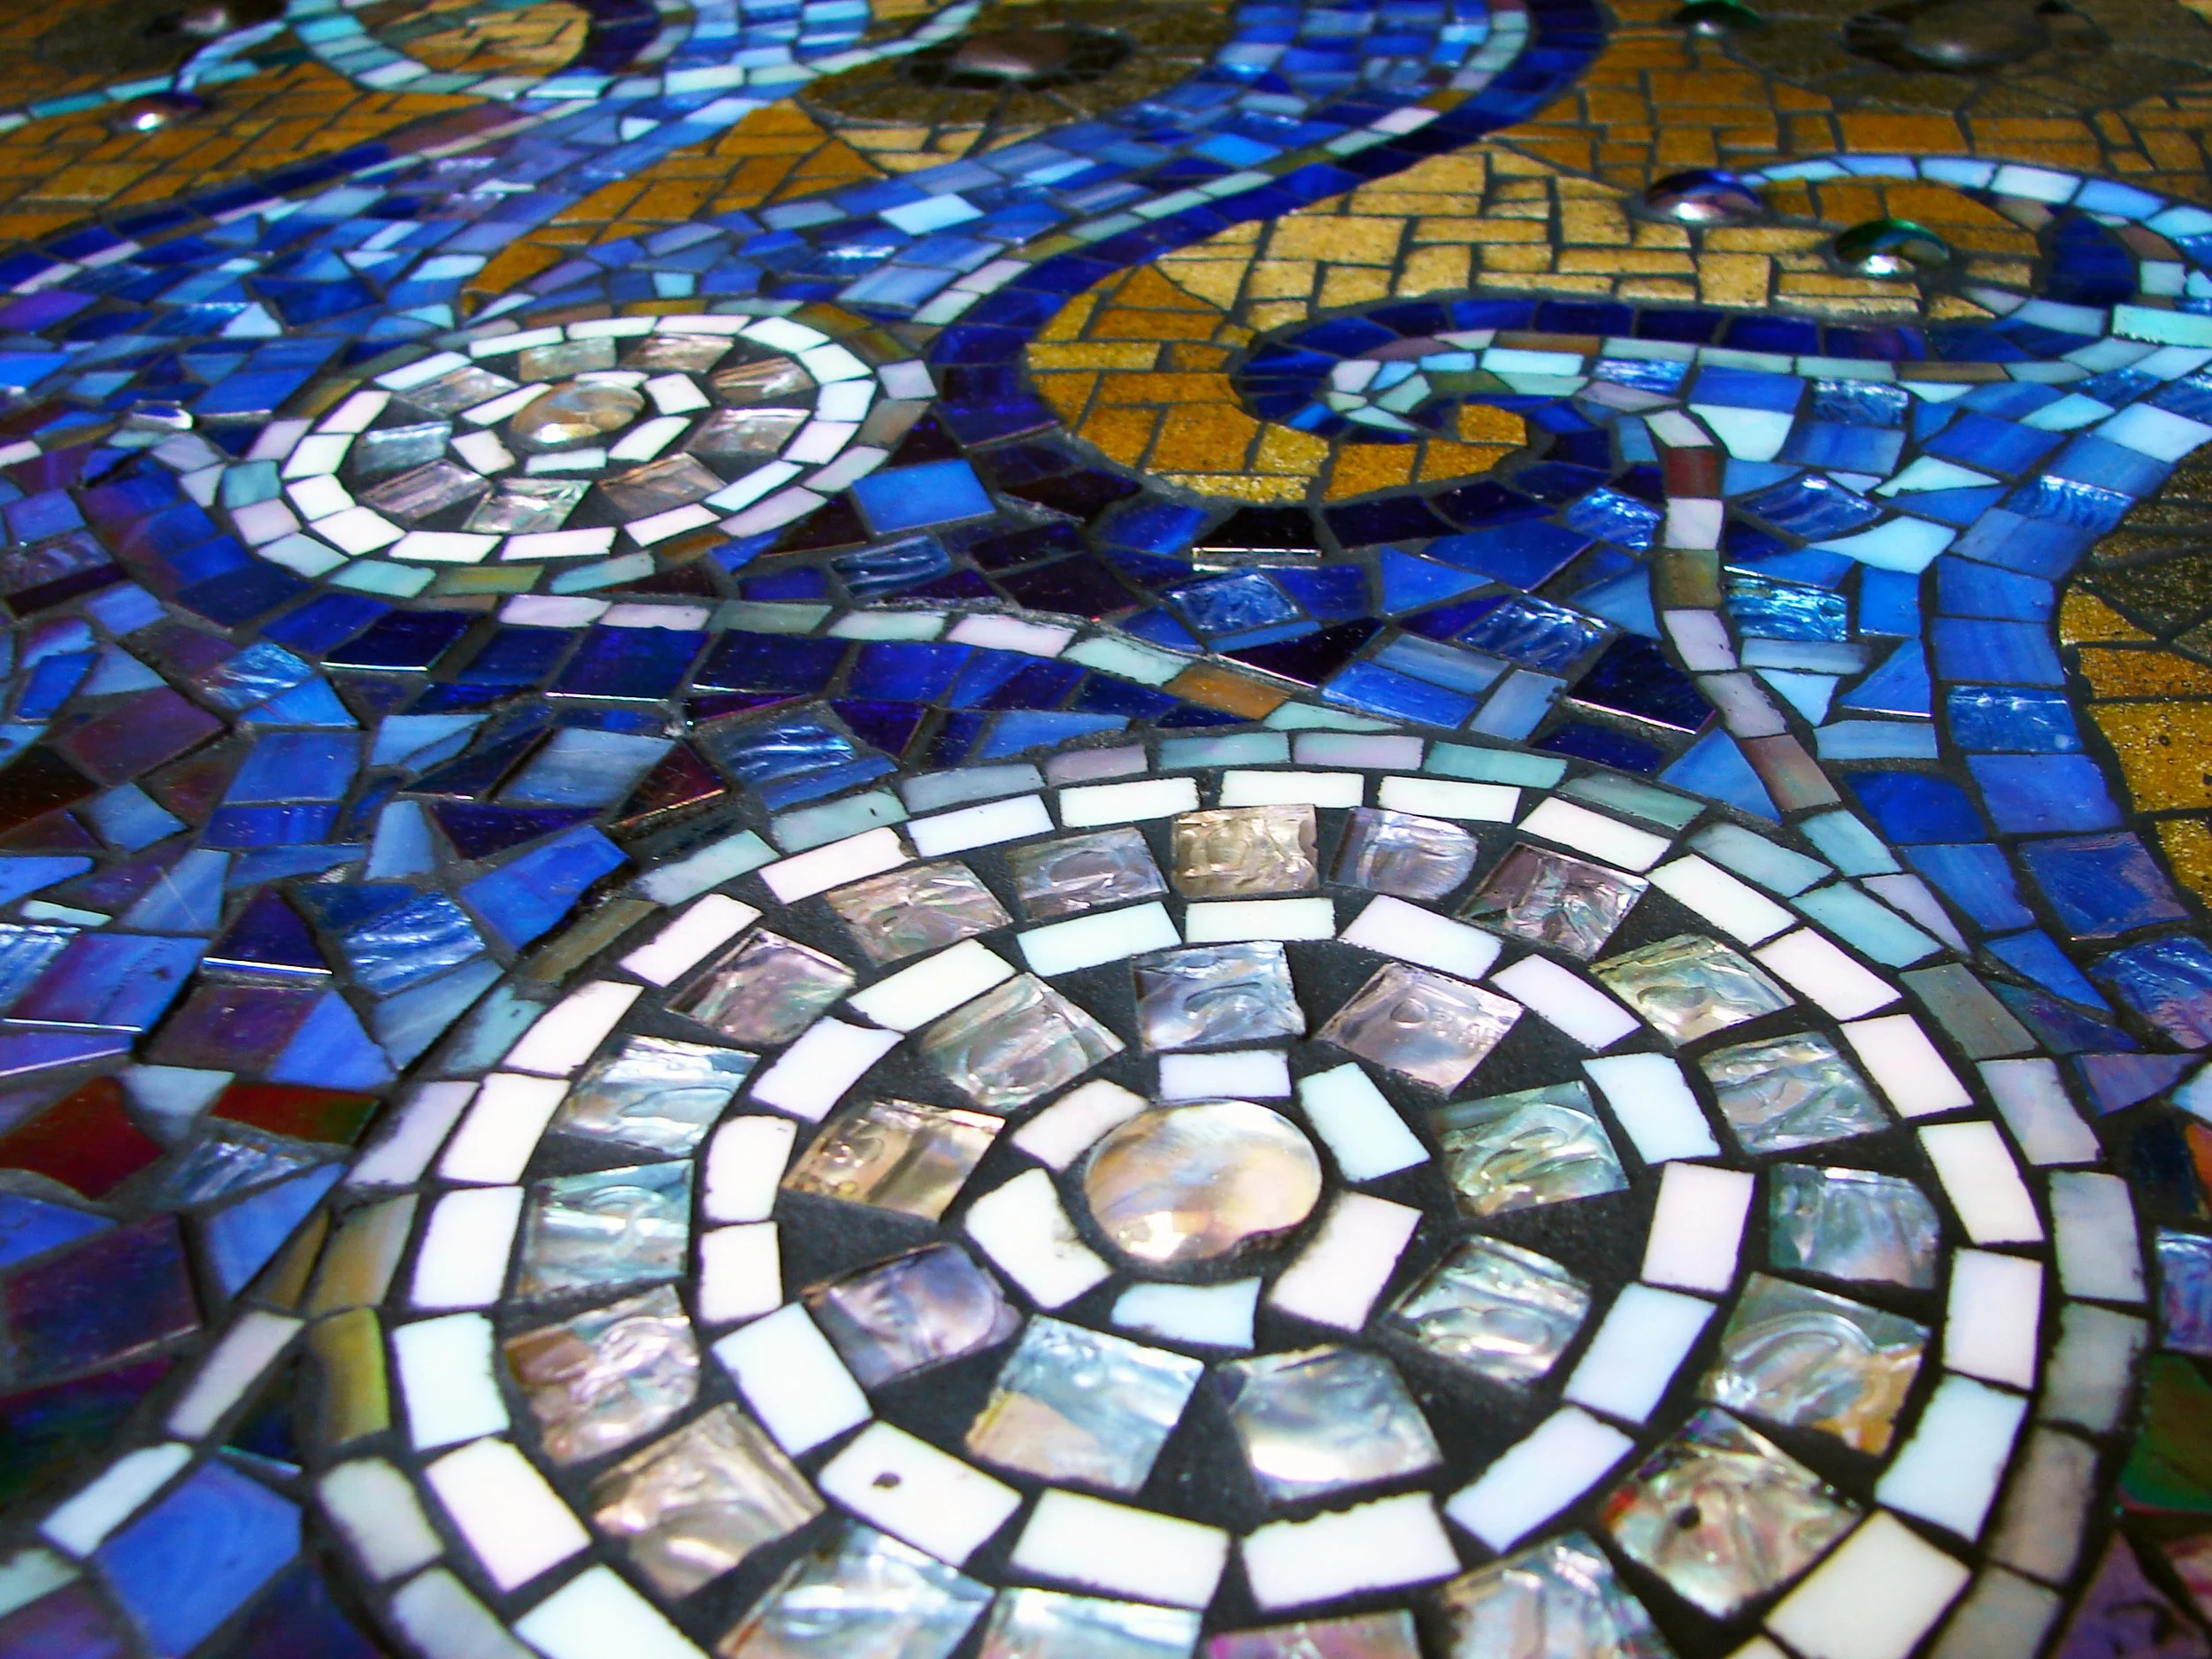
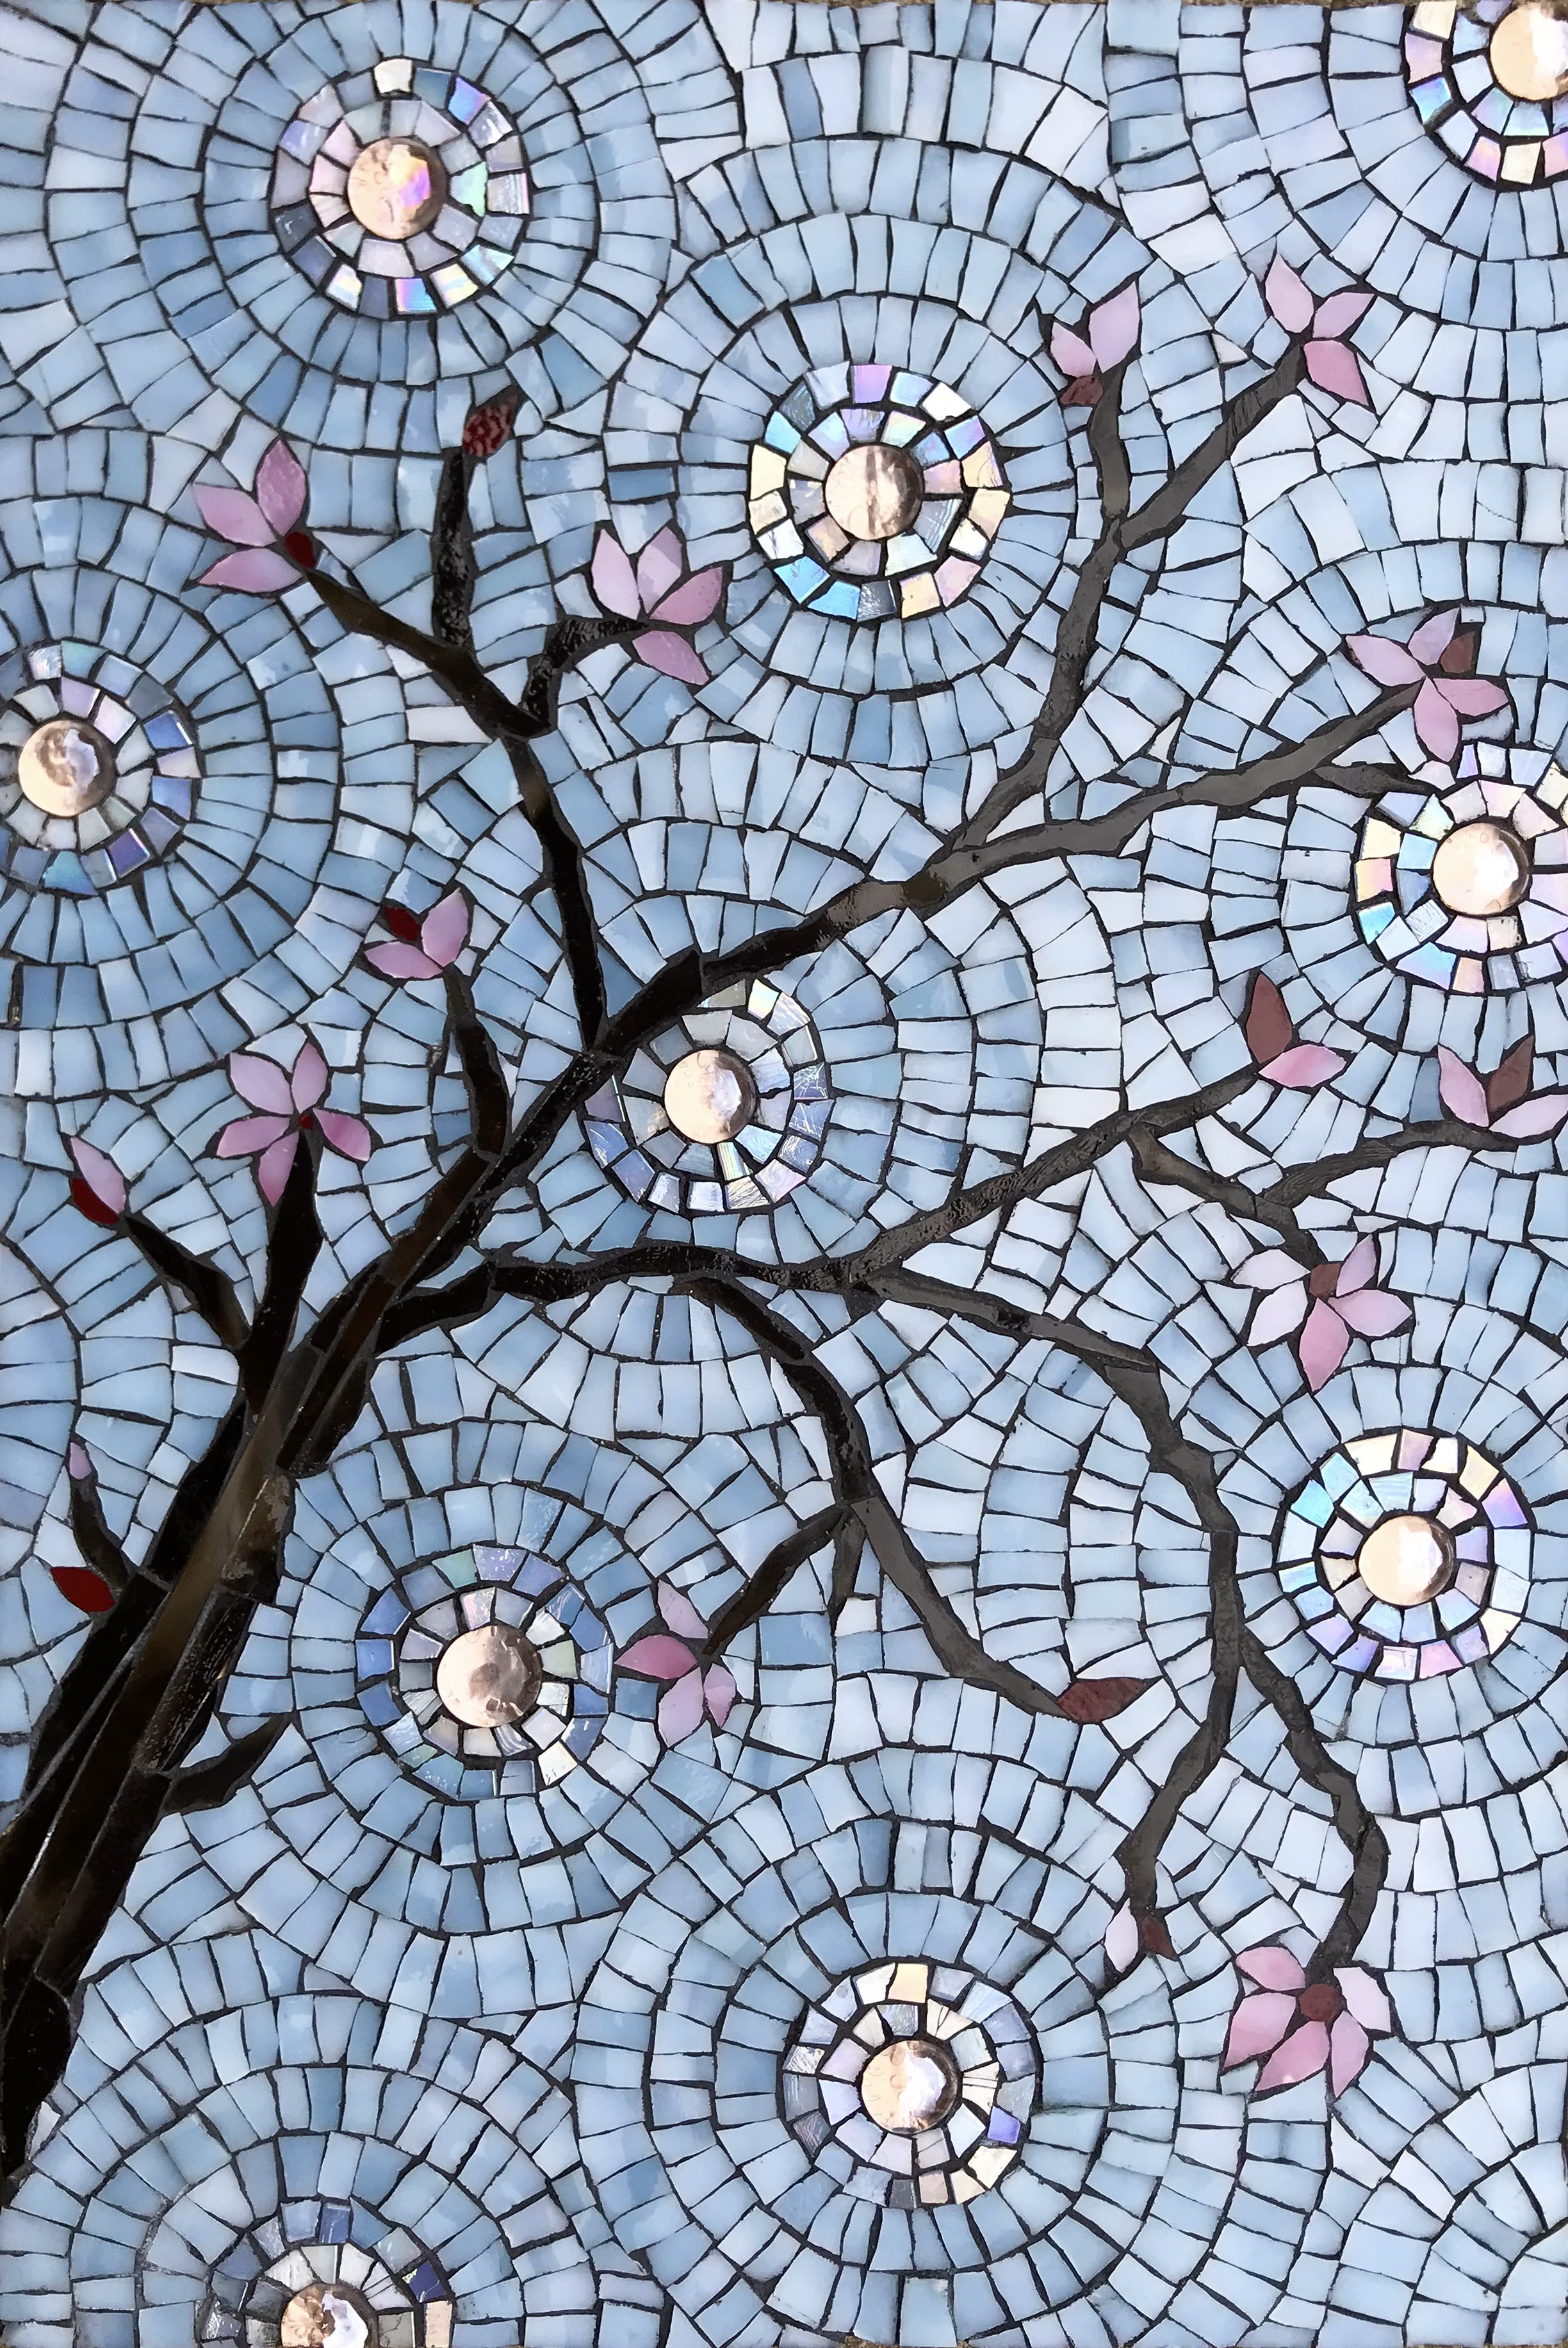
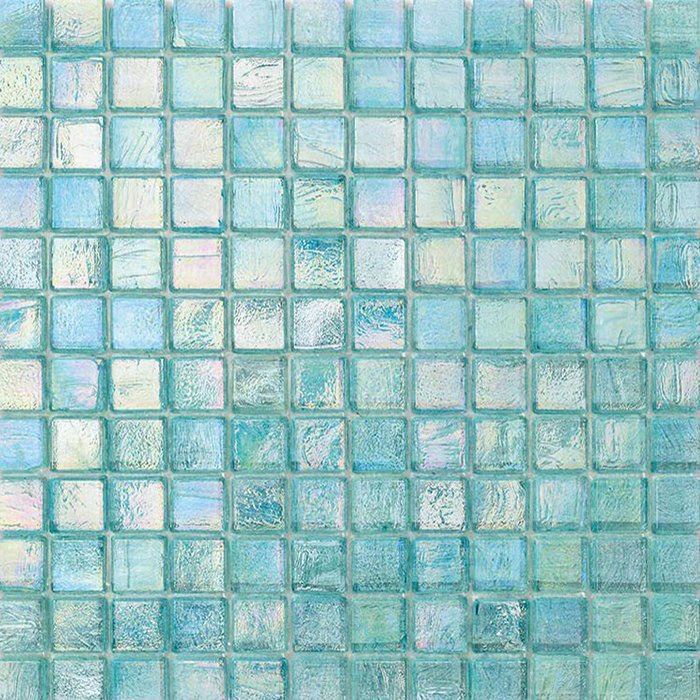
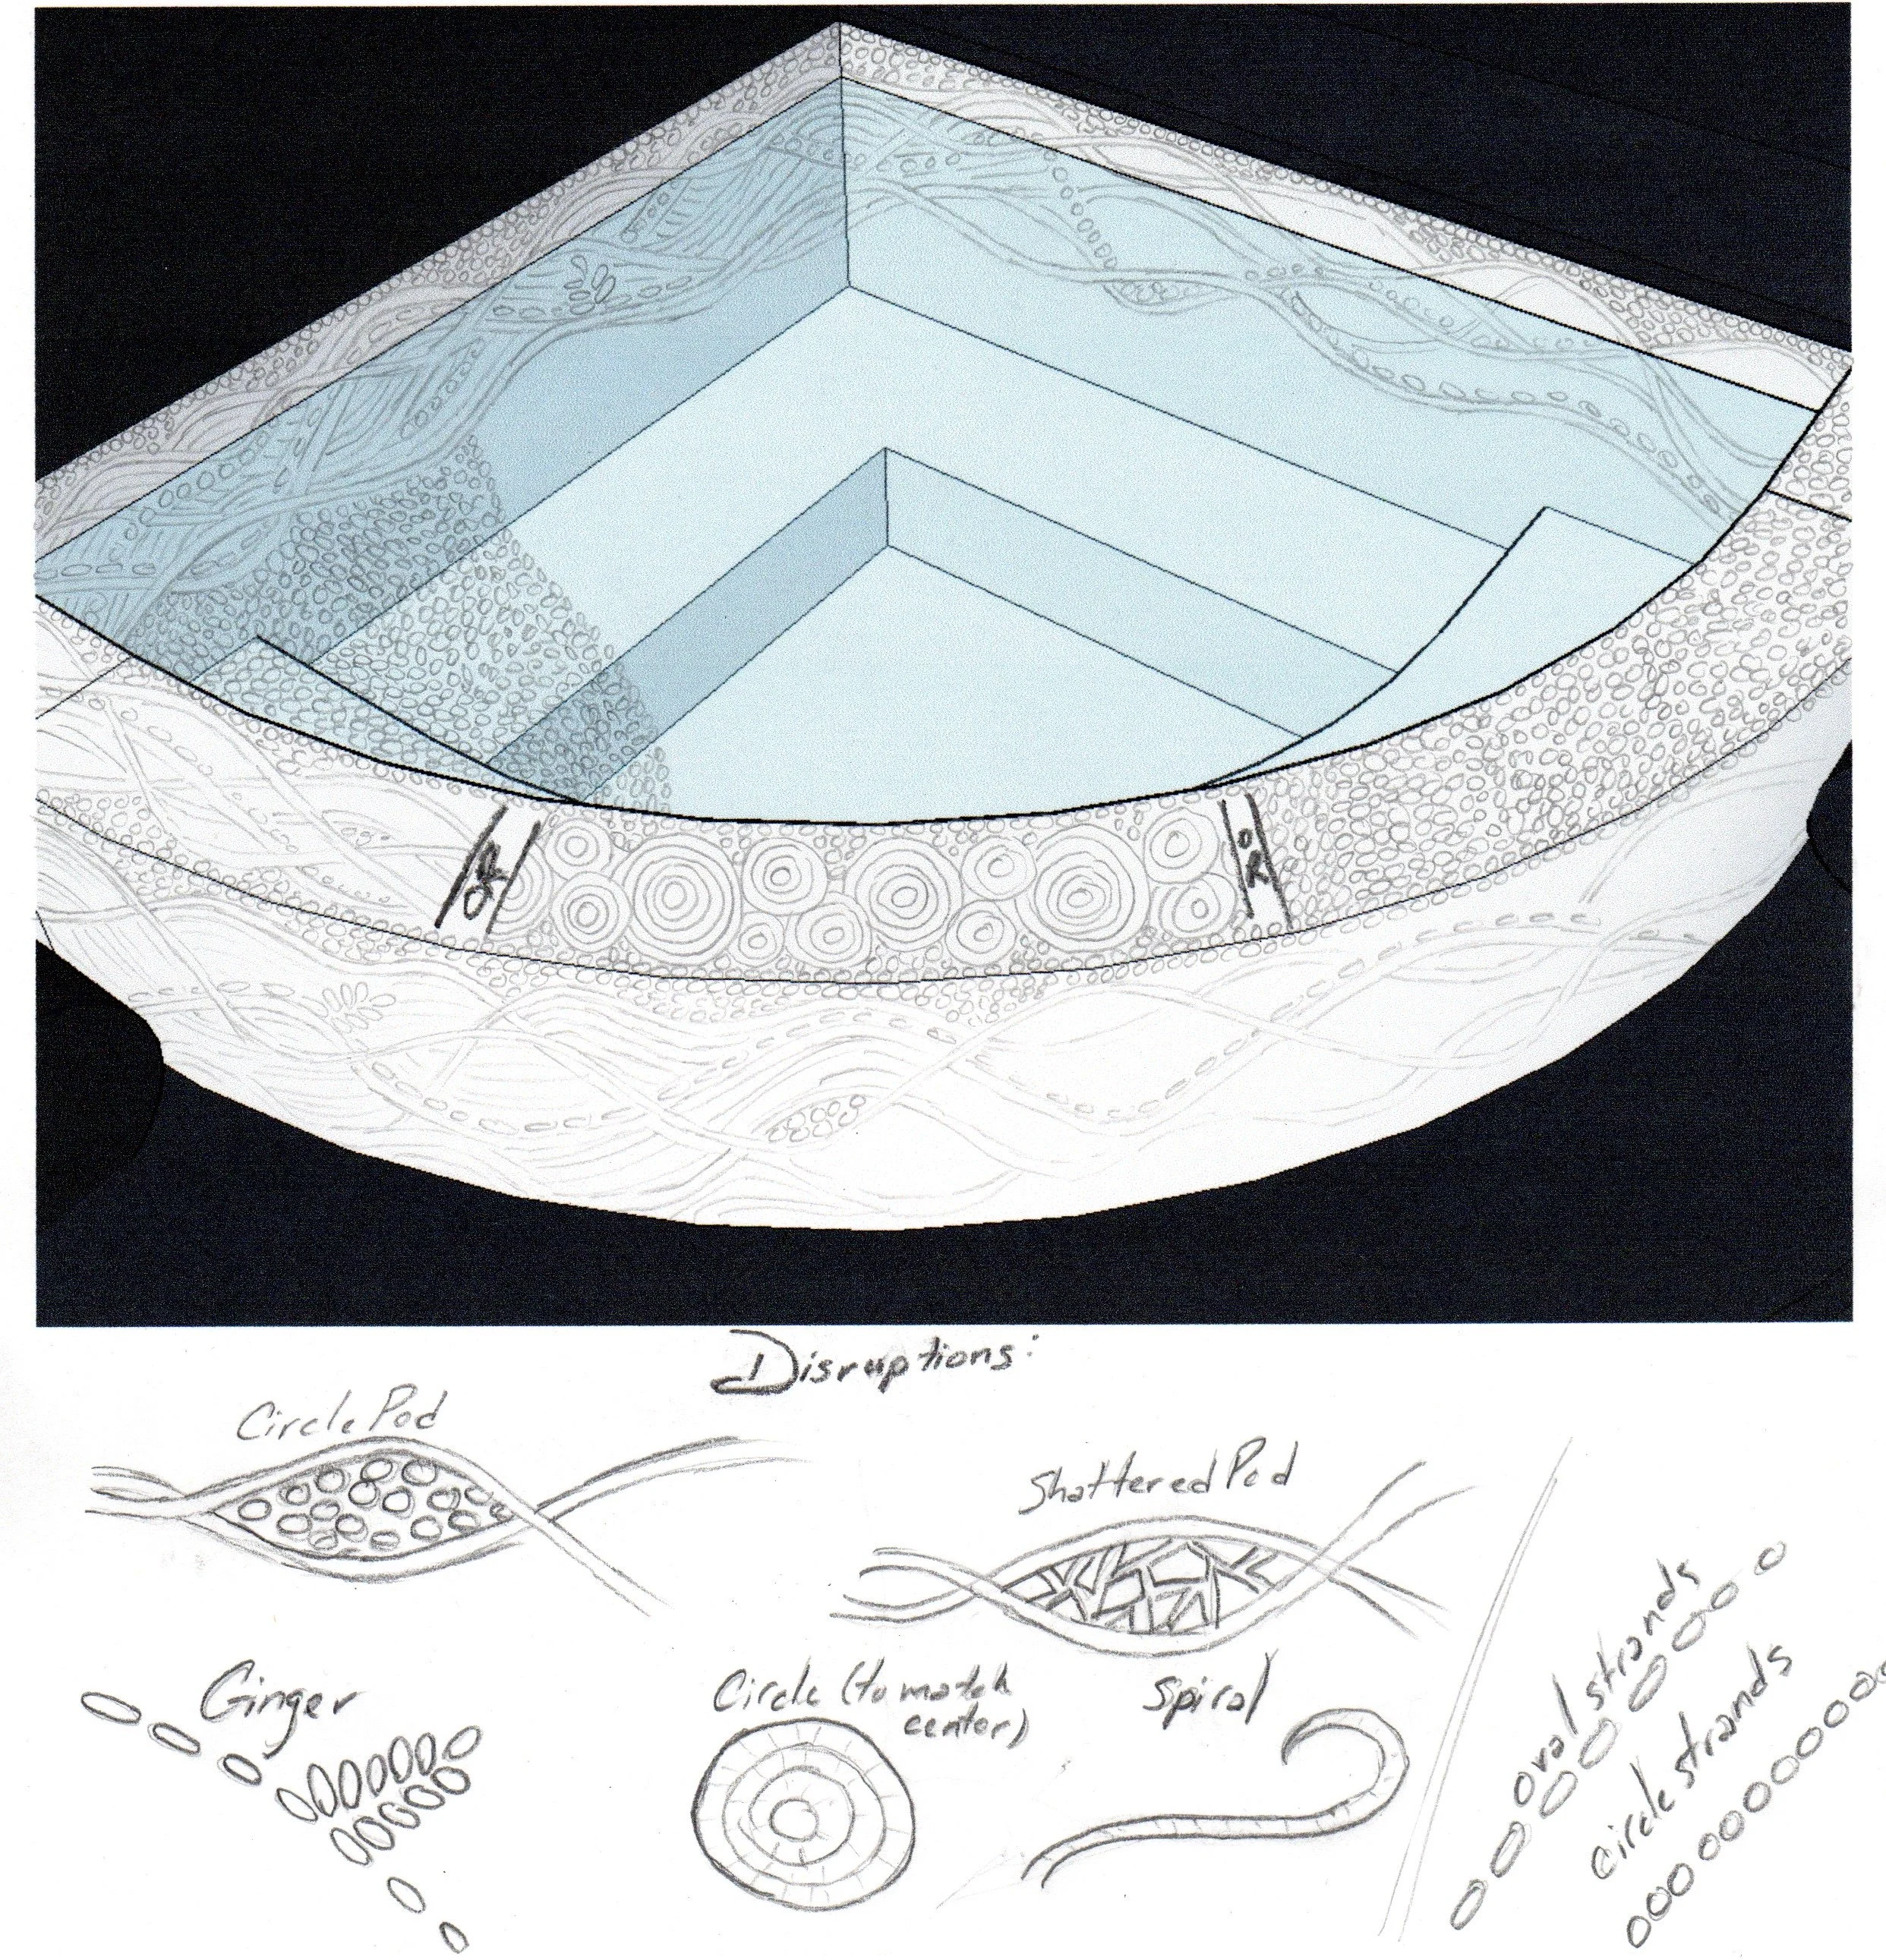
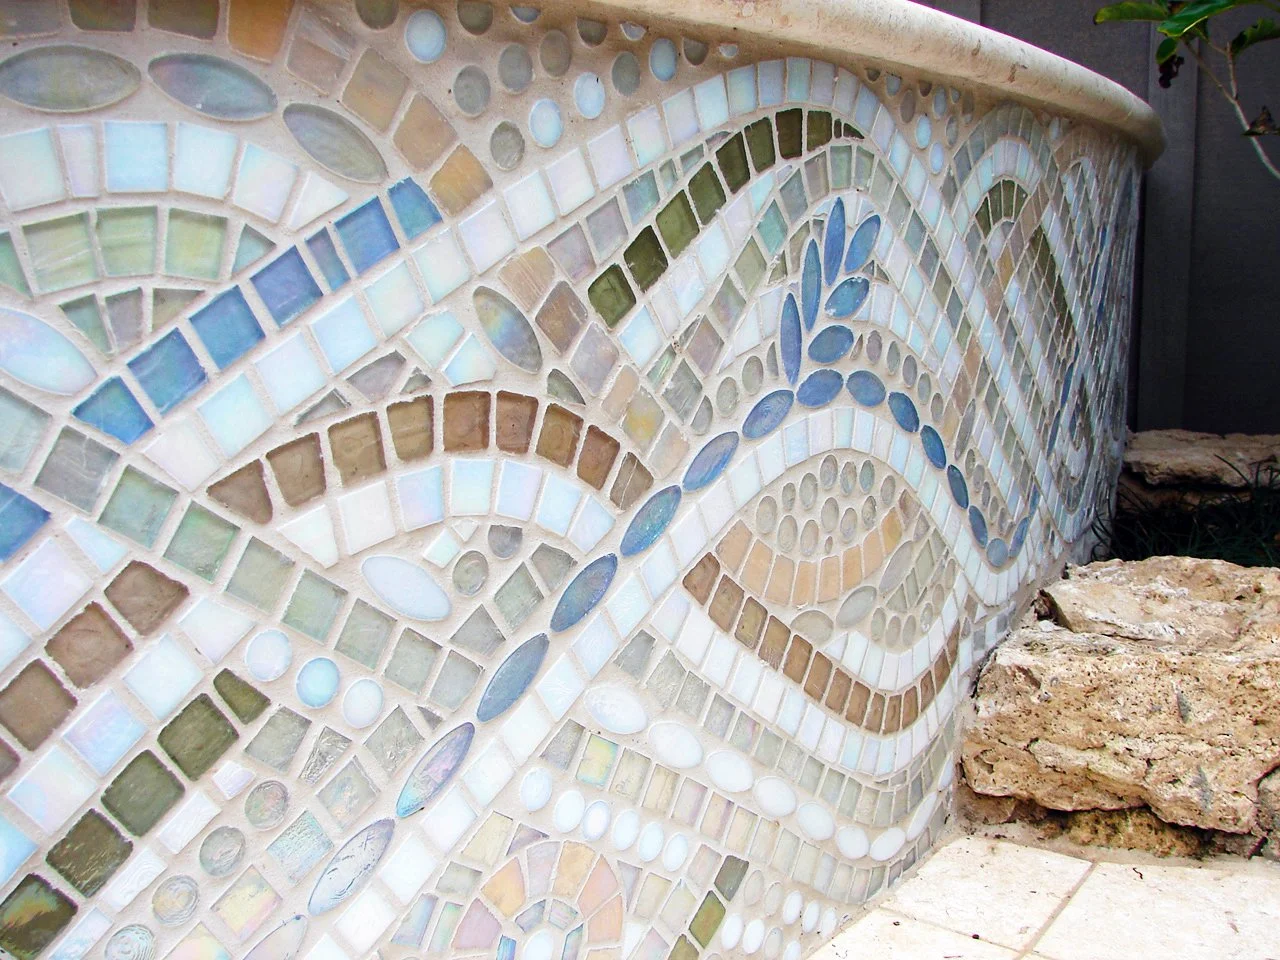
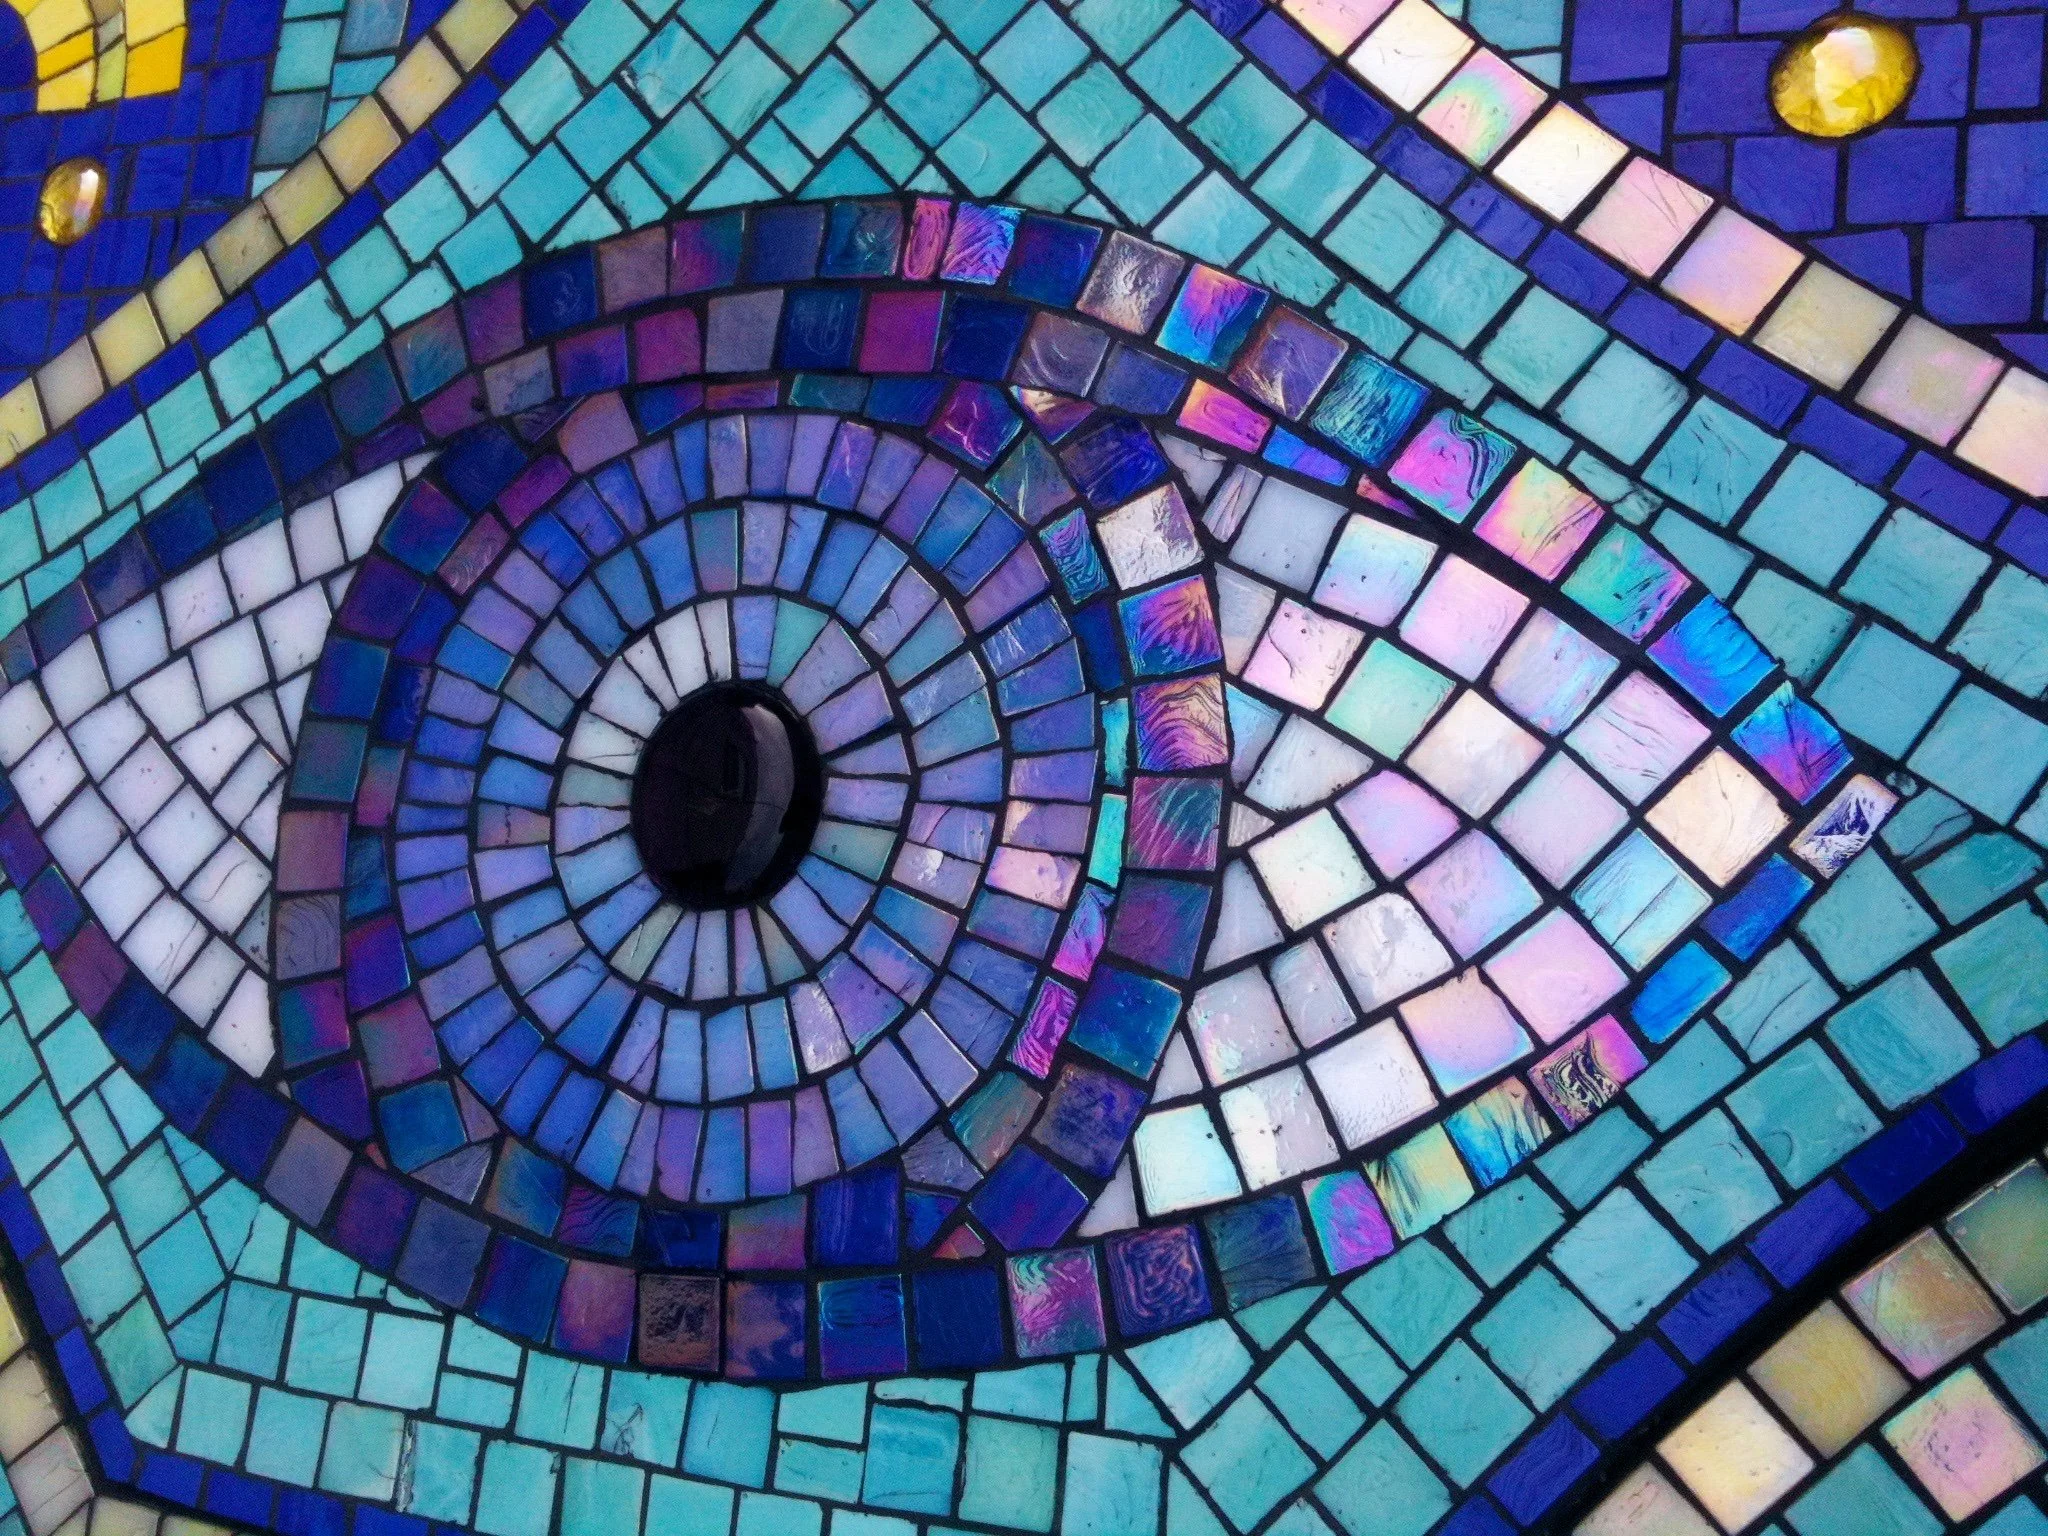
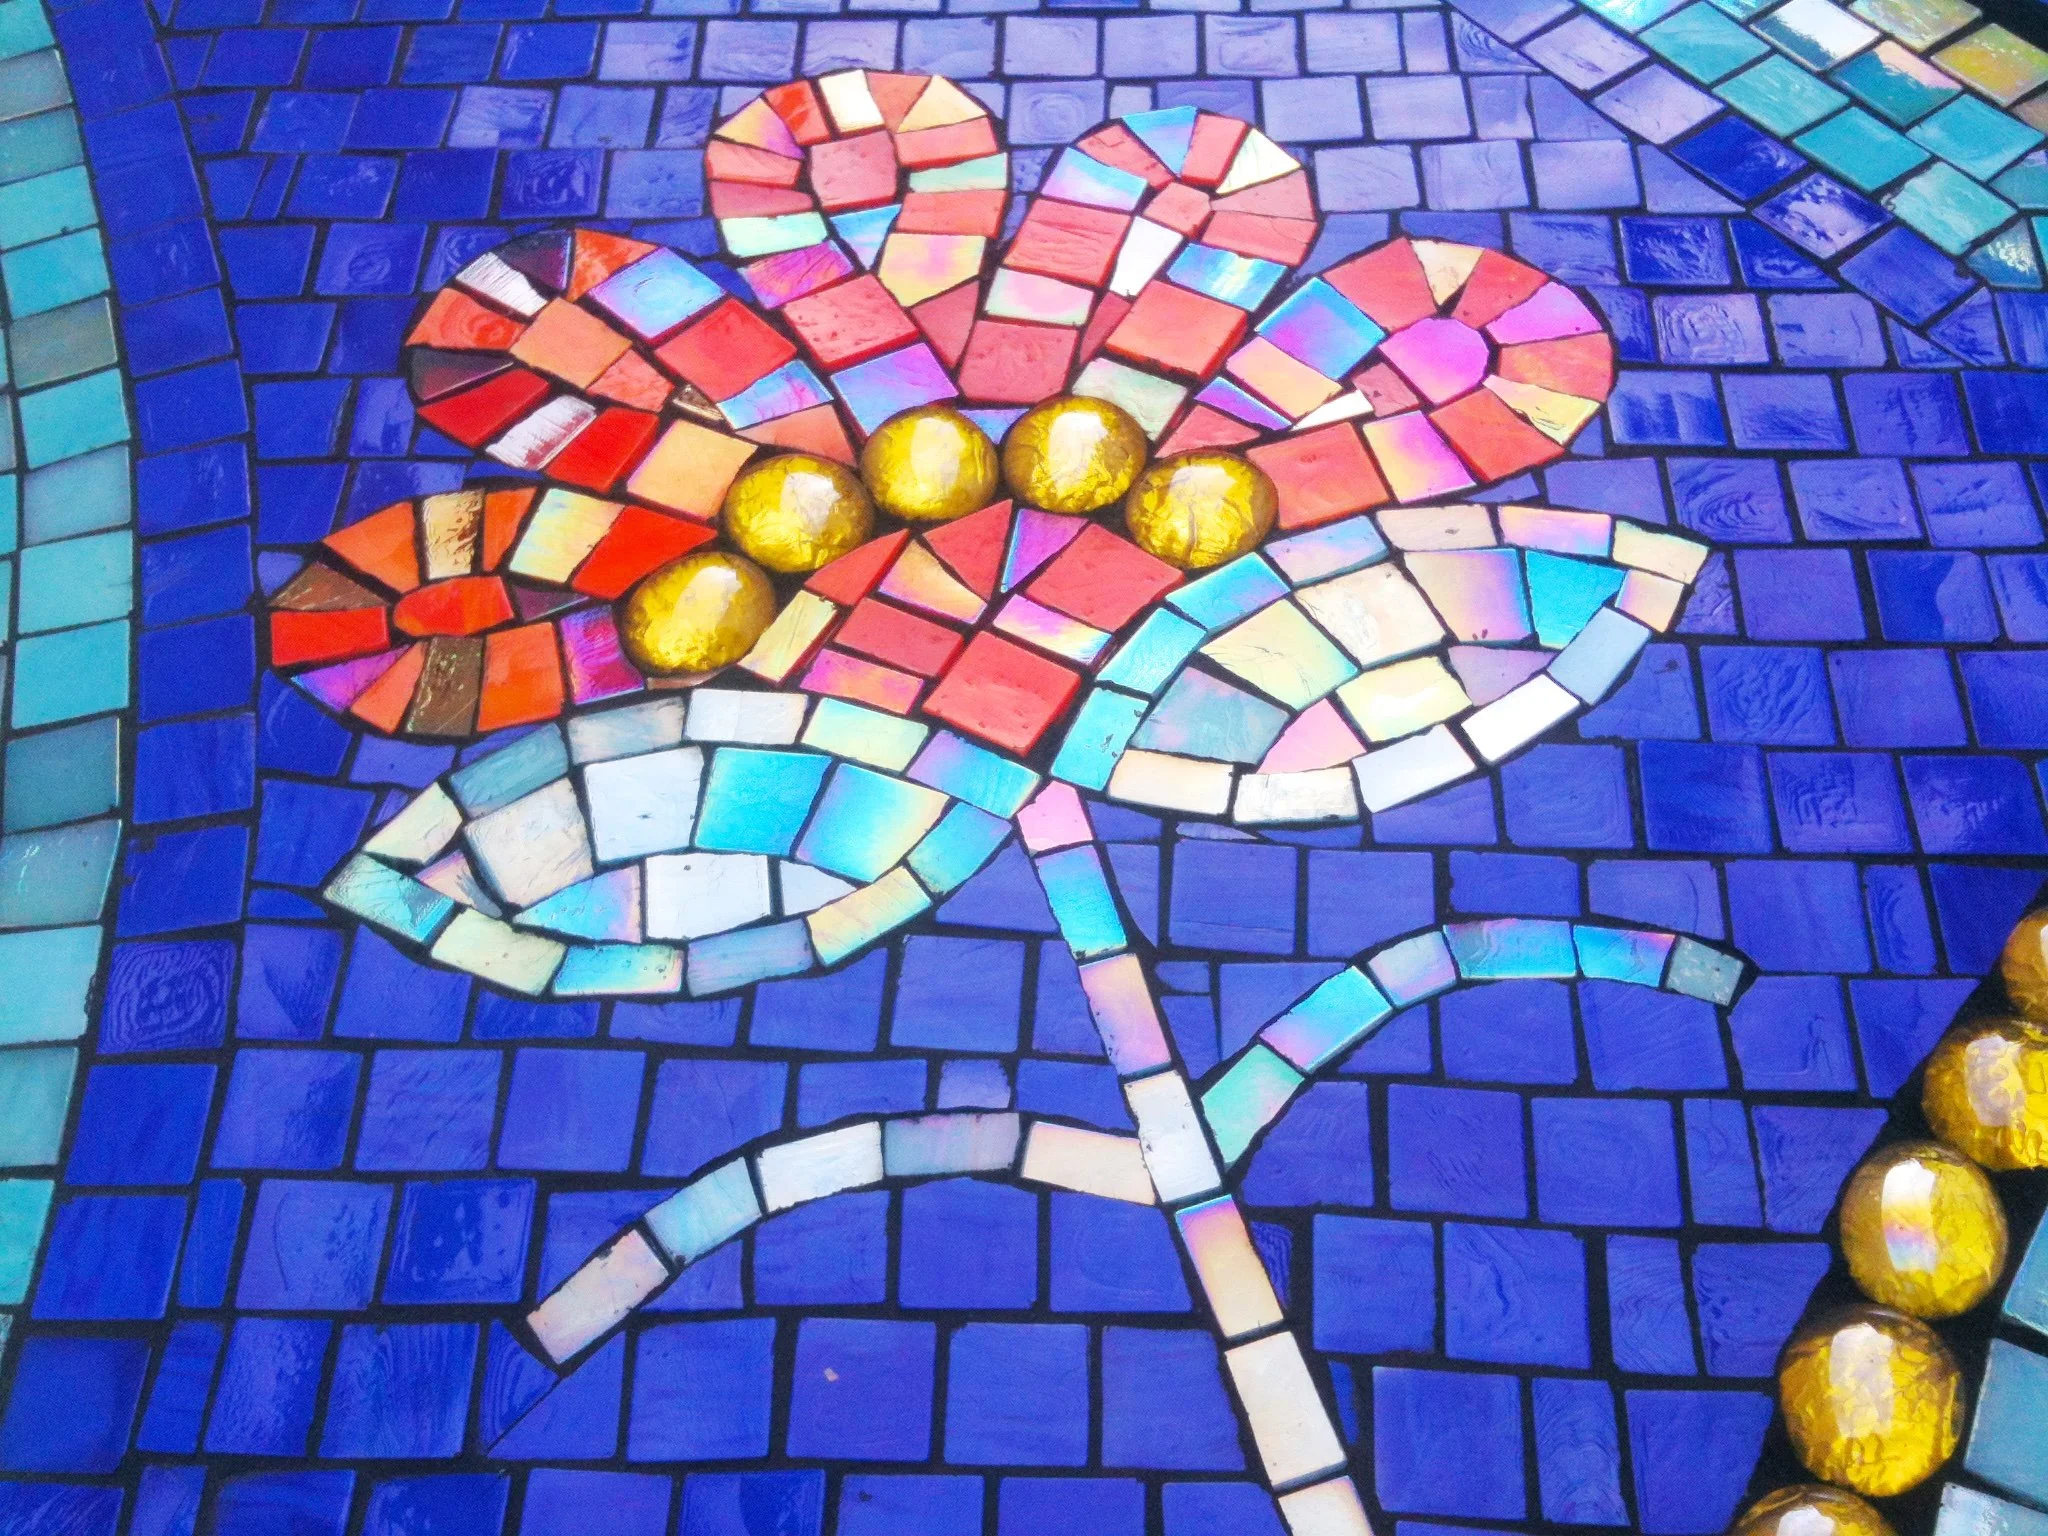
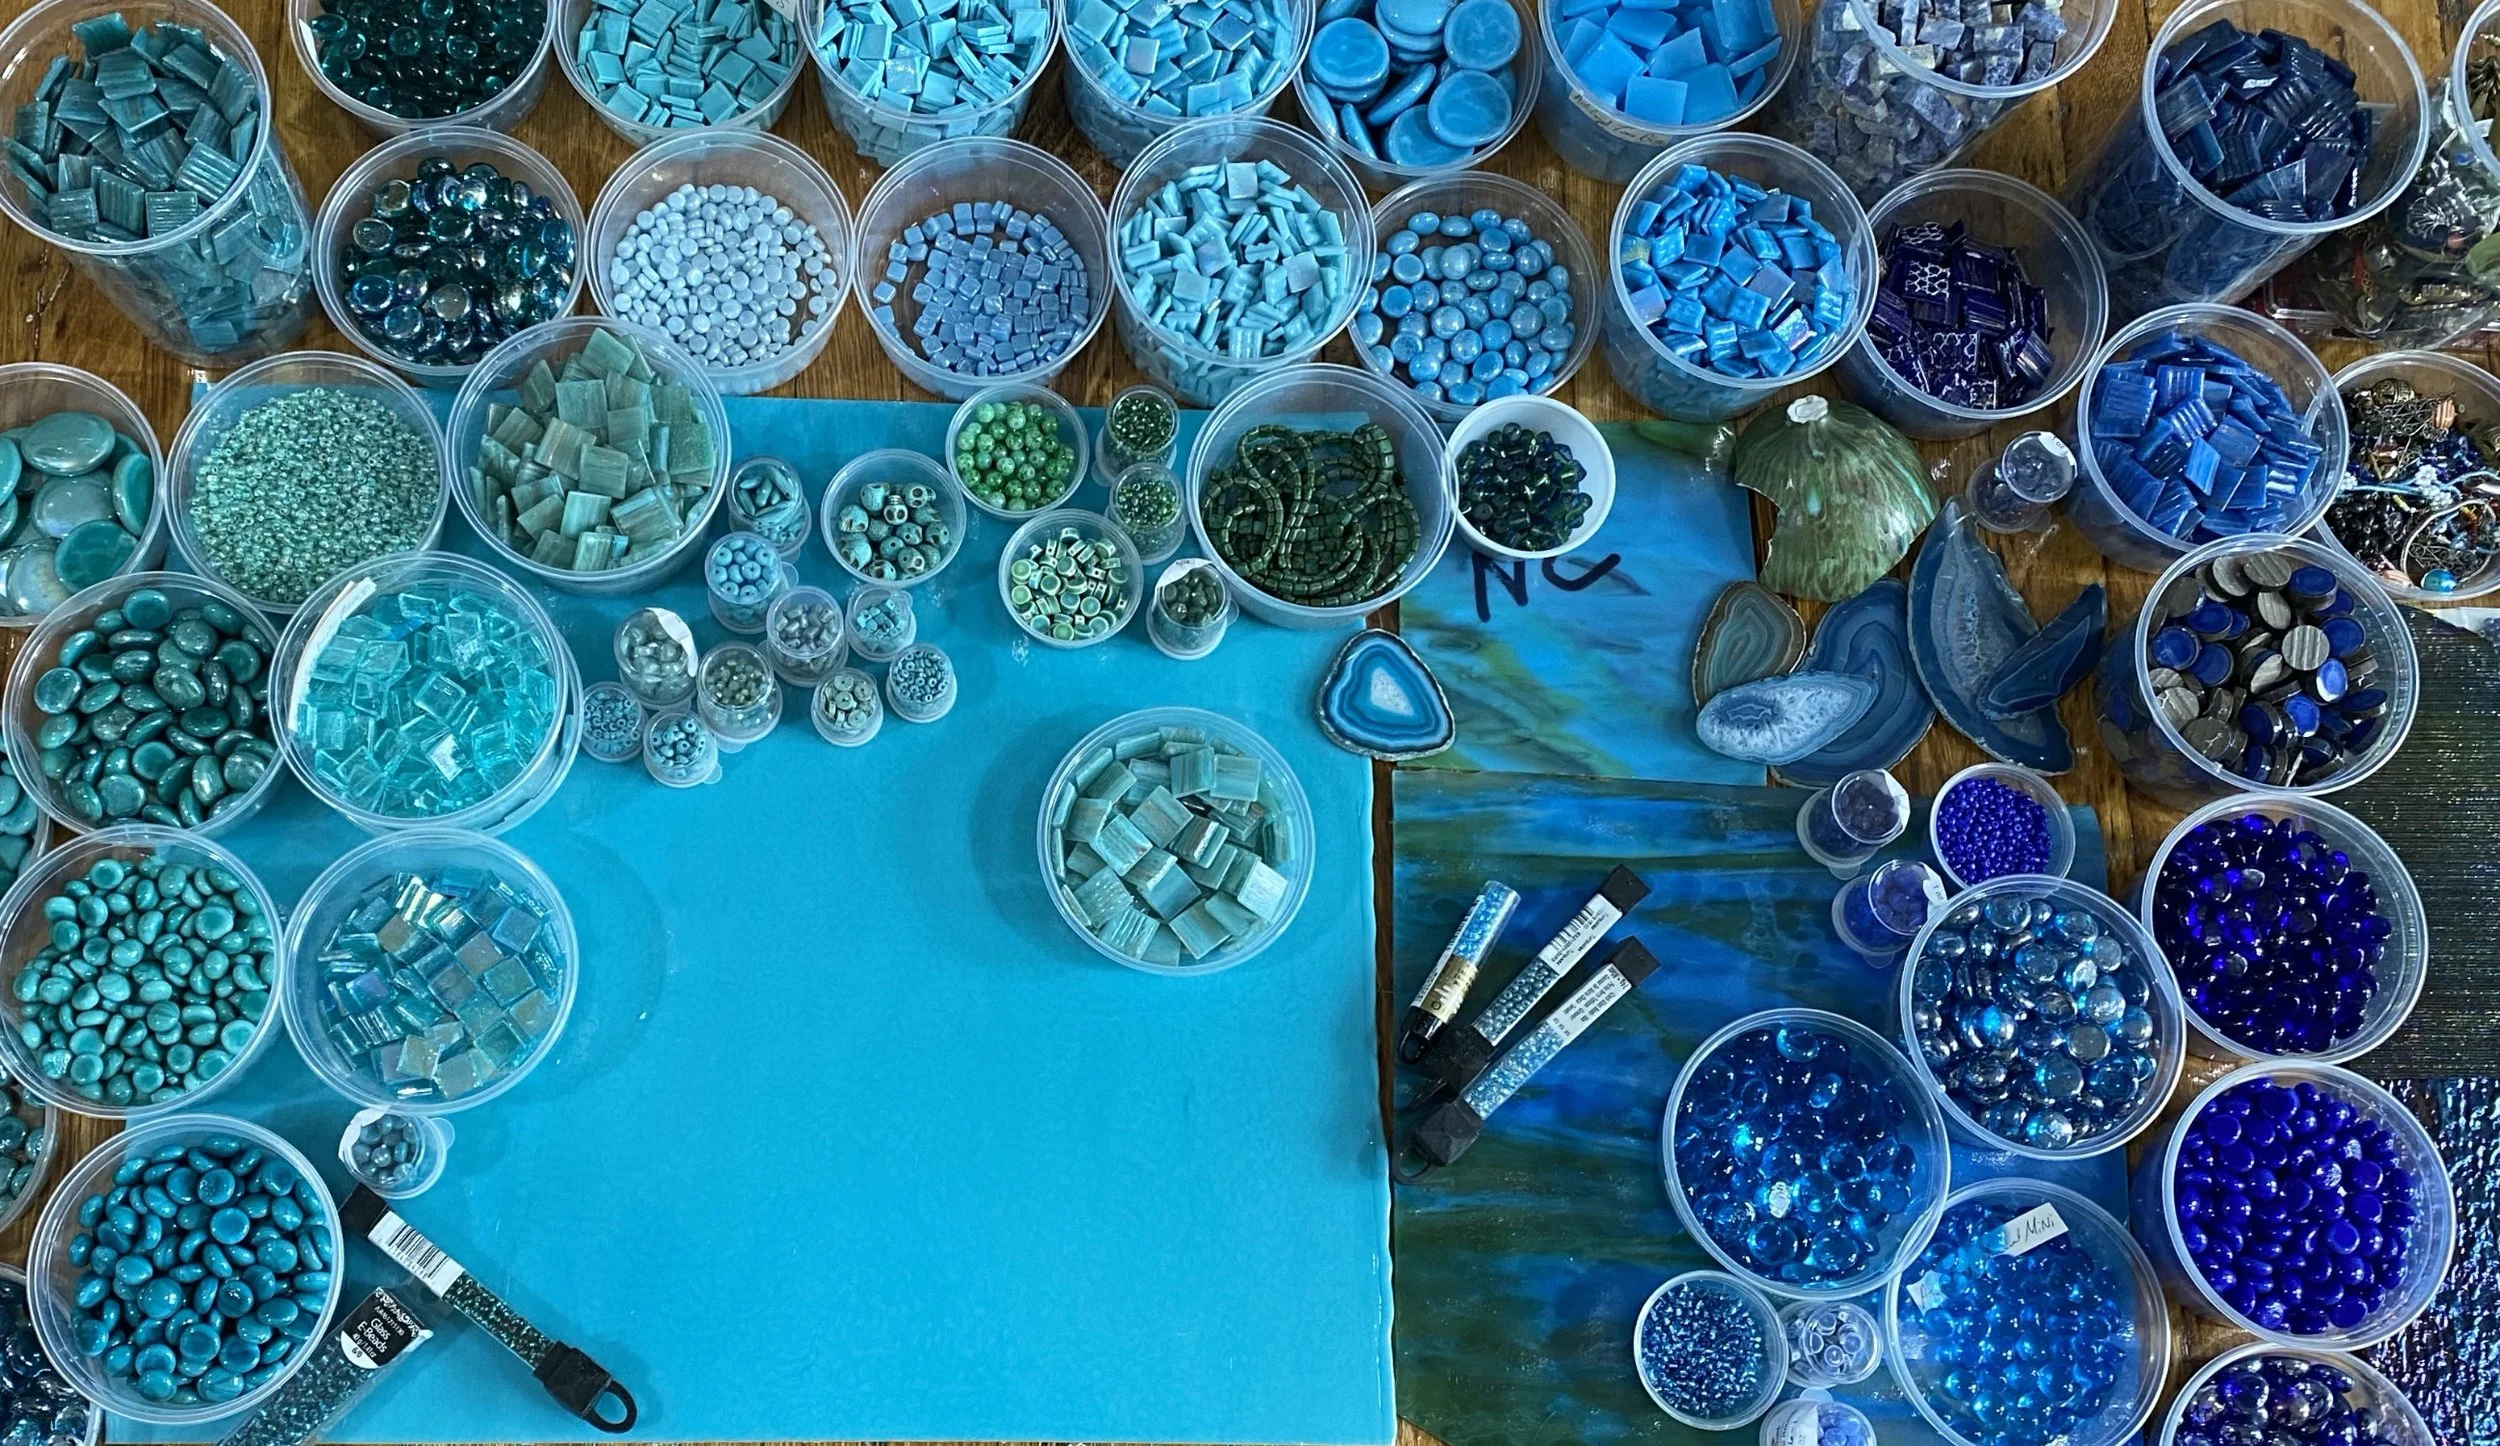
I’m going to start off with this gorgeous turquoise Bullseye stained glass as a base color for the oxidized copper. My stained glass is pretty accessible in my studio, so I will only pull out a few sheets for now just to get a range for my palette. I’m adding in a nice blue/green swirly glass, then the background color of the mosaic, which is a natural creamy glass, including some iridescence. Then I’ll add in the transition colors: earthy browns, including some with copper tones, and iridescent blacks with funky patterns. This stained glass array is the general palette.

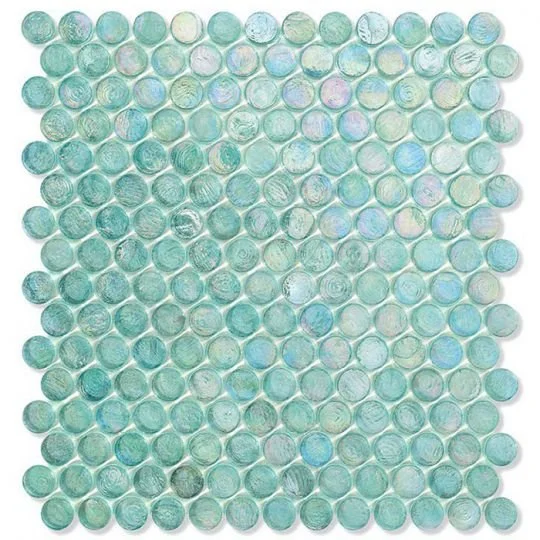
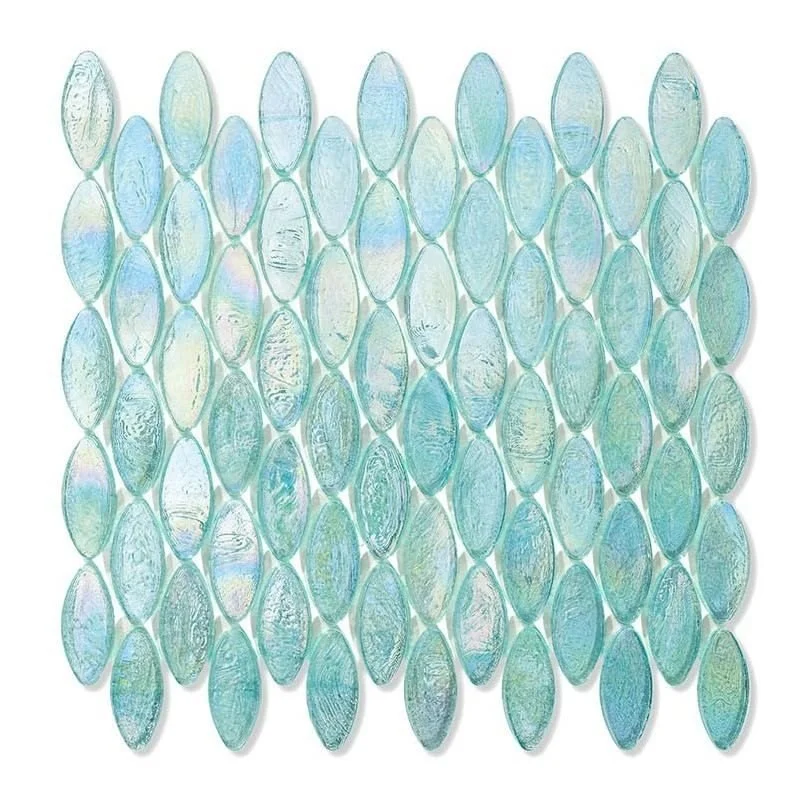
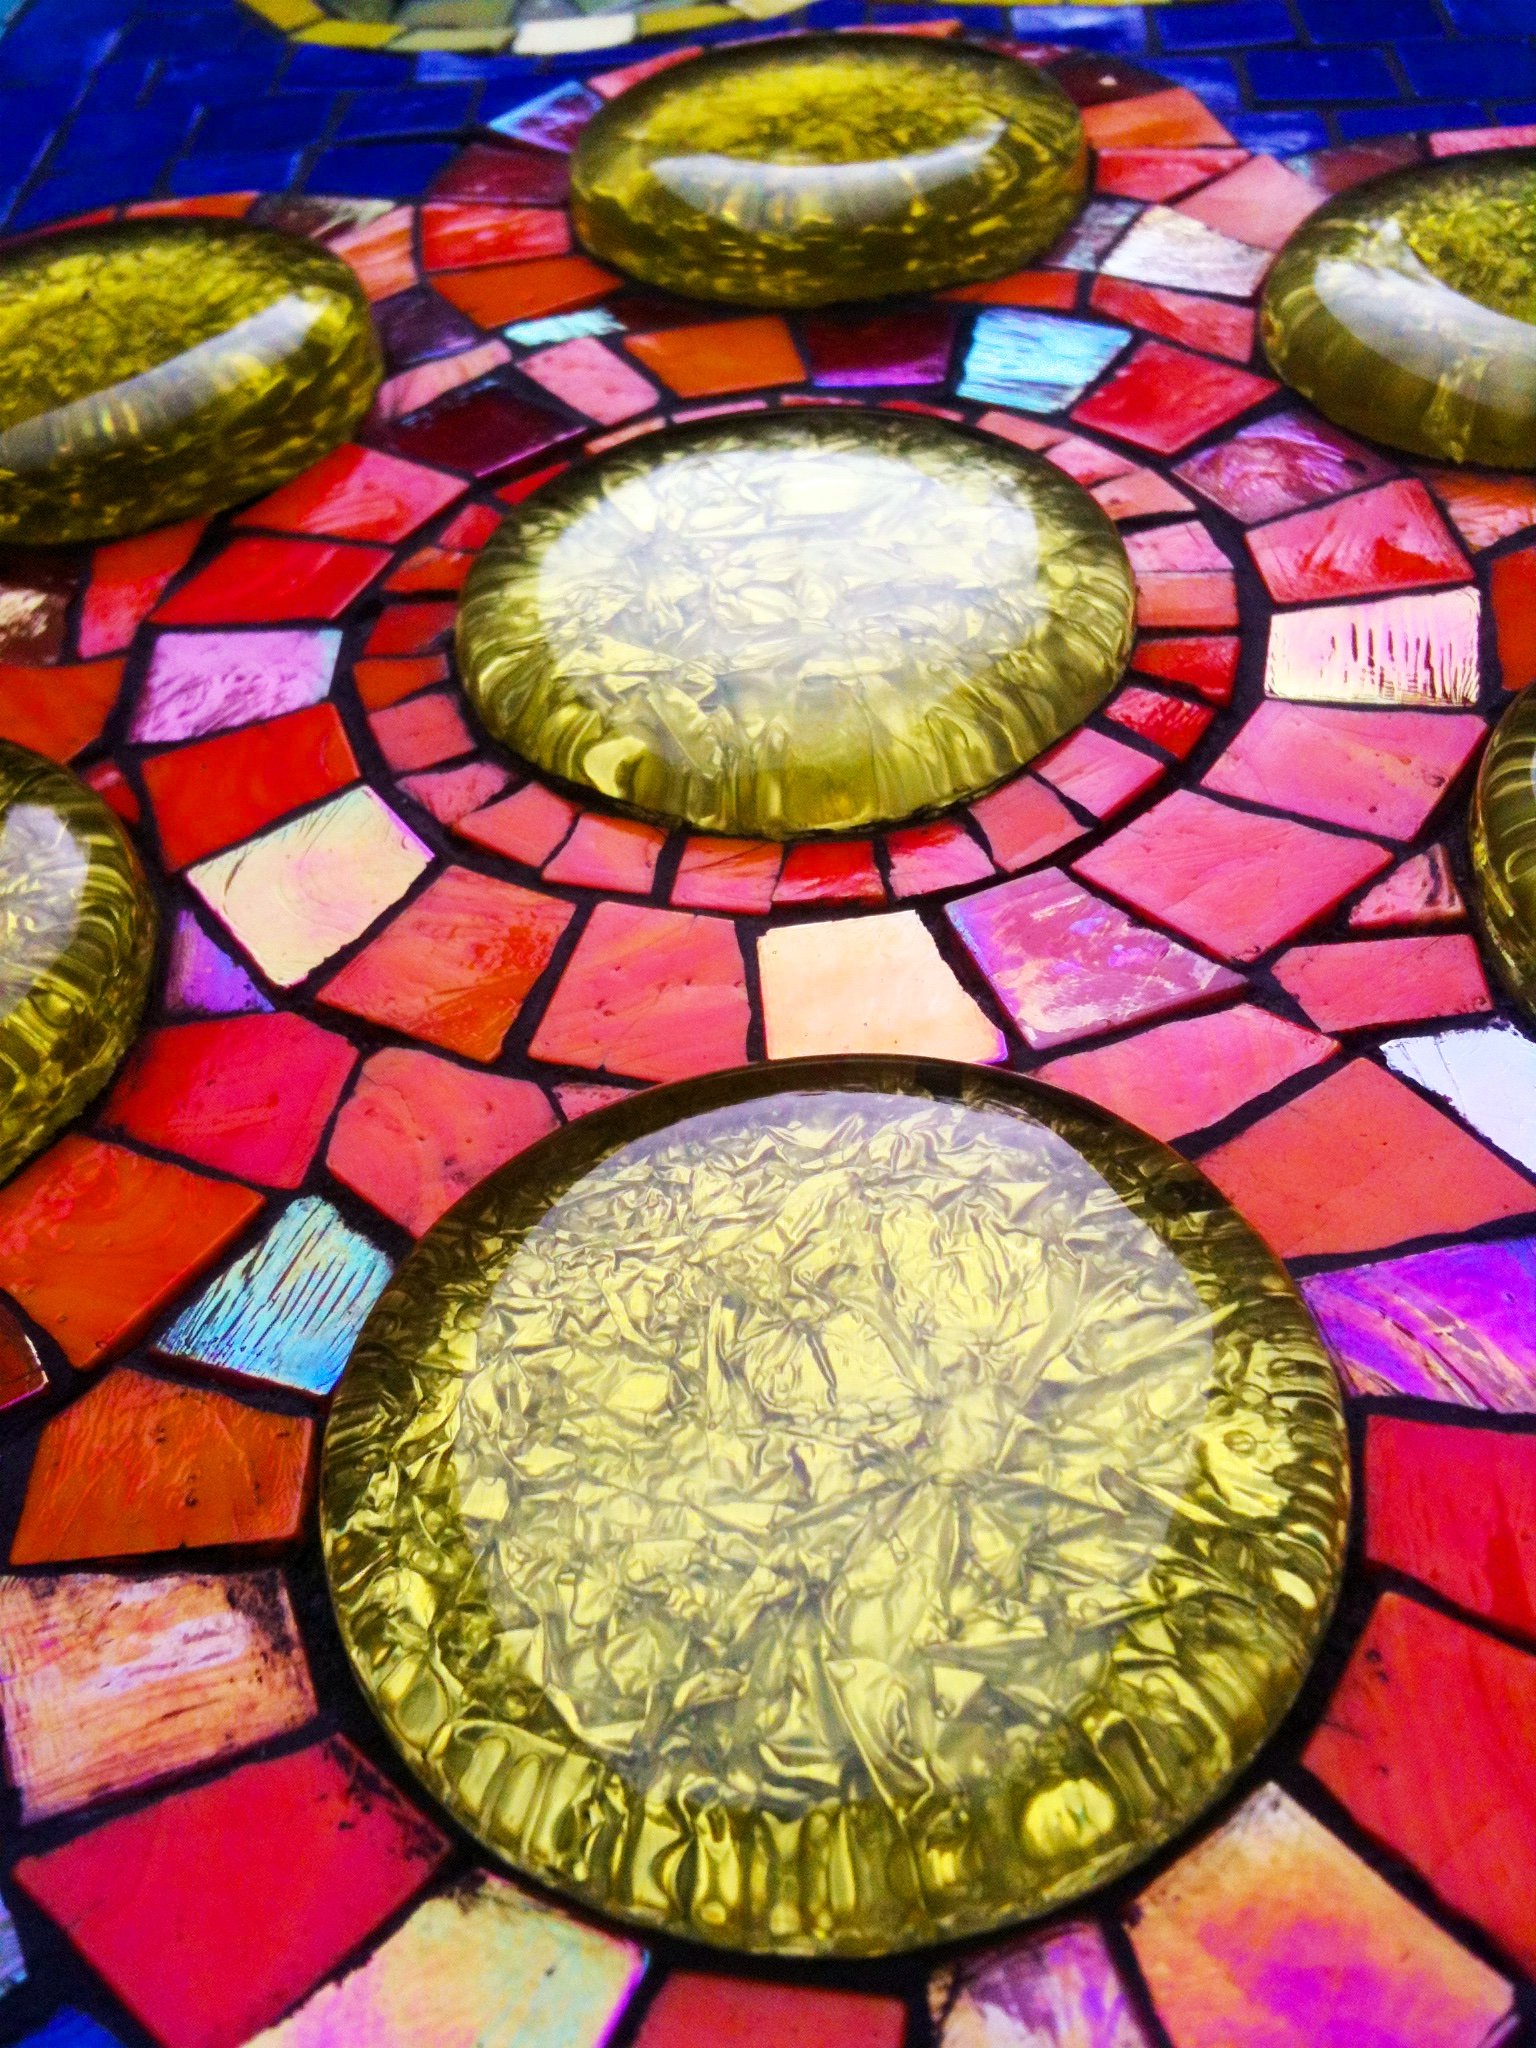
Next I’m going to pick out some gems. Here I have a variety of turquoise to blue, including iridescent and translucent gems for depth, and some milky tan gems in case I need them for the background.

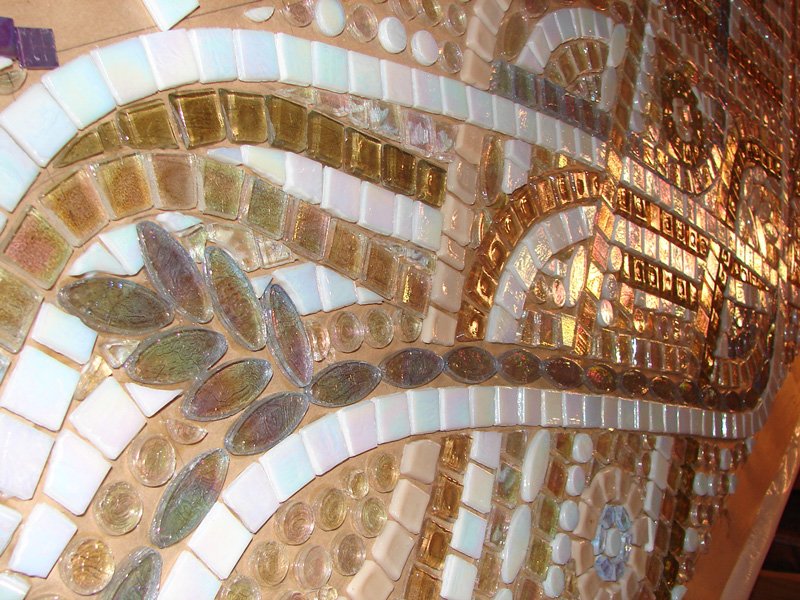
This is Hakatai Aventurine tile. It has gold streaks through it and will be perfect for this project.

Here I have a variety of 5/8” tile from Sicis and Hakatai. To add different thicknesses, I’ve pulled out some thicker tessera: glass, ceramic, marble, and metal.

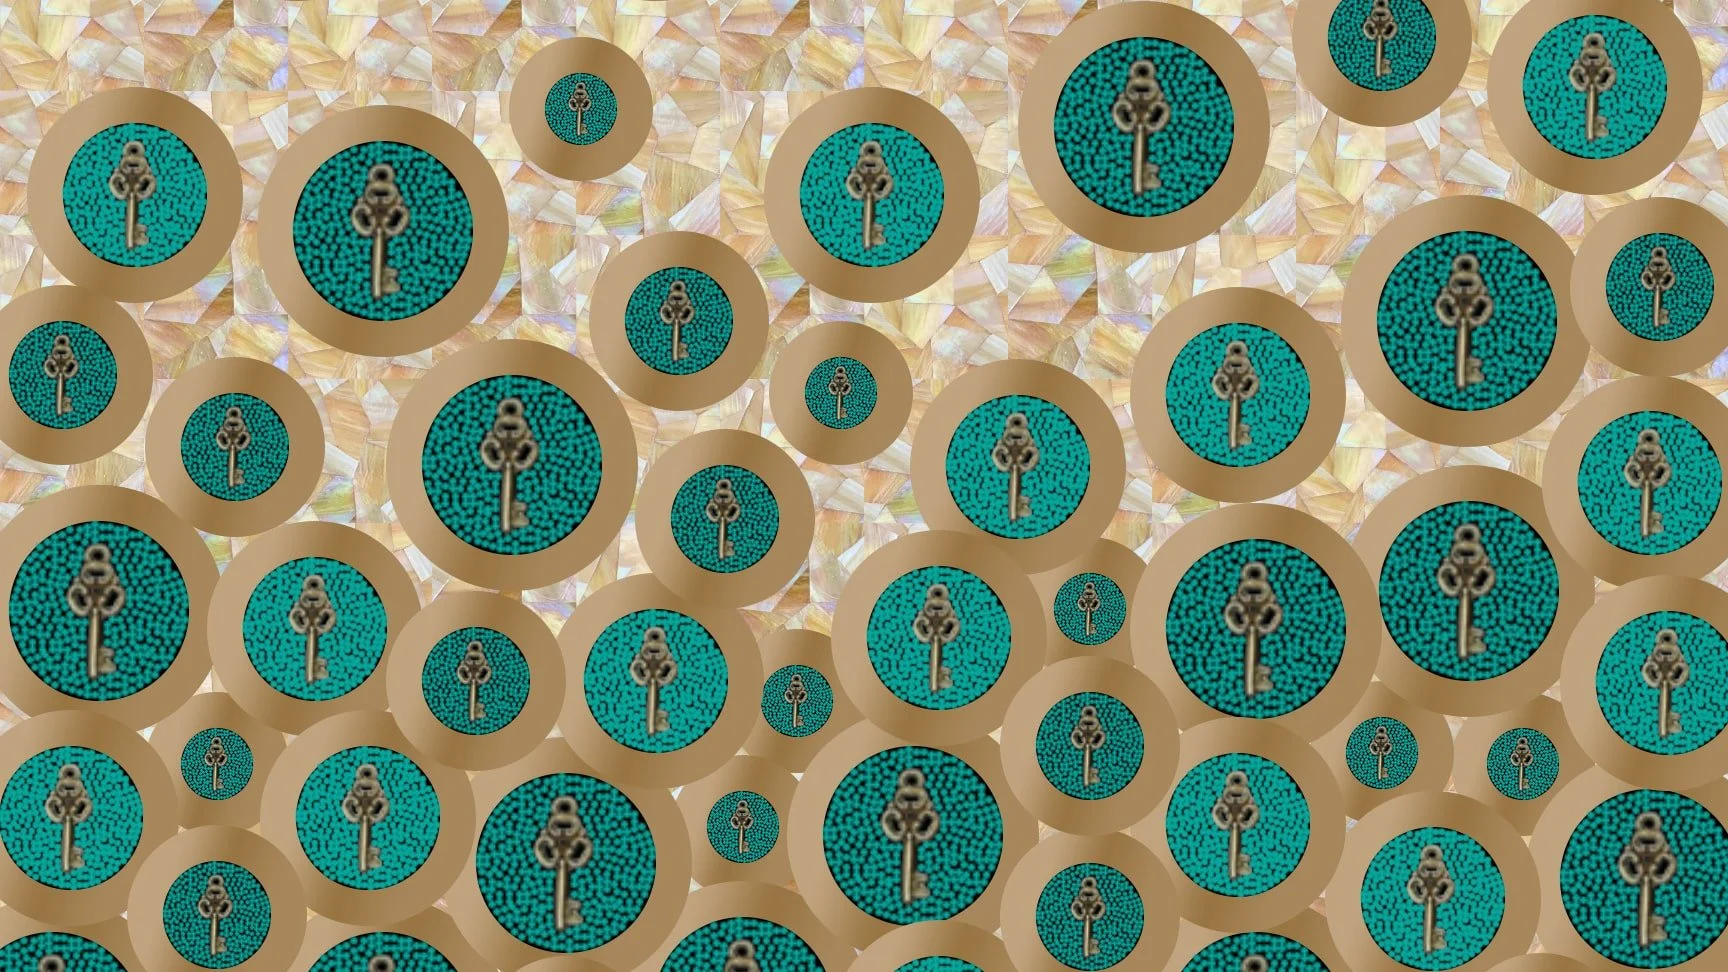
These super cute glass beads and tiles are only about 8mm. This is millefiori which means thousand flowers, ball chain, pebbles, agate slices and a bit of broken pottery I love, and some beautiful mother of pearl.

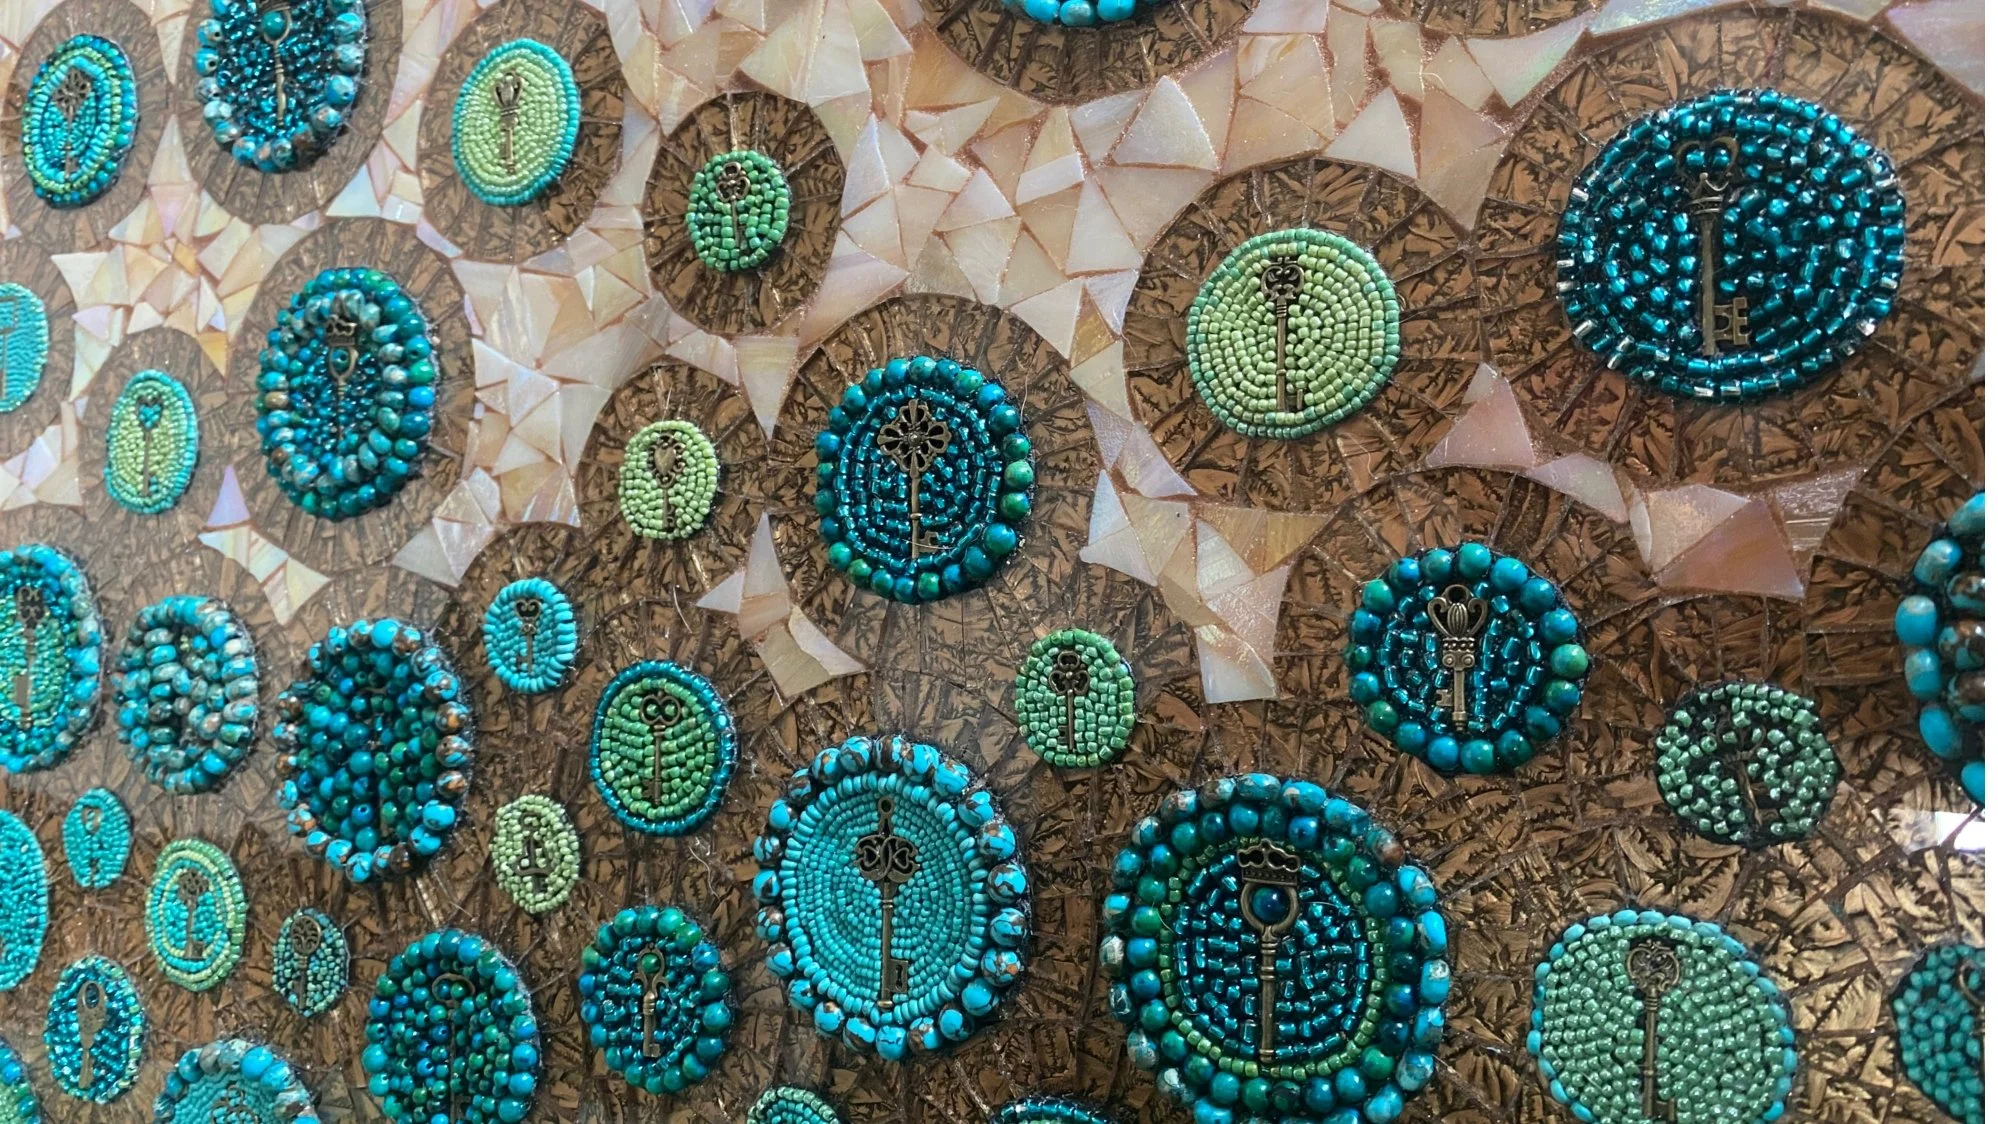
Finally we have the beads and found objects. When I had the idea for this series, I put out a call on Facebook and the wonderful Linda Broka was kind enough to send me these metal pieces. I haven’t experimented yet to see how best to use them, but I’m looking forward to it! I also try to collect a wide variety of accent pieces such as broken jewelry whenever they cross my path.

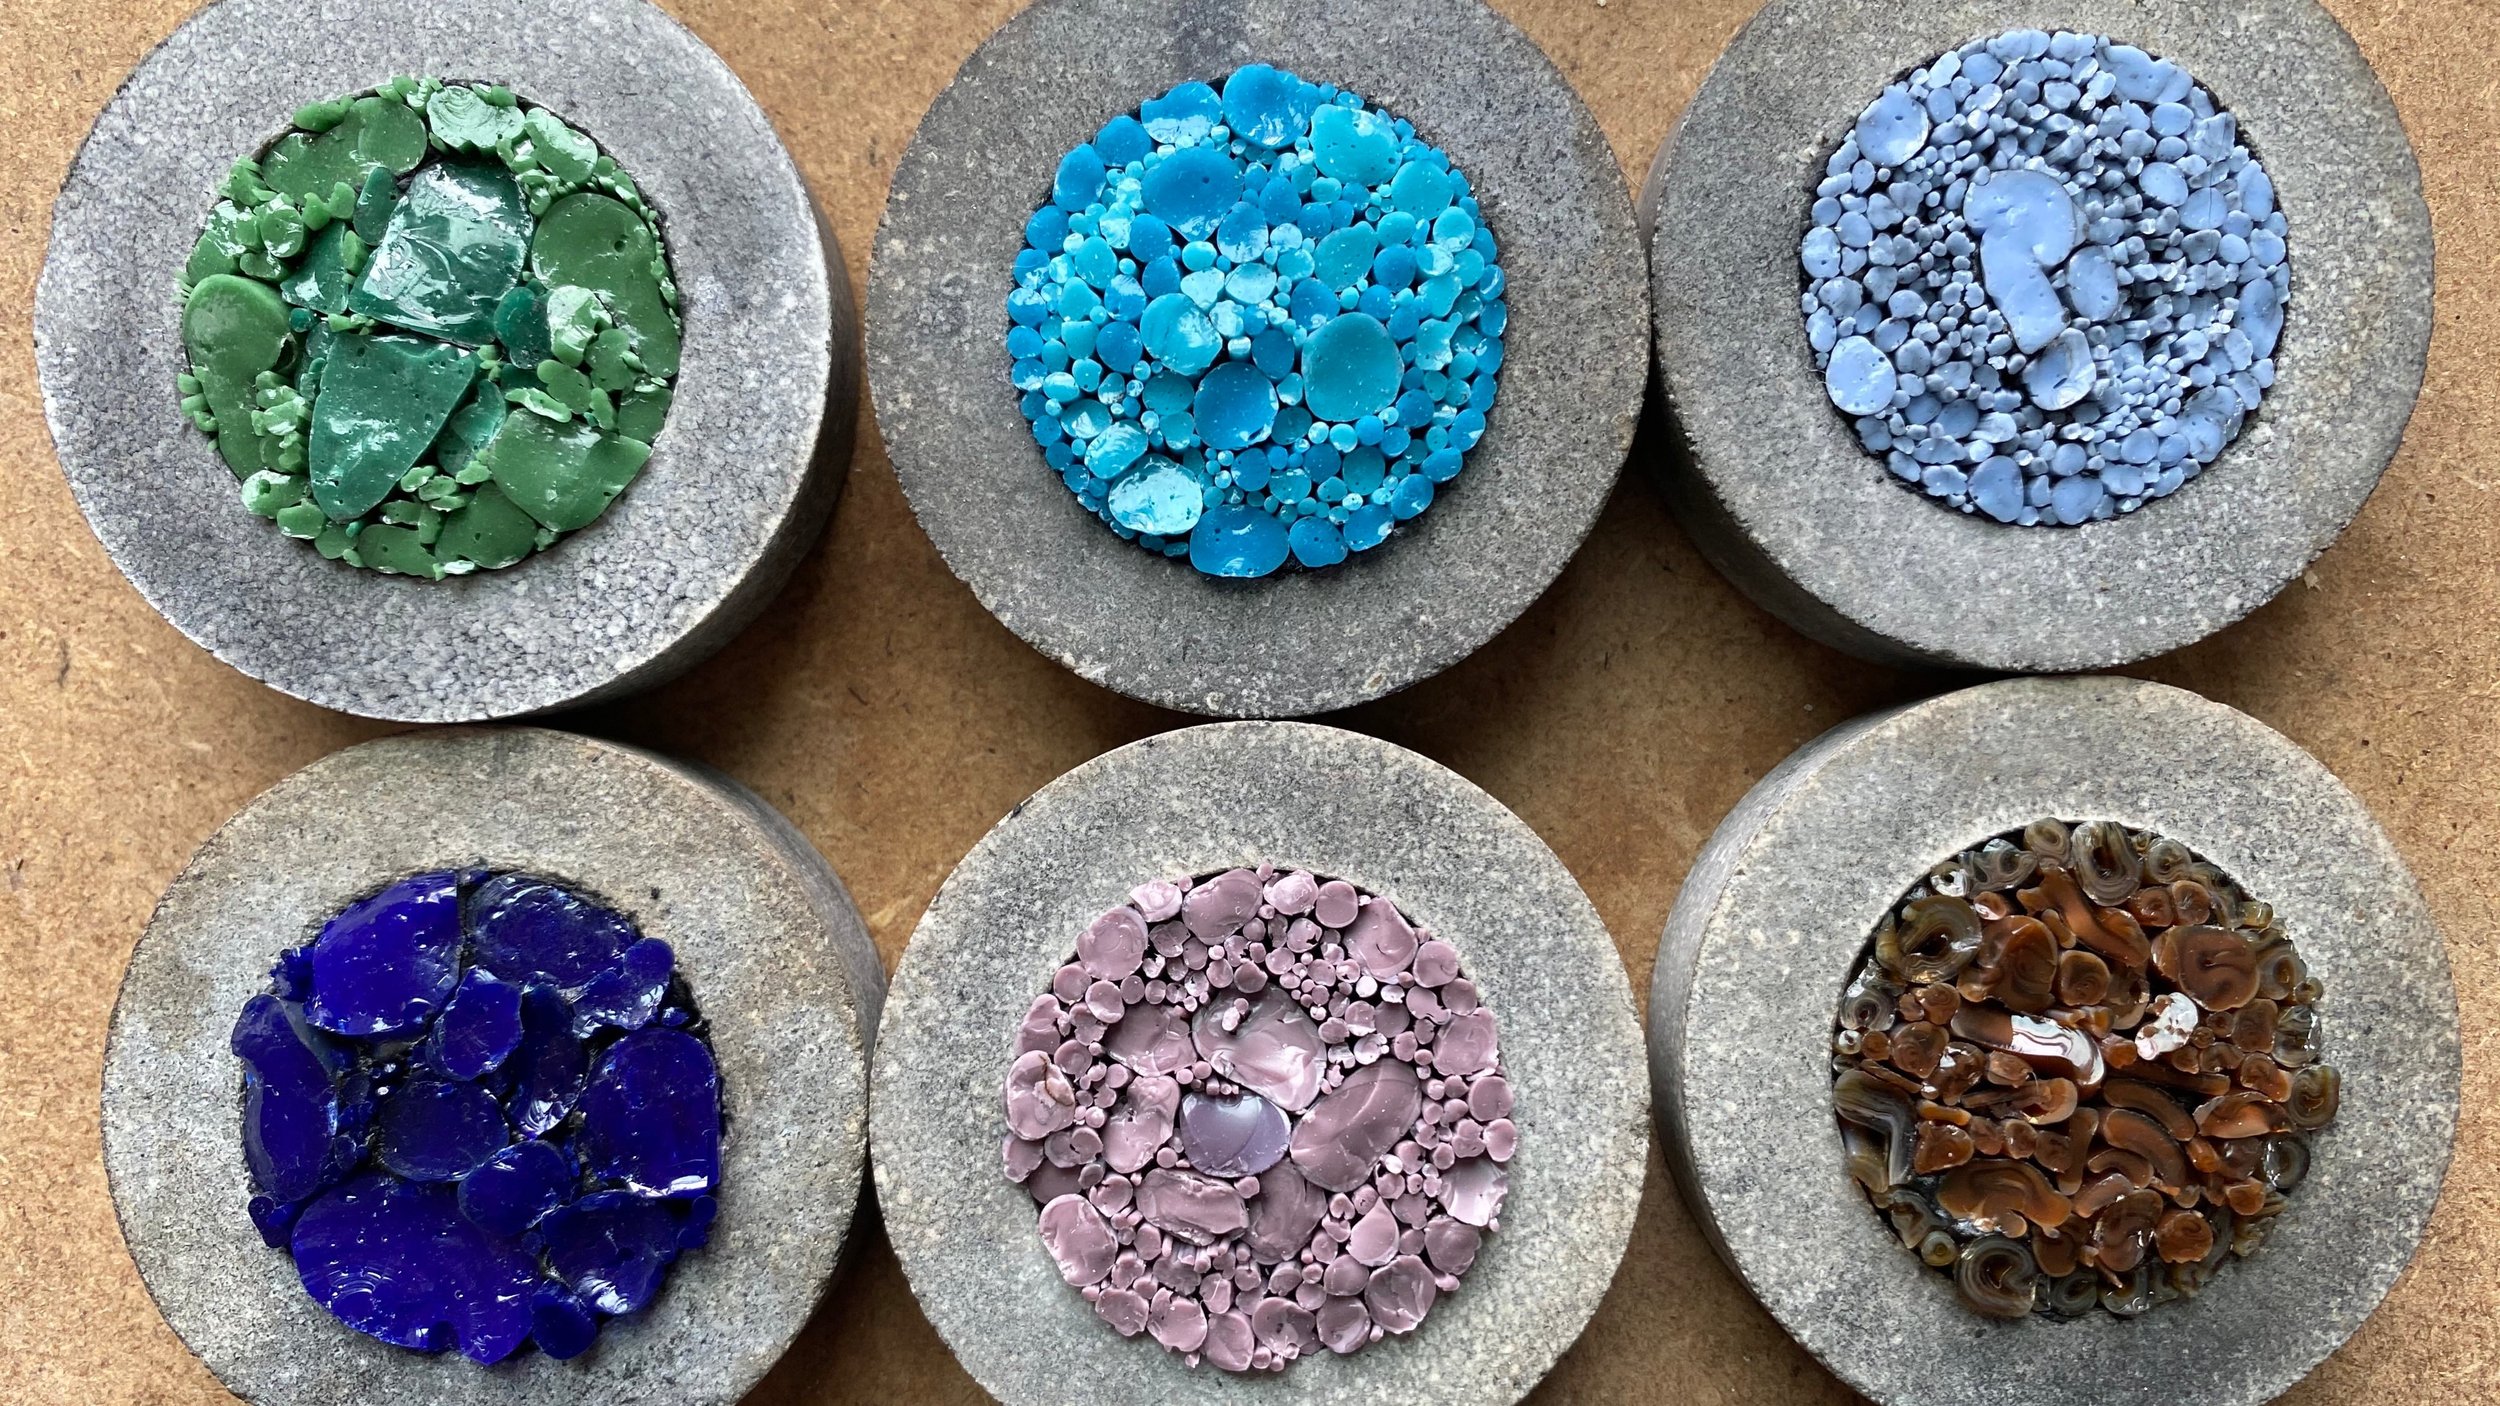
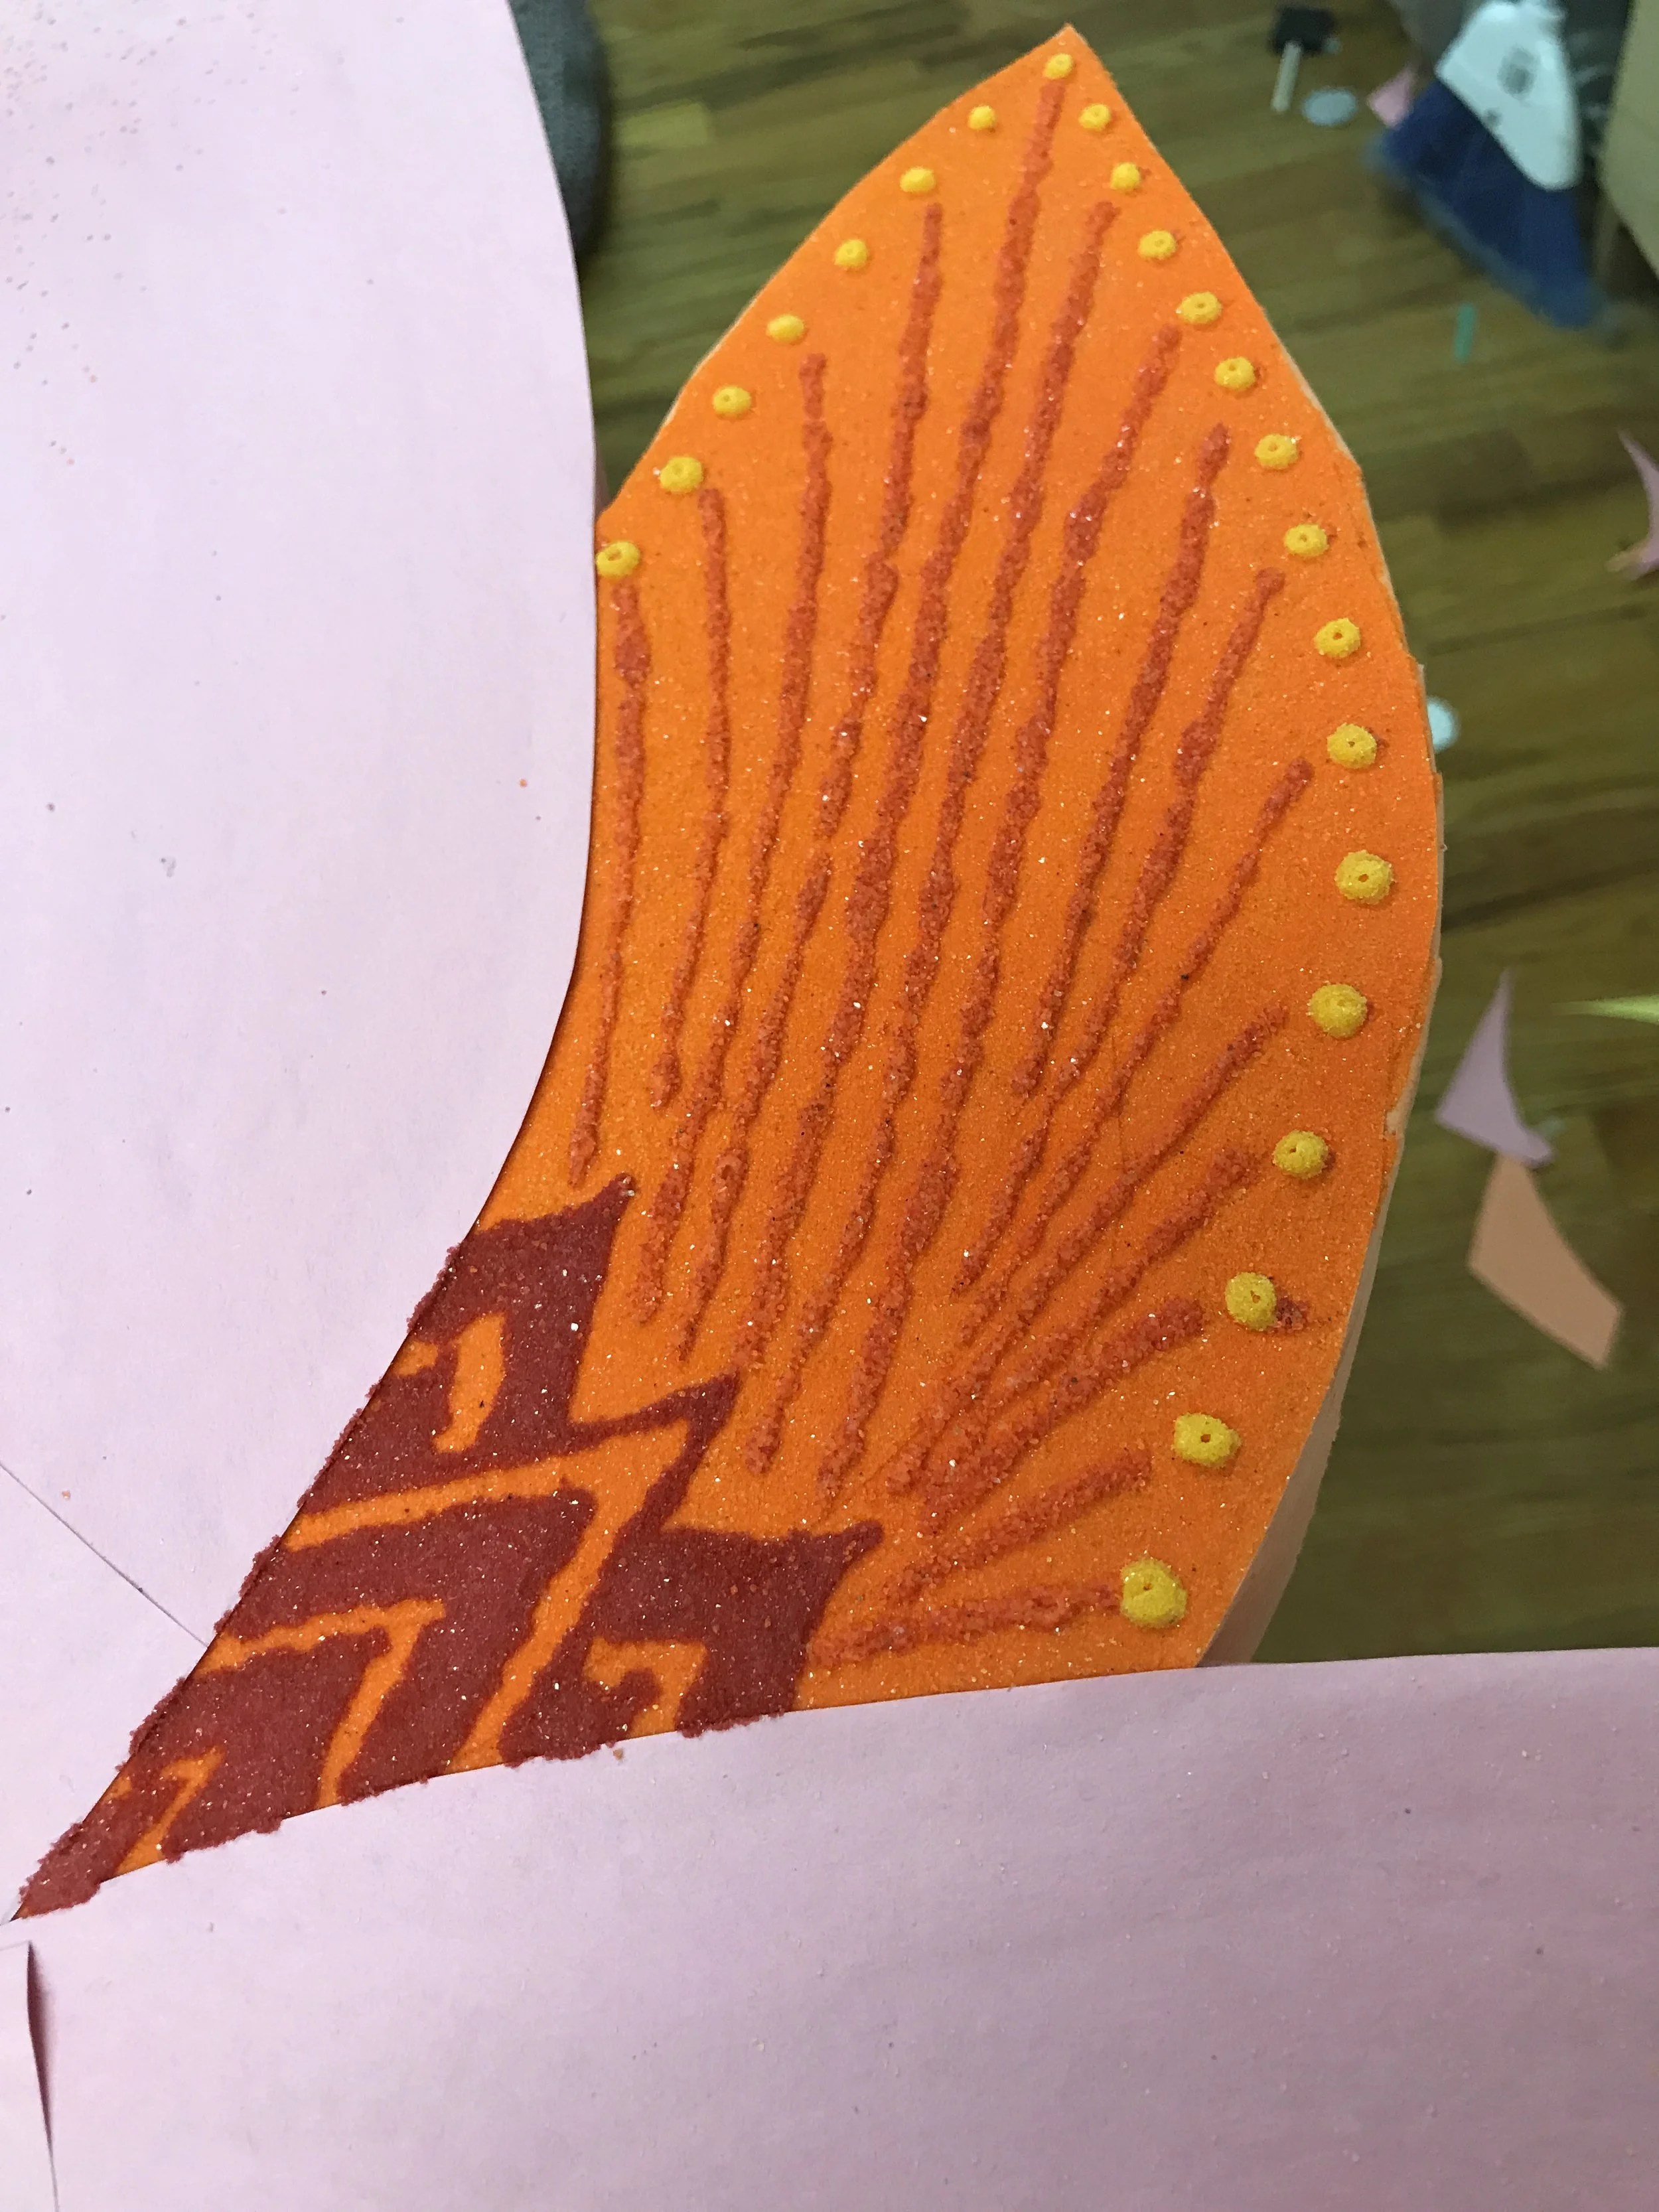
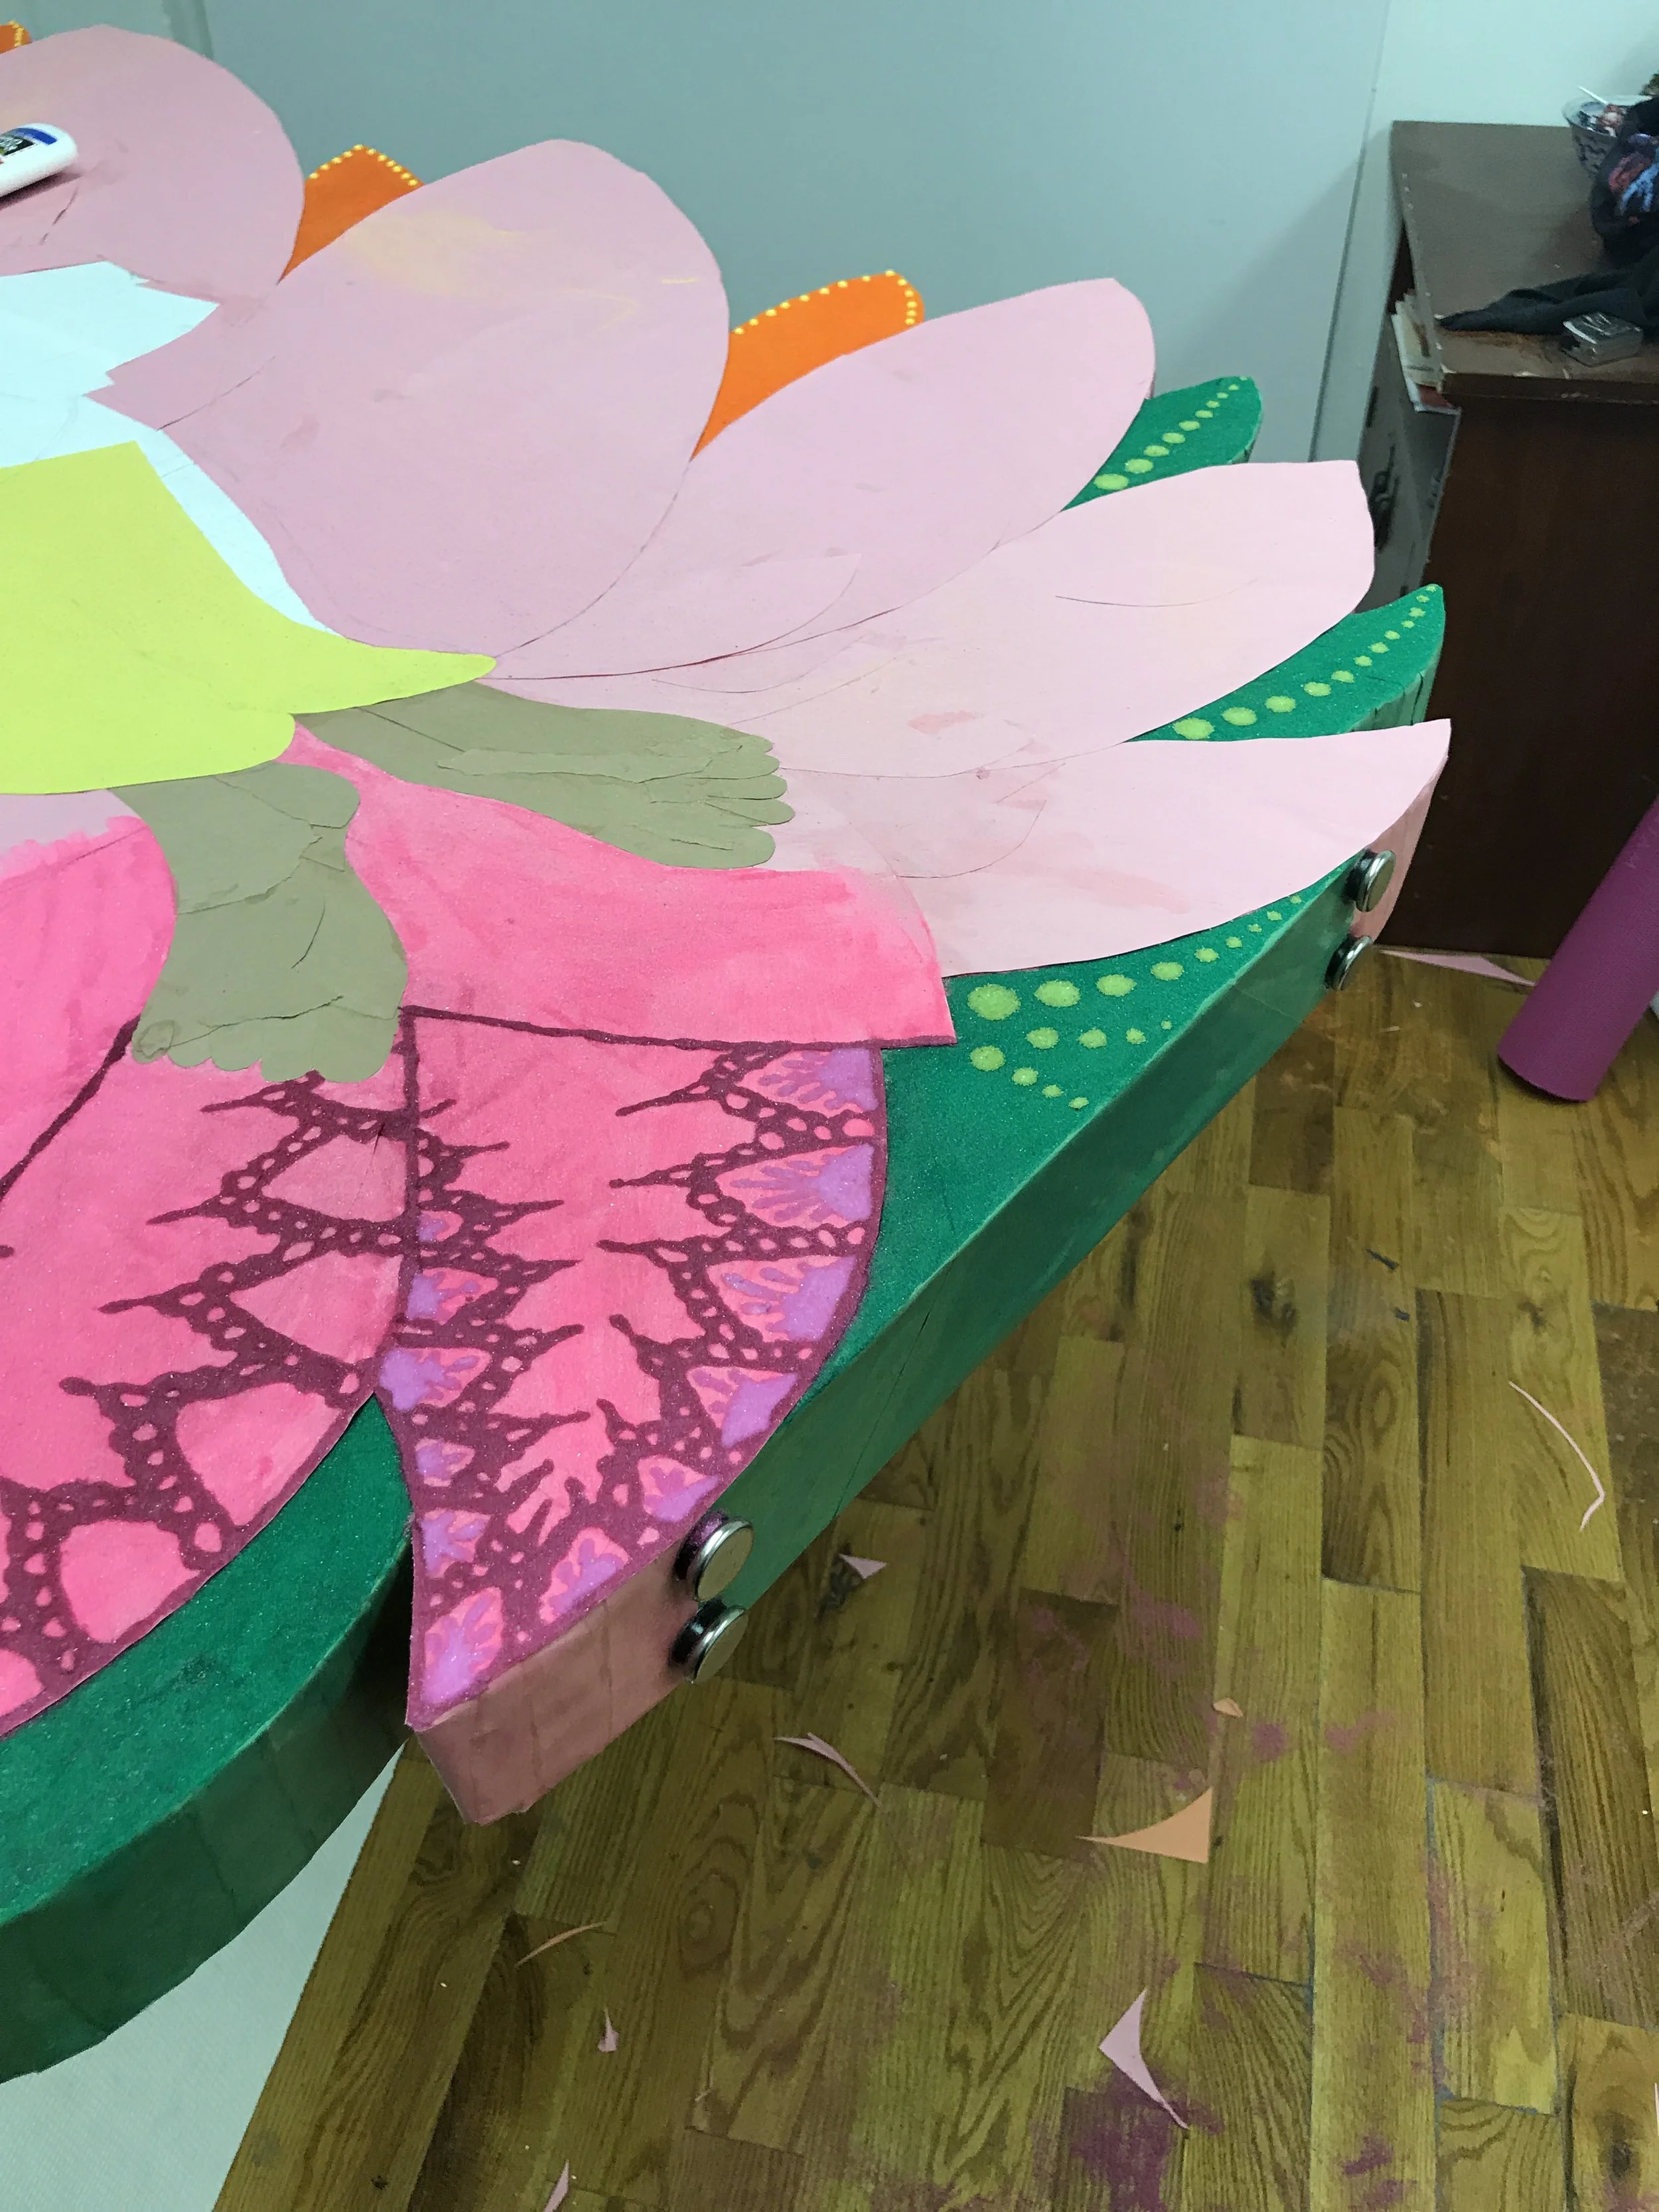
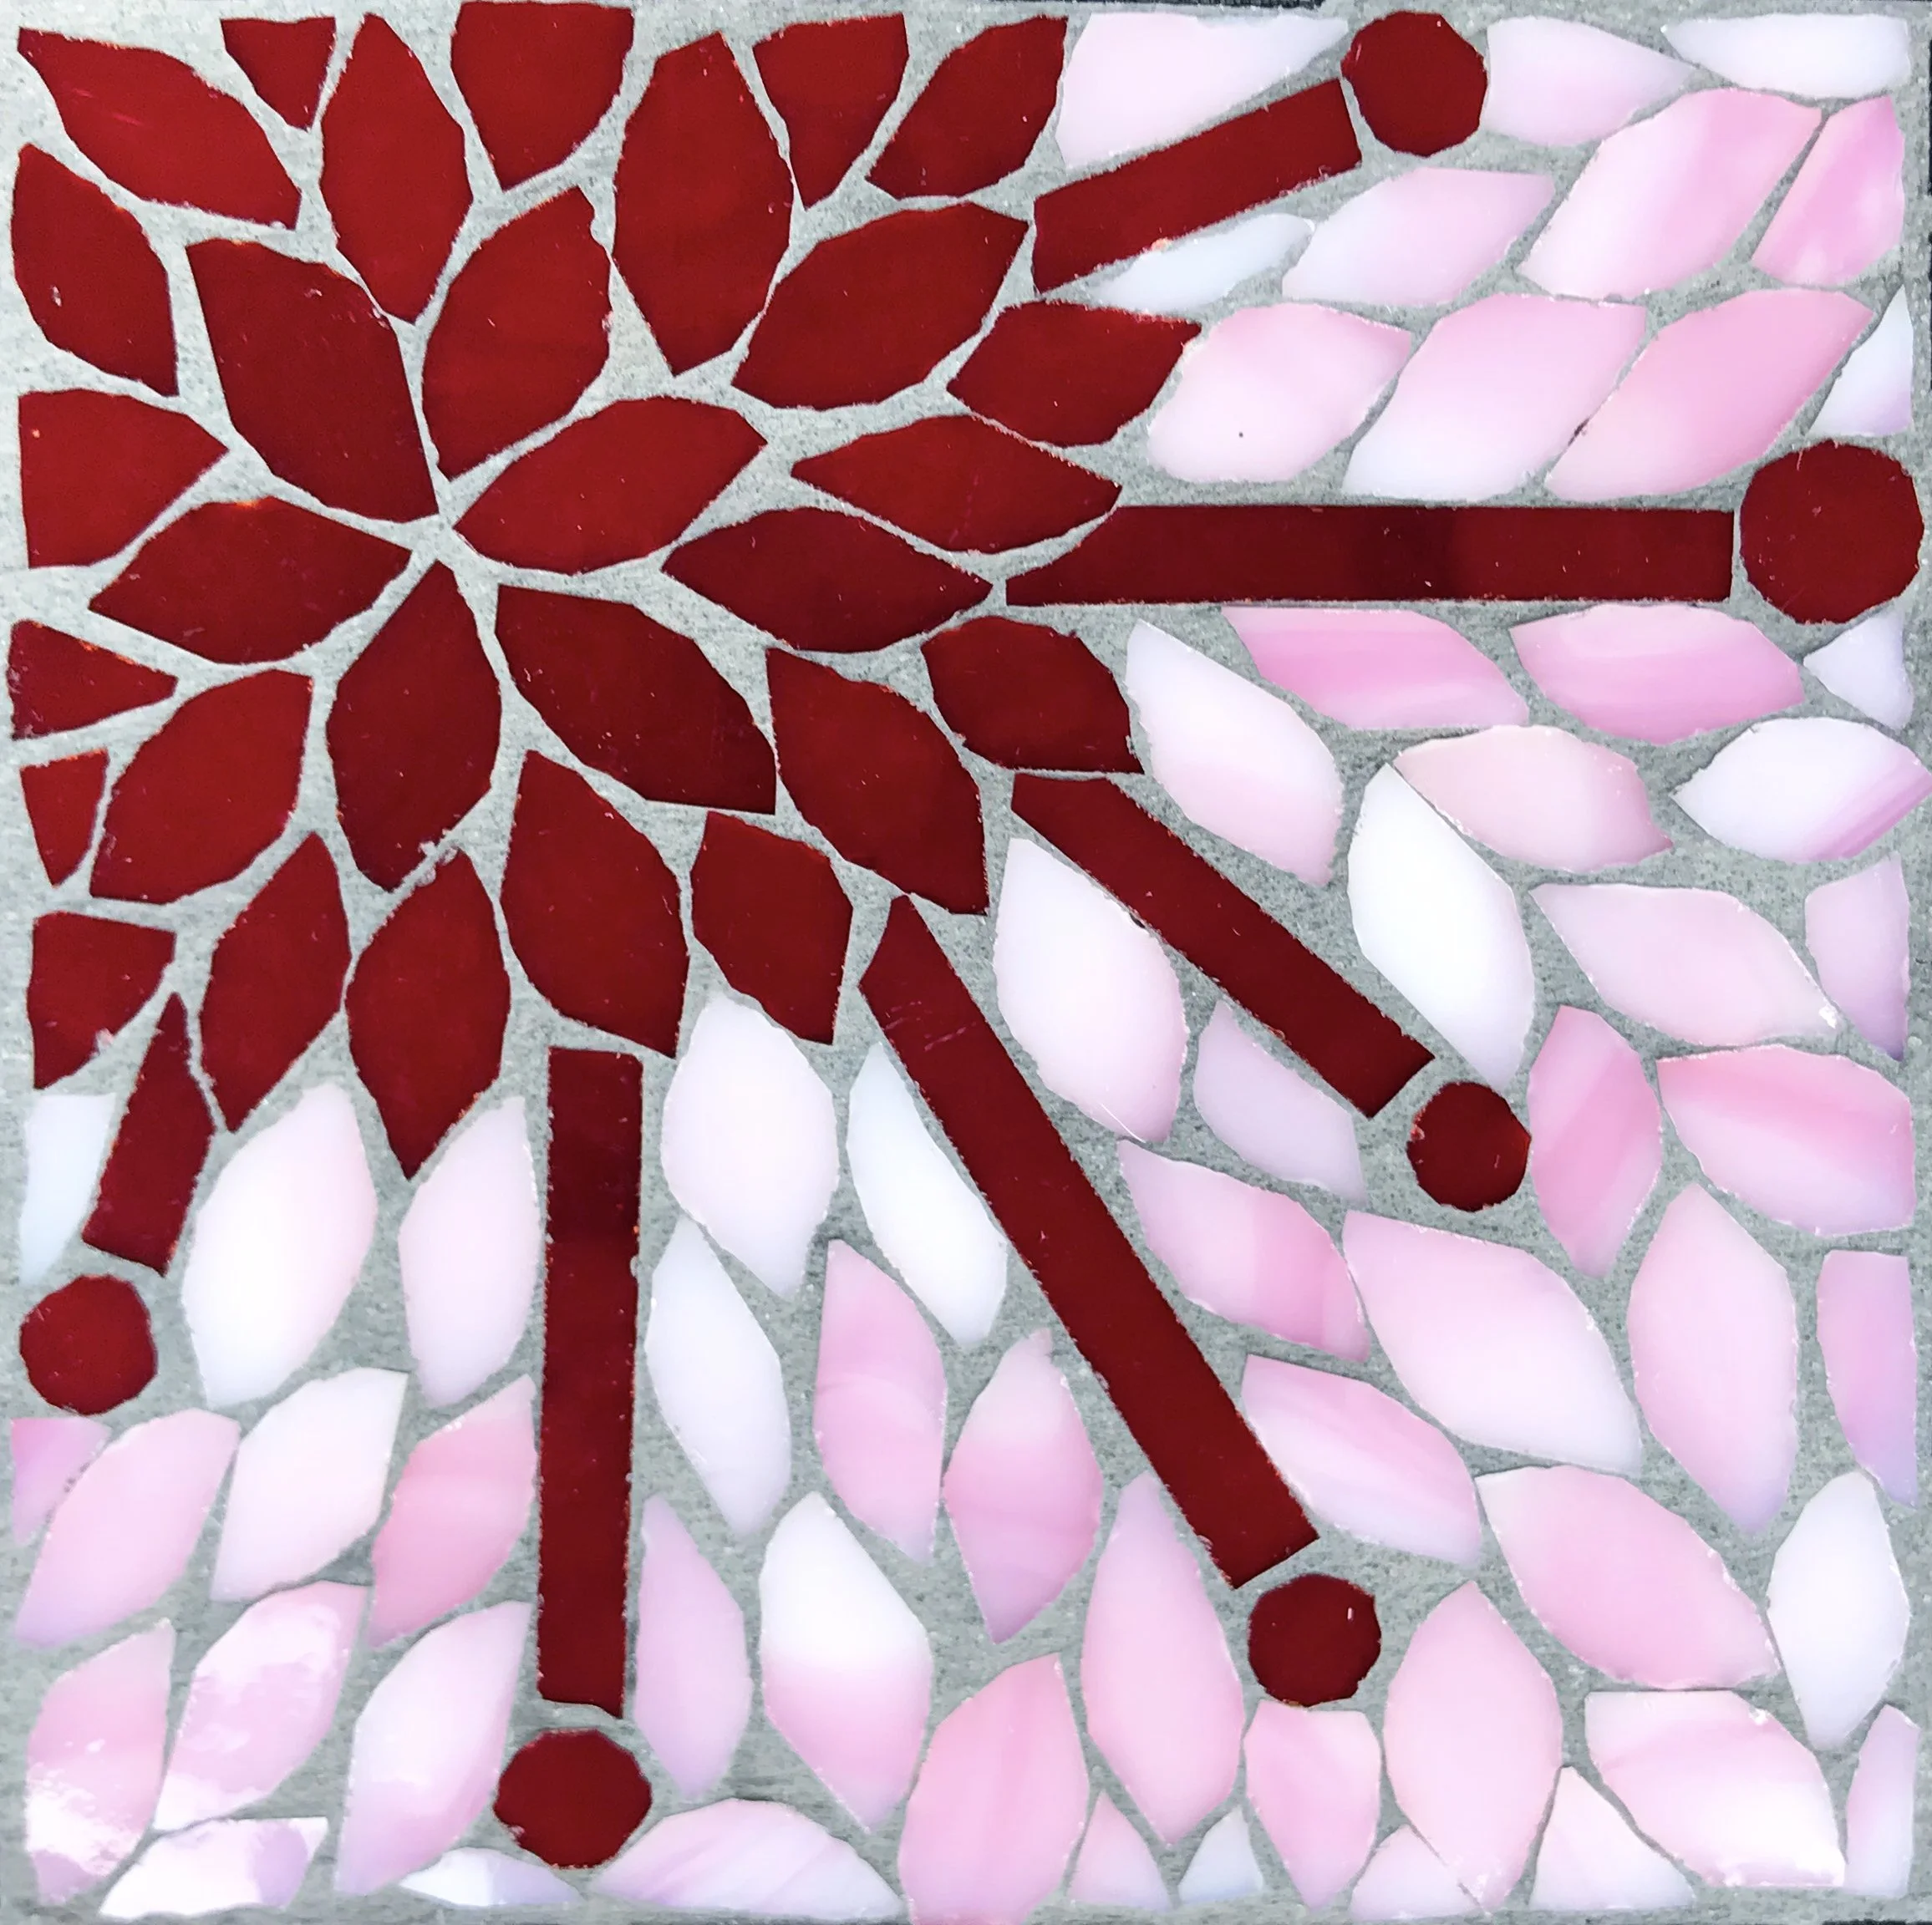
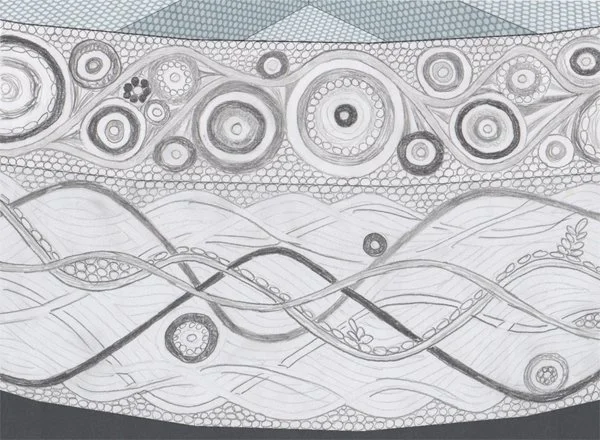
Next, I arrange everything into the color palette. You want a lot of variety when making a mosaic like this so that the final artwork has a lot of texture and depth. I have a good range of sizes, textures, thicknesses, and sheens, so I’m really excited to get started!

VIDEO: Making Filati Mosaic Rings

Here’s a fun video of me attempting to try something new in the world of mosaics: pulling my own glass filati! So exciting to try something new!! I created these rings to be a part of mosaic artist Rachel Sager's ongoing, epic mosaic installation, The Ruins Project. It is an awesome project, so please check out her site or even visit if you can!

Video transcript for deaf or hard of hearing:

Hi Mosaic Fans! Today I’m going to show you my experiment into something totally new! As a mosaic artist, I love to try new things, and recently an opportunity came up to expand my skillset.

There is an amazing mosaic artist, Rachel Sager, in Pennsylvania. I had the pleasure of meeting her over ten years ago at a mosaic conference. I love her mosaic art, and she is working on an epic mosaic work called the Ruins Project. Rachel, along with other artists, is creating mosaic installations on the walls of an abandoned coal mine on her property.

One of these projects involves having many mosaic artists make rings, each one of an individual color study, and she will arrange them to create what she describes as a “wide swath of graduating color”. The “rules” to this project is that the rings have to be made with filati, which is glass that is melted and pulled to create a long string, then cut apart and used on end. It’s the kind of glass mosaic artists use to make micromosaics. As my sister helpfully pointed out, they’re called stringers in glass fusing. This information helped a lot with my Googling!

I had to get in on this project, so Rachel sent me six rings, I bought a torch, got advice from a few friends and my sister, and got started melting glass!!

For reference, here is a completed ring with a penny to show how tiny these mosaic fillati rings are.

In this first video I am starting with Orsoni smalti. It is glass from a company in Venice, Italy, and I have a ton of it left over from a commission. This glass is poured into large “pizzas”, or “tortillas” if you buy Mexican smalti. Usually these pizzas are cut into bars, and then the bars are broken into rectangular pieces, and the artist uses the rough cut interior to create a mosaic because this interior cut has the most shine, texture, and vivid color. This is called the ‘A’ cut.

I was using this glass on the ‘B’ side, using a wet saw to sculpt the pieces for the mosaic. I was left with a bunch of very expensive scrap glass that doesn’t have much use to me. Melting it down to make filati seems like an amazing use of the leftover glass!

I also wanted to try using stained glass, because I have a lot of that around as well. This is a bar of stained glass. It doesn’t have air bubbles like the smalti, so it’s less likely to snap from the temperature change, and it’s easier to grip with just needle nose pliers instead of having to use locking pliers.

I really like the results from the stained glass too. In the end, when you see the brown ring, that is stained glass, and the other five are smalti.

For most of the rings, I cut the glass as I worked because there is less waste this way. Because I’m new to this, I had to work really hard for each millimeter of filati, but it also took forever to go between cutting and placing the glass. For these last two, I decided to just take an hour or so and pre-cut it. The thinner pieces need more stability, so I cut them about 1 cm, the wider pieces can be more shallow.

I used Apoxie Sculpt to embed the glass into the rings. It is a waterproof bonding clay that comes in a variety of colors. Rachel requested black, and since that’s what I usually use it worked out perfectly.

I wish I had taken a time-lapse video of one of the brighter colors I used because you could have seen it a lot better. I was busy experimenting and learning and forgot to set up the tripod.

Overall I loved pulling glass and making mosaics with filati. I would do a lot of it if I had enough room in my studio to set up a dedicate area for it. I would just buy stringers, but what intrigued me most about this process was getting the different shapes and sizes by pulling my own glass.

Here are the final rings. My favorites are the first and last, which are the aquamarine and the brown. Thank you for watching!

Fireplace Rugs Mosaic

I was so lucky that Jordan Design Crew approached me to make these decorative mosaics for their clients’ outdoor living room.


If my memory serves me correctly, one of the founders of Jordan Design Crew, Courtney, created this design. In addition to being a fabulous interior designer, she’s also an amazing artist. The design fit beautifully into her design for this outdoor living area.


Empress Theodora Mosaic Reproduction

I was so lucky to have a client hire me to make a reproduction of this gorgeous and famous historic mosaic of Empress Theodora.


The journey of this mosaic reproduction began when my client contacted me to ask for a very specific and special commission. He had a reproduction of the famous Emperor Justinian mosaic created by the mosaic artist that did the restoration of the mosaics of the Basilica of San Vitale in Ravenna, Italy. He sent me his Emperor Justinian so that I could use him for reference to make sure the glass and stone choices paired nicely.

This was such a beautiful mosaic to see in person. I quickly saw that this mosaic was created by the double reverse method, otherwise called the Ravenna method. Since the mosaic came from Ravenna, this all makes sense! To create Empress Theodora, I decided to use the same method. I’ve never used this method before, so I did some research and purchased supplies. I also made a tiny sample to practise.

First I placed the stone and smalti in bed of lime putty. What you see in this picture will be the front.

Once the glue was dry, I flipped over the mosaic and cleaned off the lime putty.

Then I covered the front surface with layers of tartalan (a fabric like cheesecloth) and bone glue.

Then I made a box to fit, sprinkled marble dust in the interstices, and put a layer of mortar on the back.


When the mortar was dry, I washed off the layers of tartalan and bone glue and cleaned the surface. The process worked perfectly on the first try, but I needed to adjust the amount of marble dust I used so that the mortar would come closer to the surface.


The halo around the original Empress Theodora is larger compared to her head than my version. Since the client wanted both pieces the same size and hung next to each other, we decided to switch up the ratio a bit. Other than that, I tried to replicate the mosaic as close as possible. I purchased Ravenna smalti and even found some antique gold smalti.

I used an Exacto knife to mark the sketch in the lime putty. I kept the lime putty workable by spraying lightly with water and carefully wrapping the mosaic in-between working sessions.

My Empress Theodora mosaic reproduction completed next to her partner, my client’s Emperor Justinian reproduction from Ravenna.

The client was kind enough to send me a picture of Empress Theodora at home in her frame!

Red Bull Mosaic Disco Ball Coolers

I had the opportunity to make 13 of these disco ball coolers for Red Bull. It was a ton of work, but they are so dazzingly beautiful!

These making of these fully functioning mosaic coolers started when I was approached by a product design company to make a prototype for Red Bull. I purchased the hand-cut mirrored glass from an artist on Etsy and worked hard to make sure it aligned properly as I worked my way around the cooler. The first supplier I used had almost perfect cuts, but a few coolers in, she had some family issues and couldn’t cut the thousands of mosaic tiles I needed per cooler anymore. The second supplier was wonderful, but the cuts weren’t as accurate, so I had to plan ahead a lot more.


In addition to keeping the glass in straight lines, I also had to use a specific mirror bit on my grinder to bevel the edges. These were to be used in nightclubs, so the edges had to be smooth so that bartenders didn’t get cut. You can’t use a regular grinder bit because the backing of the mirror flakes off. The mirror grinder bevels both sides to create a smooth, un-chipped edge.


It was so hard and tedious making these coolers, especially because I had to use a toxic adhesive and wear an organic vapor respirator even during some extreme heat waves, but it was worth it. I found out later that the product design company made dozens of prototypes for Red Bull products, but this is the only one that moved forward into production. I was lucky!

Krishna Sand Mosaic

I was doing a collaborative art show in which my art partner and I decided to make mosaics in different mediums than we usually do. I had the idea of working with sand and loved the outcome! This Krishna is based on a photograph by Jeffrey Boardley.


When I first had the idea of making a sand mosaic, I planned on using an image of the 14th Dalai Lama as a child on a mandala. Then I went to a photography exhibit by a high school friend. Once I saw his photograph of Krishna, I immediately asked him for permission to use his photograph instead. Thankfully, he agreed!

Here’s Jeffrey Boardley’s original photograph.

My sand Krishna is eight feet tall, so I put a grid over the original photograph to trace her onto the foam core fiberglass board I created it on.


I cut the foam core board in a stylized lotus shape, then applied construction paper to help keep the design on track and because the fiberglass board wasn’t an ideal surface for applying the sand.

I just went section-by-section applying the glue and pouring on the sand. I waited for a color to dry, then shook off the excess.

There was a lot of trial and error, as there always is when trying something new, but eventually Krishna started to come together.

Delta World Map Mosaic

This medium sized mosaic was created for Delta Airlines in 2014. Delta had assigned a national theme for each artist and they choose Mexico for me.

There are many different ways to lay out our three dimensional planet on a two dimensional map, so they wanted to make sure all the artworks in the series were using the same map for cohesion. This also allowed for each artist to add their own personal touch to the world map and be able to express their creativity using their own art forms. 

Most of the mosaic was created organically with the exception of Delta giving me the map to use for the mosaic. This piece was part of a series in which they had artists from different cities create a map in different mediums and they then featured a new one every month for their inflight magazine.

For this project, Delta had very specific dimensions that were necessary for their photography, so I created the mosaic on Wedi board, which is a lightweight, foam-cored cement backer board. By using a Wedi board, it could easily be cut to size and even though it was being created just for a photograph, I attached Wedi washers before I started so the mosaic could be hung at a later time

I choose to do the colors yellow and red because of the abundance of these colors in all Mexican art and their culture. Mexican artwork is filled with color, small details and they use a lot of beads as well. At this current time, I was super into beads and since beadwork is popular in Mexican culture, this seemed like a perfect fit.

Once I came up with a plan and choose the colors of beads, I went to Michael’s to buy the beads. I needed almost 20 little tubes of the yellow beads, but each store only stocked 3 at the time. The timeline was too short to be able to order the beads online, so I spent a whole day driving to every Michael’s in the Los Angeles area, from Long Beach to Burbank. I even had to call my bank to turn my debit card back on because apparently when you make purchases at 6 different Michael’s over the course of a few hours looks extremely suspicious!

In addition to just using beads, I used glass tiles. Most of the 5/8” tiles are Sicis and the 3/4” Hakatai. I used a combination of tiles that included translucent, iridescent, opaque, and gold-streaked glass along with wavy andamento to give the impression of movement within the waves. I wanted to create this sense of movement throughout the glass blues to create the ocean and the ripple effects of the waves.

When I started to add the blue shades of tile for the ocean, I originally intended to grout the whole mosaic, however, only the type of dark red beads that were available were painted on the outside so the grout would have just wiped the paint off.

Instead of using grout, I used white silicone with the translucent light glass on the top and then Weldbond for the rest. I also used Mapei black grout for just the bottom portion of the mosaic which included the darkest shades of blue.

I thought of a pattern that flowed from red to yellow would be beautiful, but I mostly wanted red to be the star too because I like red better then yellow and it’s also a complimentary color to the ocean blues that I am using. Just when I started to place the red beads and slowly started adding the yellow, I could see the map come along and it was easy to identify that I was creating North and South America.

Upon completion of my project, I took it to Studio Q photography where Yuno Cho placed in under a LED light box, and this helps so that the lighting can then be diffused and there would be no odd white or dark spots on the photograph in the end result. I really wish I could have all of my art professionally photographed in this way! Professional photography is very expensive... but it if for sure worth it if you can do it! Your artwork will truly benefit from it!

Cherry Blossoms Mosaic

Here’s a delicate little mosaic I made when I was inspired by the elegance of cherry blossoms.


I made this mosaic as a feature piece for a line of tile I wanted to make. I made these tile samples with the intention of making them to be placed on backsplashes embedded within other tile.


I made samples with different colors of grout and tile beds to show how they would look, but the idea didn’t catch on.

I even tried making some mosaics with a poppy theme.

Some students that came to my studio saw them sitting around and suggested to just sell them as regular hanging artwork. I did that, but they still didn’t sell. Oh well, it either wasn’t a good idea or not good in execution, but people do like my cherry blossoms mosaic and so do I, so it was worth the experiment.

VIDEO: Pathway Key to Success Mosaic: WIP #2

The second of two videos showing the making the Pathway Key to Success mosaic. This was a mosaic artwork I helped kids in a foster care program make as a thank you gift to one of their donors.

Video transcript for deaf or hard of hearing:

Hi Mosaic Aficionados! Today I’m going to show you the completion of the Key to Success mosaic I helped the kids make. We last left off after I had finished the bronze Van Gogh rings.

I added a few beaded sections for examples and glass along the edge before meeting with the group. Kids tend to stick glass hanging off the edge and I don’t feel like getting cut during grouting or transporting.

I also numbered all the rings so the kids could match up what size of key they’ll need.

The kids were kind enough to deal with a tripod in their way for about an hour so you can see them work a little. These kids were amazing! They had incredible focus and attention to detail. They were about 10-12 years old and most kids can’t handle doing something this tedious for even an hour. We expanded the sessions to 2 hours because they always wanted to keep going. And they kept busy and creating through all 6 sessions we worked with them!

It was awesome to hear about their lives and watch them enjoy mosaicking. And no one stabbed anyone with the sharp pottery needles they were using to apply the beads, so I consider that a win.

So next I’m going to show you a close up time-lapse of placing the beads and key in the Apoxie Sculpt. It’s easiest to place the key loosely, then start on the outside and work in. We left the larger beads for the outside of the larger rings, then used seed beads in the centers, or in most cases the entire small circles.

I’m using a pottery needle so I can place each bead on its side so the hole isn’t visible, then press them lightly into the Apoxie Sculpt.

Now we’re ready for grouting. I used masking because I started with a linen color grout on the edges. After that dried, I applied Mapei Flexcolor 3D grout over the regular grout on the edges and on the surface of the mosaic except the circles. They don’t need grouting because of the Apoxie Sculpt. The Flexcolor 3D grout is great for projects like this because it has a cool metallic, sort of iridescent sheen.

So, I ended up just putting the 3D grout on by working my way around the circles. Because it has a translucency and is lighter in color I’m not too concerned about a little getting on the circles. My intention was to mask the beads off with mosaic tape, but the beads were too uneven a surface for it to stick to, so it was just cleaner and easier to work around the circles.

After I get the grout worked into all the crevices, I quickly go over it with a damp sponge followed by a sponge squeezed well, then keep changing sponges if necessary, finishing with a washcloth because the texture helps clean residue off the surface.

Then it’s time for a final cleanup.

There was a residue around all the circles. It’s hard to see, but there’s a little of this haze in the lower right of this circle. I believe it’s from my assistant and me placing the Apoxie Sculpt in the circles, and then the grout sticking to the apoxie residue. We tried to be as careful as possible, even cutting out each circle to size with templates and exacto knives, but your hands very quickly just get sticky after handling it.

I used an exacto blade to get the residue off the glass and a toothbrush to polish up.

When the mosaic was done even Mango approved.

Since this is a gift for the foster care organization’s largest donor, we not only took a lot of care with the project, but also had the kids sign a little thank you plaque to be hung next to the mosaic.

Thank you for following along this journey. I’m happy to report the kids loved mosaicking and the donors loved the mosaic, especially the symbolism of the keys.

Secret Spa Mosaic

I made this mosaic mostly out of Sicis Neoglass for a spa at the same home as the Mokuluas art wall. 

I created this mosaic before the actual spa was built, so I had to put the builder’s measurements into a CAD program to make sure the glass would fit once it was built.

The client is an interior designer and fell in love with Sicis Neoglass. She wanted me to use this glass for the spa. Neoglass is about 1/4” thick and comes in 3 shapes: Cube, Barrel, and Dome.

Cube

Barrel

Dome

The client wanted a design to reflect the local surroundings, so I created a ginger flower embellishment pattern to work into the waves of the mosaic.

Originally the mosaic was going to cover the whole spa, but because of concerns about the surface being slippery, she requested I just mosaic the sides and an interior wave. They would top the spa with stone. These were the options for the original design.

With the design locked down, I started creating the mosaic in reverse on heavy kraft paper so that it could be easily shipped and installed by her builders in Hawaii.

And then the mosaic was finally installed and grouted in its home in Kailua, Hawaii.

VIDEO: Pathway Key to Success Mosaic: WIP #1

The first of two videos showing the making the Pathway Key to Success mosaic. This was a mosaic artwork I helped kids in a foster care program make as a thank you gift to one of their donors.

Video transcript for deaf or hard of hearing:

Hi Mosaic Fans! This mosaic begins when I had only a day to design a project for kids from a foster care organization to create as a gift for their largest donor.

Fortunately, I woke up at 4am and found myself looking on Etsy before I was even conscious and came across these antique bronze key replicas that range in size from ½” to 2- 1/2”.

 I immediately had an idea of how to use the keys in a mosaic, so I jumped out of bed and went straight to the computer to make a mockup. The theme is to thank their donor for giving them the “Key to Success”.

 Mango, on the other hand stayed in bed until sunrise.

 I’m going to use bronze colored Van Gogh glass to create mosaic rings. Inside the rings, the kids will choose & place a key, then fill up the circle with tiny beads. They will also mosaic the background with my favorite iridescent amber/white glass from Wissmach.

I am using a 2’x3’, ¾” birch panel for the substrate.

I started by printing templates for the inner and outer circles, the inner circles on white cardstock and the outer on yellow cardstock so I can trace them onto the wood.

Then I traced the circles onto vellum so that I have a template I can see through to help make adjustments.

I wanted to keep the circles whole, except for those that come slightly off the edge, though even with those I had to make sure the keys would fit wholly onto the panel because I don’t want to have to cut the keys.

To make sure the circles all remain circles, I carefully interlinked the borders. This will mean making a lot of adjustments as I work, but will pay off in making the circles look very clean and crisp.

With the initial sketch completed, I primed the board. You can do this before or after sketching. I chose after because it’s harder to erase once the board has been primed.

The reason for priming is to help adhesion and to cut down on moisture later getting in and warping the wood. I’m priming using watered down Weldbond, which is the adhesive that will be used for the glass. We’ll be using Apoxie Sculpt for the beads, but I’ll get to that in the next video.

So that I can do this all at once, I use cups to place the mosaic on when I flip it over to prime the other side.

I wait only a few minutes until most of the primer has been absorbed, then flip it over and prime the back. I also make sure to prime the edges.

Now it’s time to cut the Van Gogh glass.

 I’m cutting it into ½” strips using the Morton grid. From there I’ll just cut wedge-shaped tessera as needed.

I started with the simple, straight forward rings on top to get a feel for the angles needed for each of the four sizes of rings.

Then I moved to the bottom to get the hard work of the interlocking rings over with. The glass size may not exactly match my templates, so I may need to adjust some of the free floating rings in the center. Doing the bottom first will allow me to size up how things will look best aesthetically.

As I move into the middle section, I’m just adjusting from the original sketch into what will look best once all the rings and beads are in place.

While the tedious nature of mosaics is often enough to drive someone crazy, it is good in instances when I’m preparing to work with kids because it gives me the opportunity to think through the best way to have them work without too much chaos.

In part two we’ll finish up the mosaic and I’ll show the kids working on it. Spoiler alert: They did awesome! Thank you!